How to Cut Crochet to Fix Crochet Projects Without Starting Over
Hello maker friend! Serious question: Did you know, you can CUT crochet fabric? Quick answer: YES! Essentially, this means you can fix crochet projects without needing to frog hours of work! I wish I knew this years ago. I mean, we spend so much time designing and making garments ONLY to try them on and find out that it it just does not fit right. We all have thought of this, but really, there is something really scary about cutting yarn, right? I used to think it would immediately unravel and I’d be doomed!
Over the past weekend, I completed a top that really excited me! I had the perfect design that was quick, easy, and gorgeous! Once the finishing touches were done, I tried it on and OOPPS! I had made the armholes way too big! While contemplating frogging the piece up until the armpit area (which was almost the beginning since it was a side-side design) I had a crazy thought of just trimming the sides.
I thought “Is that even possible?” and did what any good creative would do. You guessed it! I went to Pinterest!
There was not much about the topic but I did stumble across an article that had just what I was looking for, proof that you can cut to fix crochet projects! Pinterest has spoken, so it must be true, right?
Related post: How to Fix Uneven Crochet Blanket Edges
Nervously, I took my shears and started to cut. Now, obviously, my experiment was a success and that is why I am sharing this crochet hack with you today. So for you my friend, rest assure, you do not have to panic as much as I did. Let’s get right to it and start saving you hours worth of work (maybe even days!).
For more tips and crochet hacks to help you save time, see my post 5 Habits to Save Time Crocheting
How To Cut and Fix Crochet Fabric

To begin, you are going to need:
- Tapestry Needle
- Extra Yarn (any yarn)
- Extra Yarn (same as your design)
- Stitch markers as guides
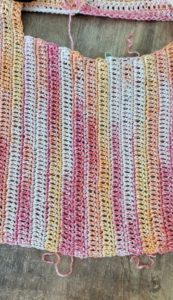
- Prepare the section you want to fix. Keep in mind that once you cut, there won’t be much room for error. I used stitch markers to mark the rows that I want to selvage, everything in between was going to go. By using stitch markers, I was able to double check and correct their placement. Note, crochet rows can get very confusing so a word from the wise, stitch markers are gold!

- Thread your needle with yarn. This yarn does not have to match your design, make sure it is longer than the row you want to selvage, this is called a life line. Weave the needle through the loops of the row you want to save, leaving tails on both ends. Do this step on both rows you marked. Because you are working in rows, keep in mind that one row is going to look like a regular row end, and the other row would have it’s thread woven through the bottom loops of a row.
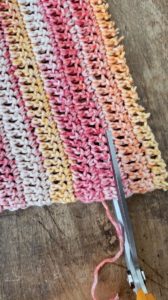
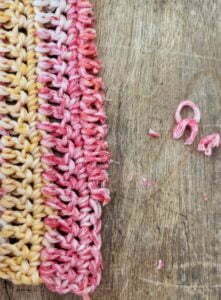
- Now it is time to cut! You are going to want to cut directly through the row that comes after your first life line and before your second life line. This step is really easy to do with rows made with wide stitches like double crochet. However, If you are working with more intricate or smaller stitches, this is where your life line really saves you. Use your life line as a guide. Get close to the line to see where the row is.


- Clean up the new live rows. Now that you cut the excess crochet fabric just clean up the edge by swiping off the little bits of yarn that is left behind. Secure the end of the row that has a live thread by simply tying it into a knot.

- Seam the rows together by passing through the bottom loops and whip stitch to the opposite (regular) row.


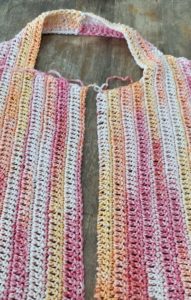
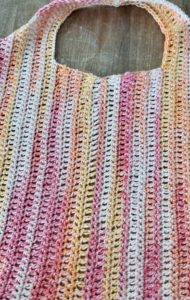
That was it! I absolutely love my top now that I fixed it. Cutting crochet clothes does not have to be scary and saves you so much time! Here’s how my top turned out, and you cannot even notice that I altered it.

Want this top? Stay tuned for the upcoming FREE crochet pattern next week here on the blog.
That’s all for now my friend. I hope this little hack saves as much time for you as it did for me!
Now you know how to make quick fixes by cutting crochet!
Crochet takes so much time and finding out that your project just is not coming together the way you want it to can be very frustrating! I get it. Make sure to subscribe to the list for more maker hacks to save time and let me know what else you would like help with below!
Want to see more crochet tips and techniques?
That’s all for now my maker friend! Remember, never miss a stitch by subscribing to my newsletter. See you next time!
xoxo
Abigail