How to Make a Crochet Sunflower in a Pot
This post teaches you how to crochet a sunflower in a pot with a free crochet pattern. Written instructions and picture tutorials are here to help you make your crocheted sunflower.
If you wish to have your own copy without ads you can get the inexpensive PDF version of this written pattern.
Are you looking to buy a ready made crocheted sunflower? See these related links:
This post may contain affiliate links and use cookies for your use. This means we receive a small commission for any purchase made through these links at no extra cost to the buyer. You can find more information on my privacy policy page here.
Sunflowers are just so beautiful, I absolutely love everything about them. Aside from their beauty, this flower hold a special place in my heart because of what it represents. That is exactly why, Today, I am going to show you how to make a crochet sunflower. But not just any sunflower, a crochet sunflower in a POT. I mean, how cute is that??
Sunflowers are the perfect gift
There is something that is just do happy and bright about sunflowers. Flowers add a burst of vivid colors to any room, however, sunflowers in particular adds a bit of timeless sophistication as well. This is exactly why sunflowers get a lot of hype year after year. You see them EVERYWHERE especially in the world of crochet.
A great way to incorporate sunflowers in crocheted gifts is through crocheted bags, decor like a sunflower dishcloth, a bunch of crocheted granny squares with crochet sunflower applique on them.
A cheerful sunflower can brighten up any space, that is why I chose to design one that can easily be displayed in a little pot. This would look great on an office desk, living room, or nursery. I am so excited for this post and to share with everyone how I make my crochet sunflowers – a lot of trial and error was involved and I recently reached perfecting how I make it.
What yarn is used to make a crocheted sunflower?
For these sunflowers I like to use a worsted weight acrylic yarn. I put together a list of the best yarns for amigurumi to help you pick the perfect yarn for your sunflower. Go through the questions in that post and choose what works best for you.
Related Post: How to Create a Handmade Production Line (save time to crochet in bulk!)
I used to use Red Hear Super Saver for most of my bulk crochet item. However, since moving to Calgary, I finally got access to a Michaels where I now buy more of Loops n Threads Impeccable yarn. This yarn costs more than Red Heart but I personally feel is of better quality and perfect color choices in everything I need.
Cotton yarn is the best yarn – in my opinion – for amigurumi because it does not not have a halo effect that acrylic yarn tends to have when worked up. Using cotton yarn will cost more but is worth the quality since you get great stitch definition and finish.
Want more Sweater Patterns?
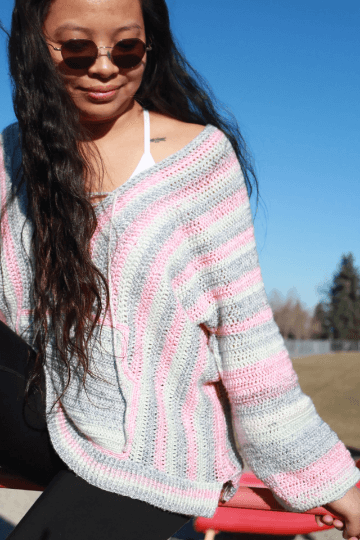
Check out thee patterns (left to right): Arnica Pullover, Louis Belle Pullover, Wanderlust Sweater

Free Pattern: Amigurumi Sunflower
This post contains the free crochet pattern for the Nooeh Pullover in size Medium. You can find the ad-free PDF version here for a low costs here.

Materials:
-Crochet hook size: 2.75mm
-Worsted/4 weight yarn: yellow, green, brown
-2″ clay pot (for 12pcs here is the best place to score it)
-12″ of 12 ga Aluminum Craft Wire (Dazzle-It Aluminum Wire here)
 Dazzle-It Aluminum Wire
Polyester Fibre Filling – you are only going to need a little bit but if you plan on using filling for other project I suggest Poly-Fil Premium Fibre Fill
-Scissors
-Darning needle
Abbreviations:
Ch – chain
Sl st – slip stitch
Sc – single crochet
Hdc – half double crochet
Dc – double crochet
Pattern notes:
- Most of this pattern is done in rounds. Remember, after the last st in each round, sl st into the top st of the round.
- The finished size of this sunflower is around 7″ standing
Step 1: Dirt
Create a magic circle
Round 1: Ch 1, 6 dc into circle. Weave in tail as you go. Sl st into top of first st to complete circle. Pull remainder of tail to fully close circle (6 st)
Round 2: Ch 1, 2sc into each st, sl st into top of first st to complete round (12 st)
Round 3: Ch 1, *sc, 2sc, repeat * until end. Sl st into top of first st (18 st)
Round 4: Ch 1, sc, sc, 2sc, repeat * until end. Sl st into top of first st (24 st)
Round 5: Ch 1, sc, sc, sc, 2sc, repeat * until end. Sl st into top of first st (30 st)

Round 6-11: Ch 1, sc into each st st into top of first st. Sl st into top of first sc.(30 st)

Round 12: Ch 1, *sc, sc, sc, sc2tog, repeat * until end. Sl st into top of first sc.(24 st).
Round 13: Ch 1, *sc, sc, sc2tog , repeat * until end. Sl St into top of first sc.(18 st)
Insert wire and filling. Do not over over fill. Fill just enough. Now you are going to work around the wire.

Cut 12″ of wire

Spiral the end that will go into the dirt portion

Round 14: Ch 1, *sc, sc2tog, repeat * until end. Sl st into top of first sc and change to green yarn.(12 st)

Step 2: Stem
Round 15: Ch 1, *sc2tog, repeat * until end. Sl St into top of first sc.(6 st)
Round 16-27: Ch 1, sc into each st. Sl St into top of first sc.(6 st)
Round 28: Ch 1, 2sc into each st, sl st into top of first st to complete round (12 st)
Round 29: Ch 1, sc, 2sc, repeat * until end. Sl st into top of first st (18 st)
Round 30: Ch 1, sc, sc, 2sc, repeat * until end. Sl st into top of first change yarn with yellow and set aside. (24 st)

Step 3: Pit
Using brown yarn
Ch 4, sl st into first ch to creat loop
Round 1: Ch 1, 6 dc into circle. Weave in tail as you go. Sl st into top of first st to complete circle. Pull remainder of tail to fully close circle (6 st)
Round 2: Ch 1, 2sc into each st, sl st into top of first st to complete round (12 st)
Round 3: Ch 1, *sc, 2sc, repeat * until end. Sl st into top of first st (18 st)
Round 4: Ch 1, sc, sc, 2sc, repeat * until end. Sl st into top of first st (24 st)
Fasten off

Step 4: Petals
Lay pit of sunflower against the top of stem. Pull through yellow yarn you attached and set aside earlier


Round 1: sc through each st (line up pit and stem) all around, fill with a little polyester before you close. Sl st into first sc (24 st)


Round 2: ch 4, skip 3 st, sc, *ch 3, skip 2 st, sc, repeat from *until end. (8 spaces)

Round 3 (in space): *sc, hdc, dc, tr, tr, dc, hdc, sc, repeat from * into each space. Sl st into first st.
Fasten off and weave in end.

Step 5: Leaves
Ch 8+3
Row 1: 2 tr into 4th ch from hook, tr, dc, dc, hdc, hdc, sc, 3sc into last ch (going around to Row 2

Row 2: sc, hdc, hdc, dc, dc, tr, 3 tr into last ch. Sl st into top of +3 ch

Attach leaves where you desire on sunflower, place sunflower in pot.
You now have a new Sunflower to add to your garden
You can even try making a ton of these (without the dirt portion) to make a whole sunflower bouquet!

That’s all for now my maker friend!
I would love to see your sunflowers, tag me on social media @knitsandknotsbyame
