Tana Turtle Tank: Free Pattern (knit)
Hello again makers to another FREE PATTERN! I am really liking this idea of making my patterns available for free in this space. Sharing the stories behind my designs have been so freeing and diary like. So here goes another one! My first KNITTED pattern, the Tana Turtle Tank.
The Tana Turtle Tank was named after the book I was reading at the time Into the Woods by Tana French. I love reading! I like to say that reading was my first love and I have never stopped reading since I was a little girl. In more recent years, sadly, I have slowed down a bit in reading but I still love diving into the pages of a book! I guess this design really ties into the part of my that is a total bookworm.
It is no secret, I am more comfortable with crochet than knitting. I would say a good chunk of my work is primarily crochet. The Tana Turtle Tank is something that I never knew I would turn out just as good! Ultimately, this design actually boosted my confidence as a knitter and challenged me to explore and develop my knitting skills afterwards.
At this point in my endeavors as a designer, I was still so new to measurements that I made a whole Tana out of experiment just to try on. This sounds like a total waste of time. It was. Then I marked some adjustments that I wanted to make based on the “prototype” and – because I did not know how to frog a knitted garment and redo just some parts – I made a second Tana! We learn from our mistakes though! I am happy to report I no longer need to waste precious hours of time to make the slightest corrections on designs.
The yarn I chose for Tana was Feels Like Butta, mostly because it was all the craze during that time and I was so curious! You can read about the yarn here. I definitely want to make another one using a different kind of yarn and compare how the pattern works up.
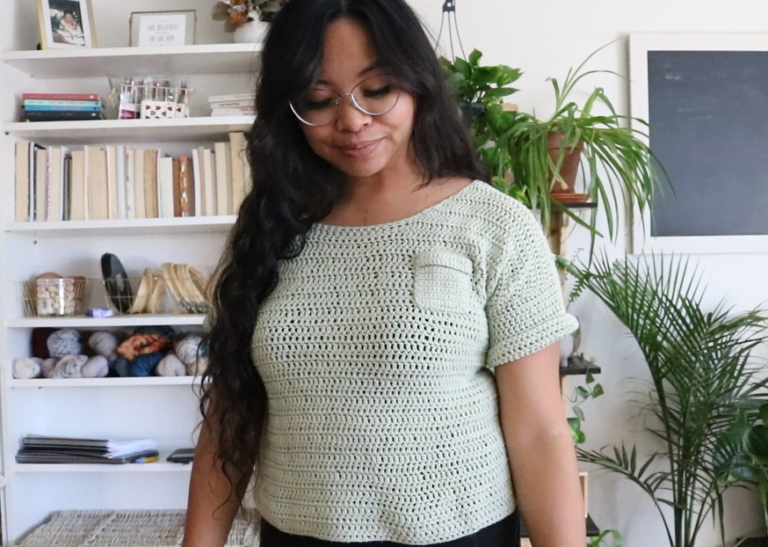
The tank is made by making two similar panels and seaming down the sides. It is a sleeveless turtle neck that keeps the curled edges of the bottom. When knitting in a stockinette stitch (knit one row, purl one row) the natural reaction of the fabric is to curl but this can easily be fixed by blocking the garment if you want the bottom to lay flat. The pattern includes stockinette stitch, simple decrease shaping, and a ribbed neckline. This is a beginner friendly pattern.
The Tana Turtle Tank

Due to the grading of the pattern, this post only shows instructions for SMALL.
Get the ad-free pattern and additional sizes here: Tana Turtle Tank
Get the kit here: Tana Turtle Tank Knit Kit
Materials:
- 5.5mm Knitting needle (I used flat needles for the pattern)
- Light worsted weight yarn/ level 3 yarn. I used Feels Like Butta
- Scissors
- Tapestry Needle
- Stitch counter ( optional)
Abbreviations:
- K – knit
- P – Purl
- K2tog – knit two together
- P2tog – purl two together
- St – stitch
- R – row
Dimensions: Due to the grading of the pattern, this post only shows instructions for SMALL. Use these dimensions for reference.
XS – approx. 16” wide, 18” in length
S – approx. 18” wide, 21” in length
M – approx. 20” wide, 23” in length
L – approx. 23” wide, 26” in length
Dimension of final product may vary depending on multiple factors, check your gauge and choose a size that best fits your expectations
Gauge:
18st by 26 rows = 4”x4”
Special notes:
- Pattern body is done in stockinette stitch (knit one row, purl one row). Turn after each row.
- The garment is made in two identical patterns seamed at the sides and neck portion. Create two panels to complete garment.
- Photo above is a size medium pictured on a 5.1” female with a bust of 34 and weight of 125lbs
- Due to the grading of the pattern, this post only shows instructions for SMALL.
Pattern: Small
Color A
Cast on 81
R1: Knit across row (81 st)
R2: Purl across row (81 st)
R3-45: repeat R1 and R2 in stockinette st (81 st per row)
Switch to color B
R46: purl across row (81 st)
R47-76: continue in stockinette st (81 st per row)
R77: k2tog, k77, k2tog (79 st)
R78: p2tog, p75, p2tog (77 st)
R79: k2tog, k73, k2tog (75 st)
R80: purl across row (75 st)
R81: k2tog, k71, k2tog (73 st)
R82: purl across row (73 st)
R83: k2tog, k69, k2tog (71 st)
R84: purl across row (71 st)
R85: k2tog, k67, k2tog (69 st)
R86: purl across row (69 st)
R87: k2tog, k65, k2tog (67 st)
R88: purl across row (67 st)
R89: k2tog, k63, k2tog (65 st)
R90: purl across row (65 st)
Switch to color C
R91: k2tog, k61, k2tog (63 st)
R92: purl across row (63 st)
R93: k2tog, k59, k2tog (61 st )
R94: purl across row (61 st)
R95: k2tog, k57, k2tog (59 st)
R96: purl across row (59 st)
R97: k2tog, k55, k2tog (57 st)
R98: purl across row (57 st)
R99: k2tog, k53, k2tog (55 st)
R100: purl across row (55 st)
R101: k2tog, k51, k2tog (53 st)
R102: purl across row (53 st)
R103: k2tog, k49, k2tog (51 st)
R104: purl across row (51 st)
R105: k2tog, k47, k2tog (49 st)
R106: purl across row (49 st)
R107-116: continue in stockinette st (49 st per row)
Start 1×1 ribbing
R117-134: k1,p1 repeat from all the way across (49 st per row)
R135: cast off
Assembly:
- Seam along ribbing on neck sides.
- Seam along sides until beginning of decreases. Note, this is originally made to have a wide armhole, continue seaming if you wish to close the armhole a bit more.
Wasn’t that so simple! This is still one of my favorite things to wear! Let me know what colors you chose for your in the comments below!
Until next time,
xoxo
Abigail


Whoa! This blog looks just like my old one! It’s on a completely different topic but it has pretty much the same page layout and design. Excellent choice of colors!
That’s great! I bet your blog was stunning