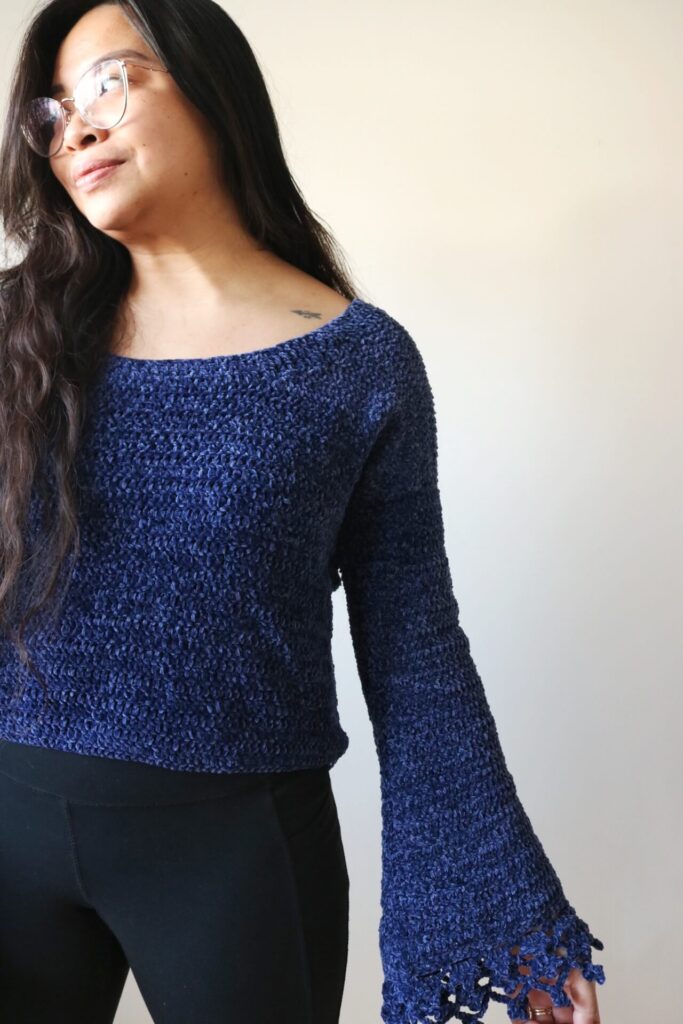
How to Make an Easy Crochet Bell Sleeve Sweater with Lace Edges
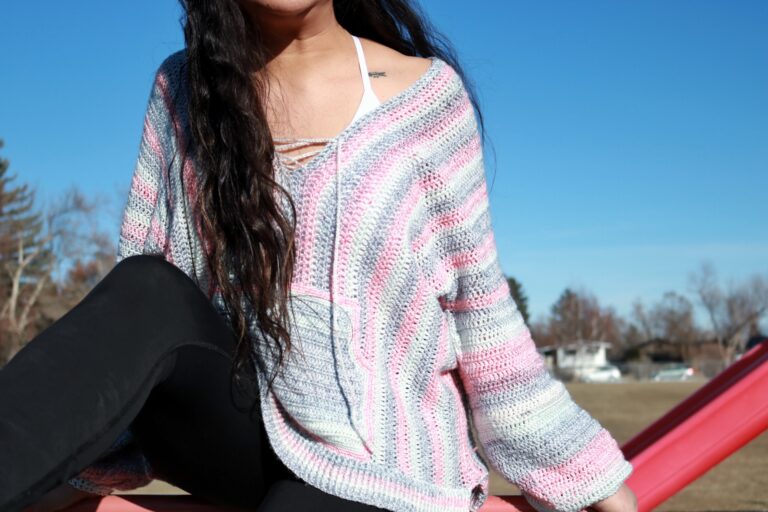
This post shares the the free crochet pattern for the Louis Belle Pullover – a crochet bell sleeve sweater. This top is a beginner friendly pullover that uses an easy construction and features long bell sleeves with a simple lace edge.
Get the inexpensive ad-free pattern for this pattern here. The paid pattern includes extra written and picture tutorials to help you with your crocheted sweater.
Want to create you own handmade wardrobe? I put together this list of free crocheted sweater patterns so you do not have to spend hours looking for your next project.
This post contains affiliate links. I get a small commission from any purchase made through these links at no expense to the buyer. This allows me to keep free awesome content coming your way. Check out my privacy policy for a full rundown of disclosures.
About the crochet bell sleeve sweater
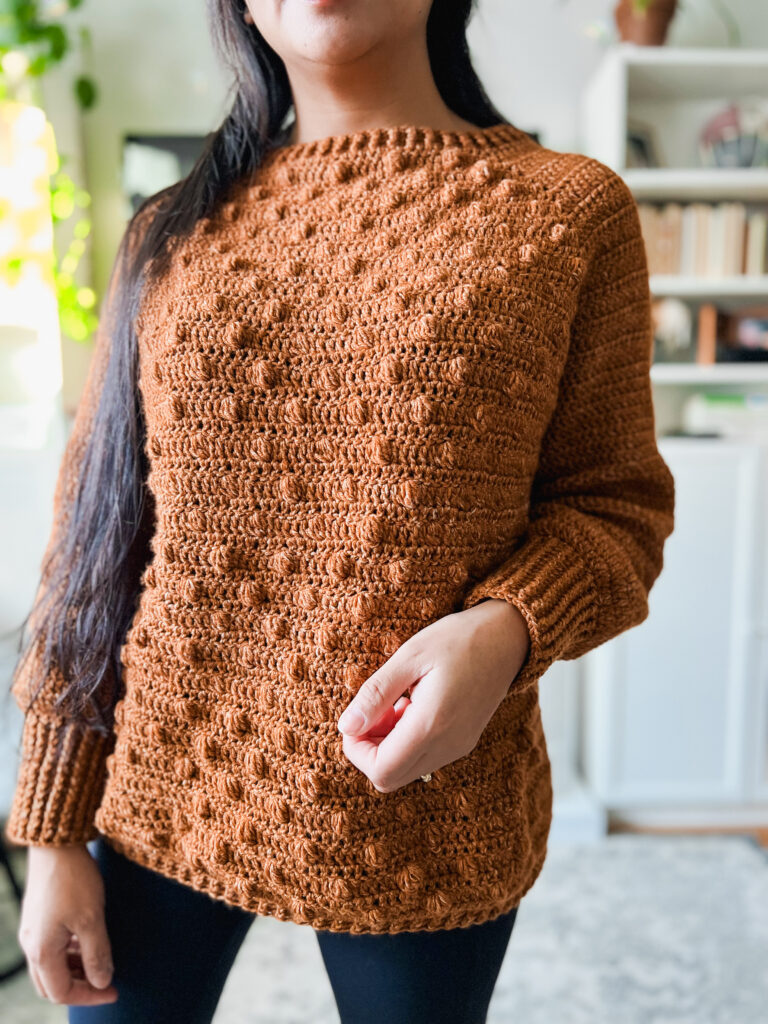
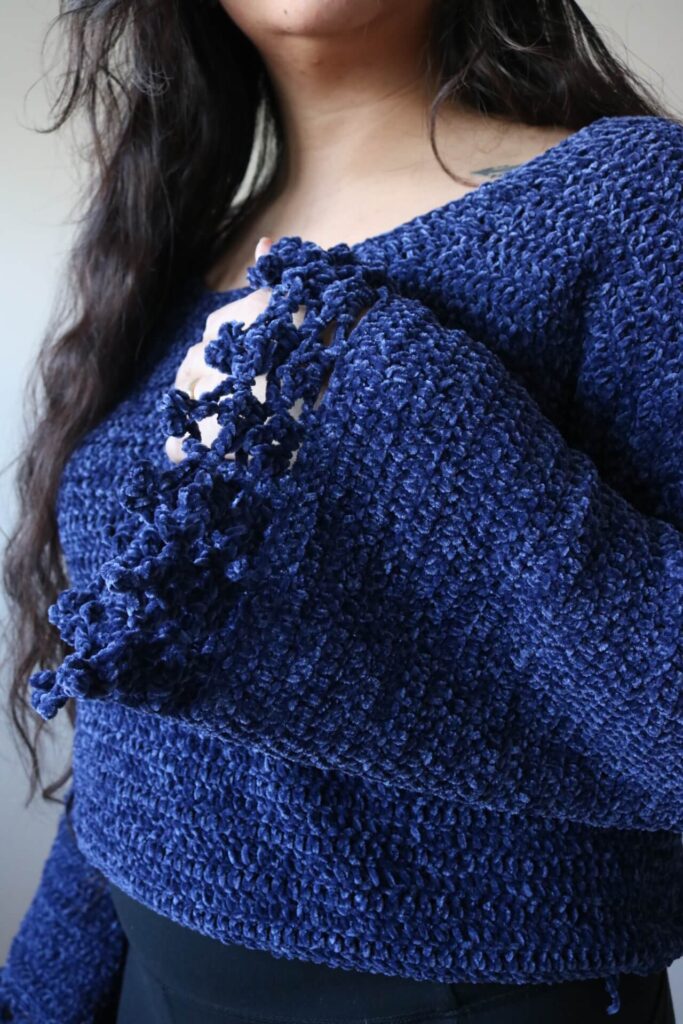
The Louis Belle Pullover is a beginner friendly pullover that is perfect top for transition months of Fall and Spring. The crochet top has long sleeves with a simple laced detail at the end of the sleeves.
The pullover is primarily made using double crochet stitches for the body, neckline, and sleeves. The lace portion of the sleeves make use of a combination of simple chains and stitches. If you have never crocheted lace before, this pattern would be a great place to try it!
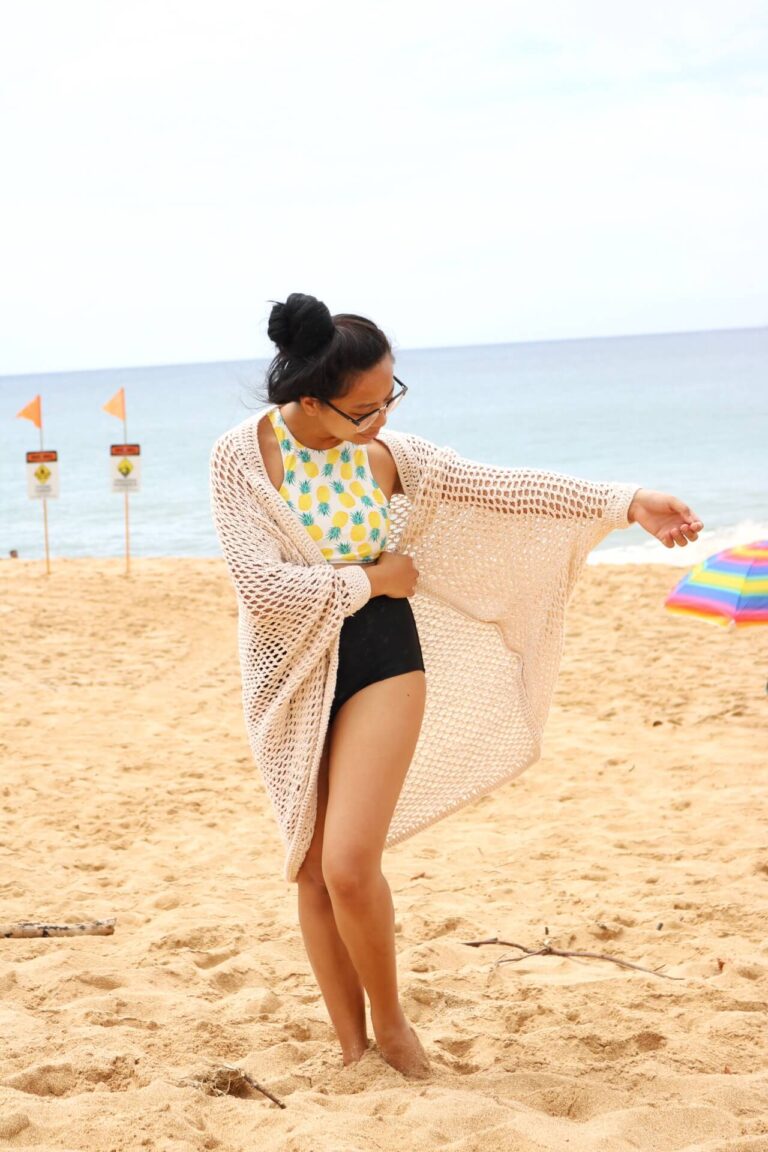
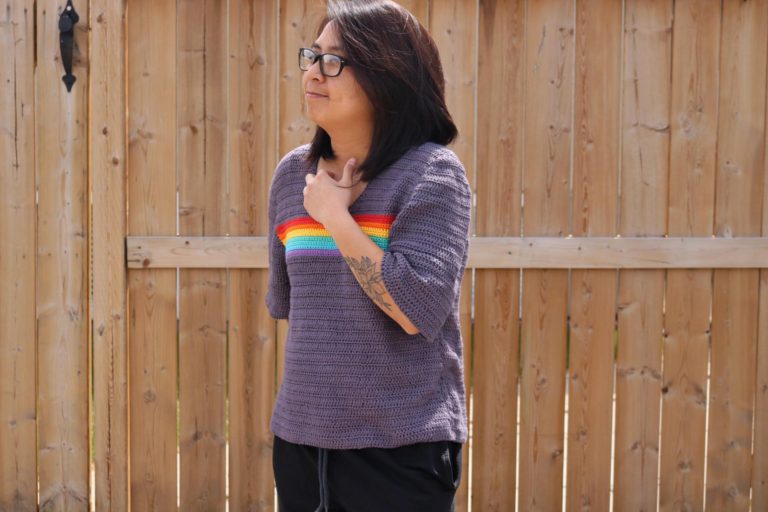
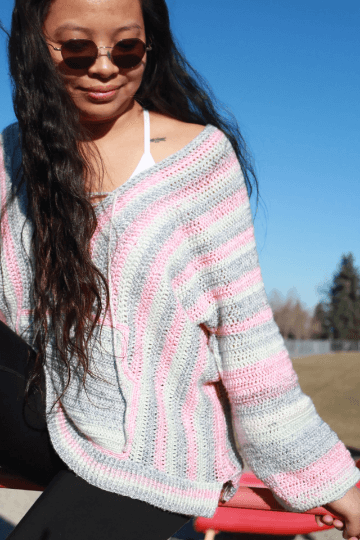
Related Post: Check out this Crochet Bell Sleeve Top with Rainbow stripes
First time making a sweater? No worries! The construction for this top is fairly simple with little shaping required. The only part that require shaping is around the neckline and the increases for the flared sleeves. Trust me! This crochet bell sleeve sweater is absolutely beginner friendly.
The easy construction of this top makes it extremely easy to modify and adjust according to the different body sizes. I am considering adding my additional skeins of yarn to increase the full length of the top – maybe turning it into a dress! How fun!
Want more Sweater Patterns?
Check out thee patterns (left to right): Ellie Pullover, Puffin Pullover, Wanderlust Sweater
See more crochet sweater patterns in this list I curated filled with trendy and FREE patterns:
Yarn
I want to thank Lion Brand Yarn for providing me with the yarn for this beautiful top! Nevertheless, everything I say about this yarn is my own opinion.
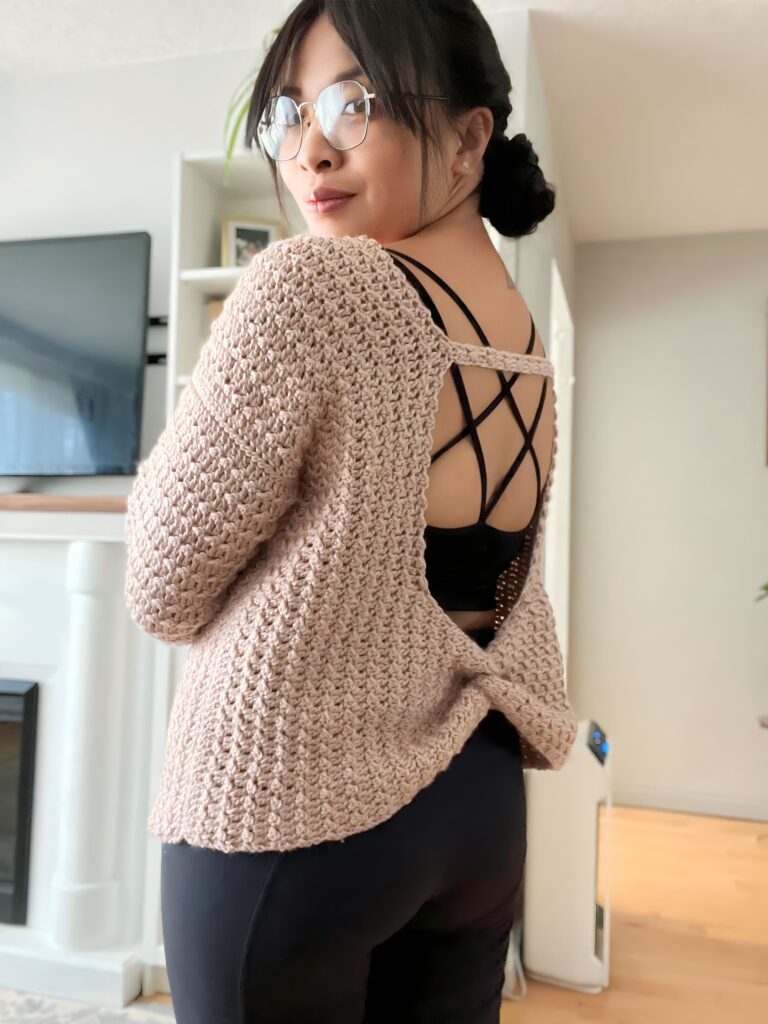
The original crochet sweater is made using Lion Brand Yarn’s Nap Time which is a super soft 100% polyester yarn that looks and feels like velvet.
When I first finished this top I put it on for a quick photoshoot. My wife came along to give me a hug and she literally gasped! She said that the fabric was so soft and “it looks and feels different from all your other yarn”. And it’s true! It is!
I usually see this sort of yarn in bulkier sizes, but I absolutely love how thin Nap Time is which did not make the garment look bulky or extremely warm to wear.
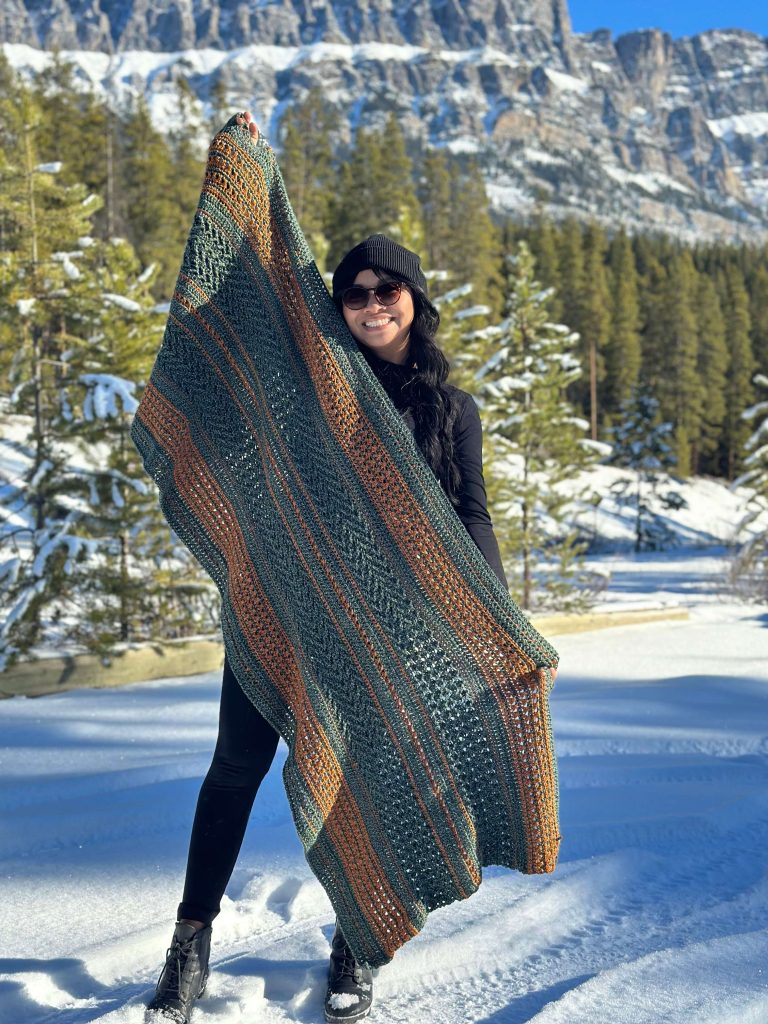
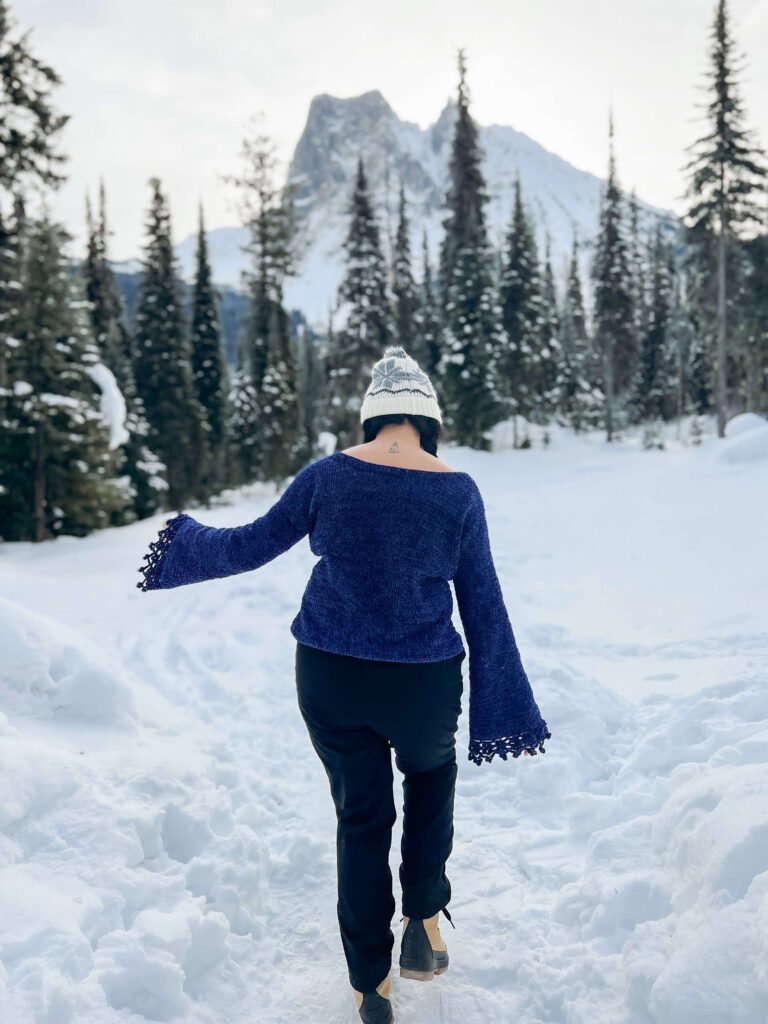
Some time after, we went on a birthday getaway and I brought the top. The place we stayed was an absolute winter wonderland! I wore my top outside without an extra jacket and was warm enough. You can really feel the soft velvety yarn work it’s magic when worn outdoors in winter. It even snowed which was a great birthday treat from the universe.
But hold on! Not to say this pullover can always be worn alone, always check your weather conditions and dress appropriately.
Do you have the right yarn for this project? Make sure to check out my post Best Yarn for Crochet Sweaters to help you choose the perfect yarn for this design.
The Louis Bell Pullover Pattern
This is a free written pattern the Louis Belle Pullover – a crochet bell sleeve sweater.
Are you a visual learner? You can always get the ad-free crochet pattern pdf version with picture tutorials here.
Pattern notes:
1.This pattern is made using US terminology.
2.The ch 2 at the beginning of rows are considered one dc st in the final st count per row
Regularly counting your sts in a row is good practice. In the photos you will notice a lot of stitch markers, these were just to help me count
Materials:
DK Weight Yarn – I used Lion Brand Yarn’s Nap Time in Navy
3.5 mm crochet hook
Stitch Marker
Scissors
Tapestry Needle
Gauge – Do not forget to make your gauge!
4”x4” = 16 sts x 10 rows in half double crochet
Size Guide
for best result, base your garment according to your bust size . The pattern has a bit of positive ease (approximately 1-2 inches) and is not totally fitted.
| Garment Width (laid flat) | Pullover Length | Upper Arm Circumference | |
| Extra Small | 16 | 16 | 10.25 |
| Small | 18 | 17 | 11 |
| Medium | 20 | 18 | 12 |
| Large | 22 | 19 | 13.5 |
| Extra Large | 24 | 21 | 13.5 |
Abbreviations (US Terms)
- Ch – Chain
- Slst – slip stitch
- Dc – double crochet
- Sc – single crochet
- Dc3tog – double crochet three sts together
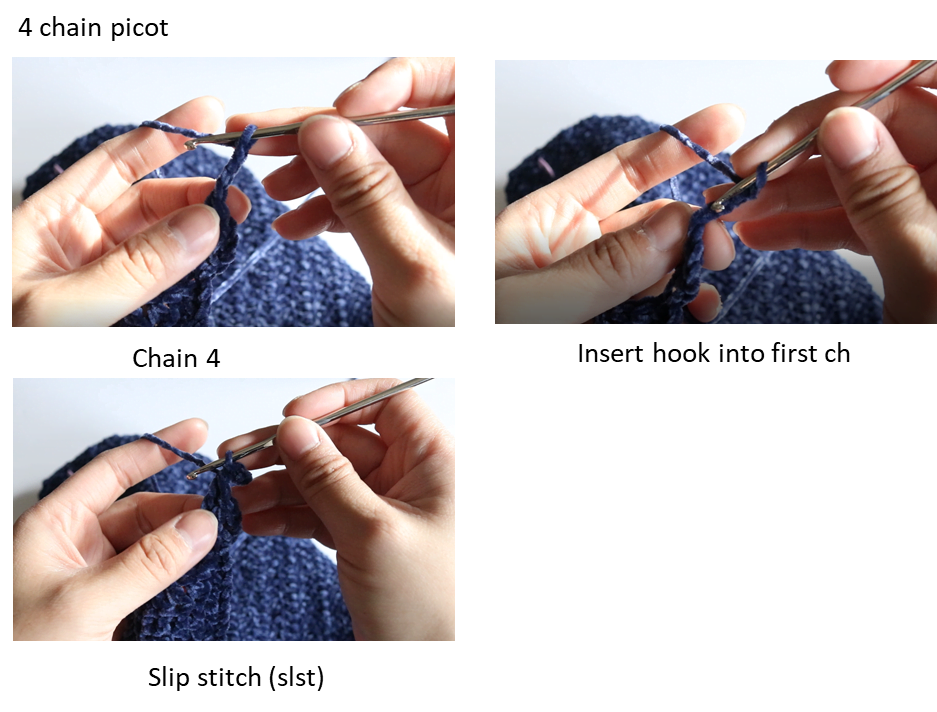
- 4 ch picot – see stitch explanation
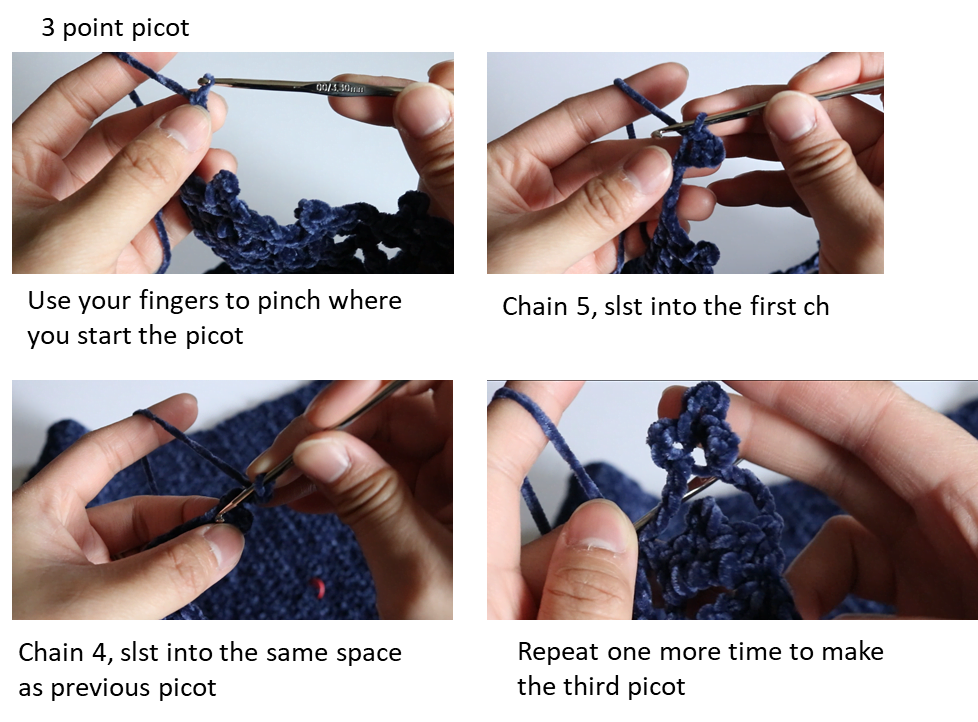
- 3 point picot – see stitch explanation
Front Panel
Ch 65 (73, 81, 89, 97) +2
R1: dc into the 4th ch from the hook, dc into each ch down the row. (65, 73, 81, 89, 97 sts)
R2-28(30, 30, 33, 33): ch 2, dc into each st down the row. (65, 73, 81, 89, 97 sts)
This is the length of the bottom of the garment to the neckline scoop. If you want a longer garment add more rows. If you want it shorter, remove rows. Note, any adjustments here need to be done as well to the back panel
You are now going to start shaping the neckline. Locate the middle of the row. Set a stitch marker 6 (6, 8, 8 8) stitches from the middle of the row on both sides.
R29(31, 31, 34, 34): ch 2, dc in each st until 4 sts to the stitch marker, dc2tog, dc2tog. (24, 28, 30, 34, 38 sts)
R30(32, 32, 35, 35): dc2tog, dc2tog, dc in each st down the row. (22, 26, 28, 32, 36 sts)
R31(33, 33, 36, 36): ch 2, dc into each st until 4th st from end of the row, dc2tog, dc2tog (20, 24, 26, 30, 34 sts)
R32(34, 34, 36, 36): dc2tog, dc in each st until end of the row. (19, 23, 25,29, 33 sts)
R35: ch 2, dc into each st until last 2 sts, dc2tog. (18, 22, 24, 28, 32 sts)
R33 (35, 35 37, 37)-40 (43, 45, 48, 53): ch 2, dc into each st down the row (18, 22, 24, 28, 32 sts)
Fasten off and Repeat on the other side of the neckline
Back Panel
Ch 65 (73, 81, 89, 97) +2
R1: dc into the 4th ch from the hook, dc into each ch down the row. (65, 73, 81, 89, 97 sts)
R2-35(40, 40, 43, 48):ch 2, dc into each st down the row. (65, 73, 81, 89, 97 sts)
Note: if you made any adjustments in the front panel for the length of the garment, you need to repeat them here.
You are now going to start shaping the neckline. Locate the middle of the row. Set a stitch marker 6 (6, 8, 8 8) stitches from the middle of the row on both sides.
R36(39, 41, 44, 49): ch 2, dc in each st until 4 sts to the stitch marker, dc2tog, dc2tog. (24, 28, 30, 34, 38 sts)
R37(40, 42, 45, 50): dc2tog, dc2tog, dc in each st down the row. (22, 26, 28, 32, 36 sts)
R38(41, 43, 46, 51): ch 2, dc into each st until 4th st from end of the row, dc2tog, dc2tog (20, 24, 26, 30, 34 sts)
R39(42, 44, 47, 52): dc2tog, dc in each st until end of the row. (19, 23, 25,29, 33 sts)
R40(43, 45, 48, 53) : ch 2, dc into each st until last 2 sts, dc2tog. (18, 22, 24, 28, 32 sts) Fasten off and Repeat on the other side of the neckline
Sleeves (make 2)
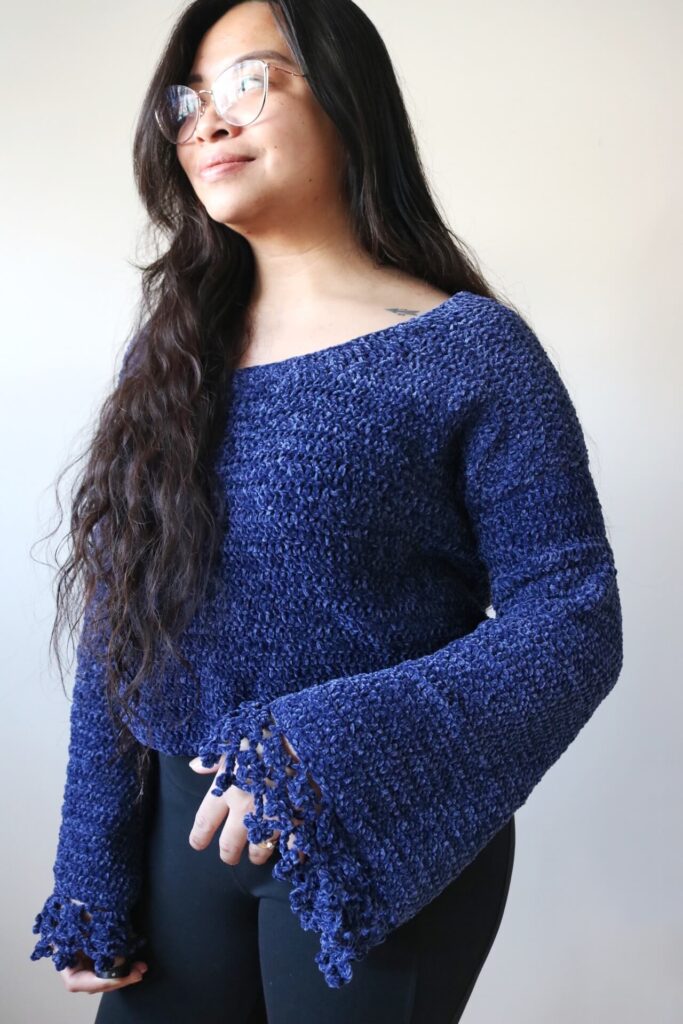
You are now moving on to the star of the show! This is all about a crochet bell sleeve sweater, now we are going to make those beautiful angel sleeves!
Note: “inc” means increase. Make 2 DC into the stitch.
Ch 40 (44, 48, 54, 62)+2
R1: dc into the 4th st from the hook, dc in each st down the row (40, 44, 48, 54, 62 sts)
R2-18(20, 20, 22, 22): ch 2, dc in each st down the row (40, 44, 48, 54, 62 sts)
R19 (21, 21, 23, 23): inc, dc into each st down the row until last st, inc. (42, 46, 50, 56, 64 sts)
R20 (22, 22, 24, 24): ch 2, dc into each st down the row. (42, 46, 50, 56, 64 sts)
R21 (23, 23, 25, 25): inc, dc into each st down the row until last st, inc. (44, 48, 52, 58, 66 sts)
R22 (24, 24, 26, 26): ch 2, dc into each st down the row. (44, 48, 52, 58, 66 sts)
*continue increasing in this matter (every other row) until you reach (60, 65, 70, 75, 85 sts.
** You are now going to start the lace portion of the sleeve. This portions adds an extra 3 inches to the sleeve. If you want a longer sleeve add more rows now.
Lace Portion
Row 1: Ch 2, sc into 2ch from the hook. *Ch 5, skip 4 sts, sc into next st. Repeat from * until end of the row.
Row 2: Ch 4, 2dc-ch 4, slst into 1st ch- 2dc. *ch 2, 2dc – 4 ch picot – 2dc. Repeat from * until last chain space. Ch 2, dc into first st of the row below.
Row 3: Ch 2, sc into 2ch from the hook. *Ch 5, skip 4 sts, sc into next st. Repeat from * until end of the row.
Row 4 (repeat row 2): Ch 4, 2dc-ch 4, slst into 1st ch- 2dc. *ch 2, dc – 4 ch picot – 2dc. Repeat from * until last chain space. Ch 2, dc into first st of the row below.
Row 5:Ch 2, sc into the 2 ch from the hook. *ch 4 – 3 point picot – ch 4, sc into space. Repeat from * until end of row.
Assembly
1.Line the shoulders and seam.
2.Locate middle portion on the top of the sleeve and align with the shoulder’s seam line. Seam the top of the sleeve to the front and back panels.
3.Fold the garment in half with the front side facing you, fold over the sleeves as well. Seam from the wrists to the armpit then down from the armpit down to the bottom of the top.
Neckline
Attach yarn to the mid portion of the back neckline. DC all around the neckline. Note, there are no definite stitch counts here as it depends on how you space your own stitches and the size of your garment.
Locate the pivot points in the neckline. These are the points where the neckline curves where you increase/decrease and go straight. DC3tog at pivot points.
Dc3tog at pivot points, the previous dc3tog should align with the middle st in the current dc3tog.
Continue decreasing at pivot points in this manner until you are happy with the width of the neckline. Fasten off.
Now it’s time to get making!
Want to try out some patterns? Make sure to check out all of my beginner friendly patterns here where you can find garments, amigurumi, and accessories.
Want to see crochet sweater patterns for fall?
That’s all for now my maker friend! Remember, never miss a stitch by subscribing to my newsletter. See you next time!
xoxo
Abigail