Free Crochet Hoodie Pattern with Fur for Beginners
This post show you how to make a crochet hoodie with a large hood lined with faux fur. This pattern is beginner friendly using easy crochet stitches that work up nice and quick.
Get the inexpensive ad-free pattern for this Riverside Hoodie. Print and add to your crochet pattern collection now. See more free sweater patterns here.
Related: Cross Body Crochet Sweater Pattern
This post may contain affiliate links. I get a small commission from any purchase made through these links at no expense to the buyer. This allows me to keep free awesome content coming your way. Check out my privacy policy for a full rundown of disclosures.
Inspiration behind the Riverside Pullover (crochet hoodie)
The Riverside Pullover was inspired by beautiful winter landscape and cozy times indoors.
I love exploring outdoors and watching how the seasons change our surroundings. In the winter, our rivers turn to ice and we enjoy ice skating along the path.
One thing that really stuns me about winter is how it turns everything a beautiful hue of blue when we are outdoors. I am guessing this is because the color of the frozen water. But don’t quote me on that! Haha

Design Details
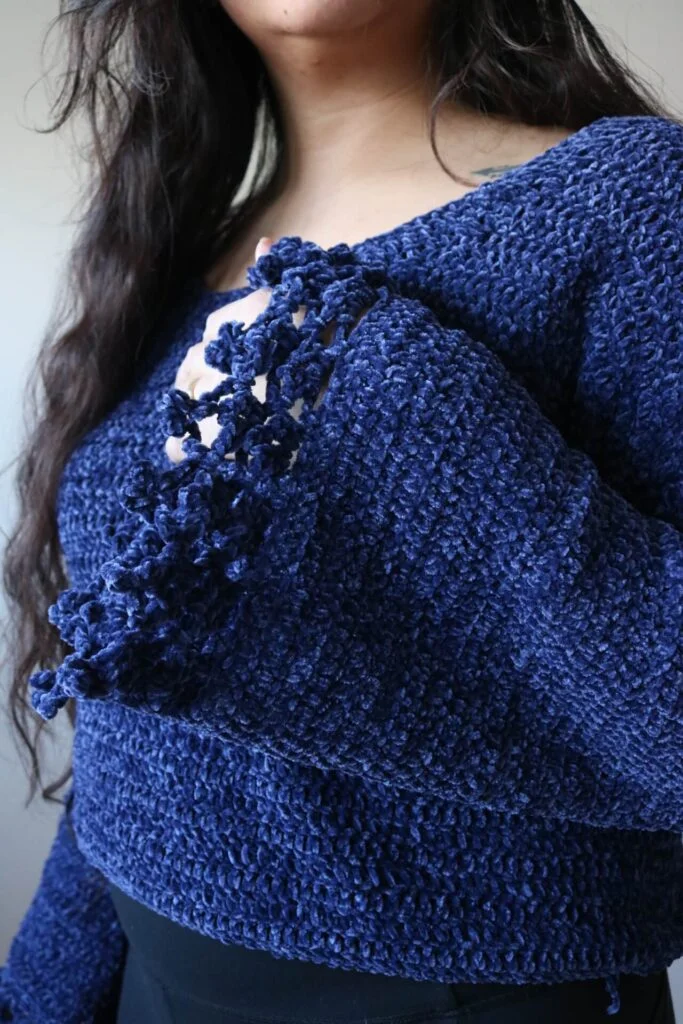
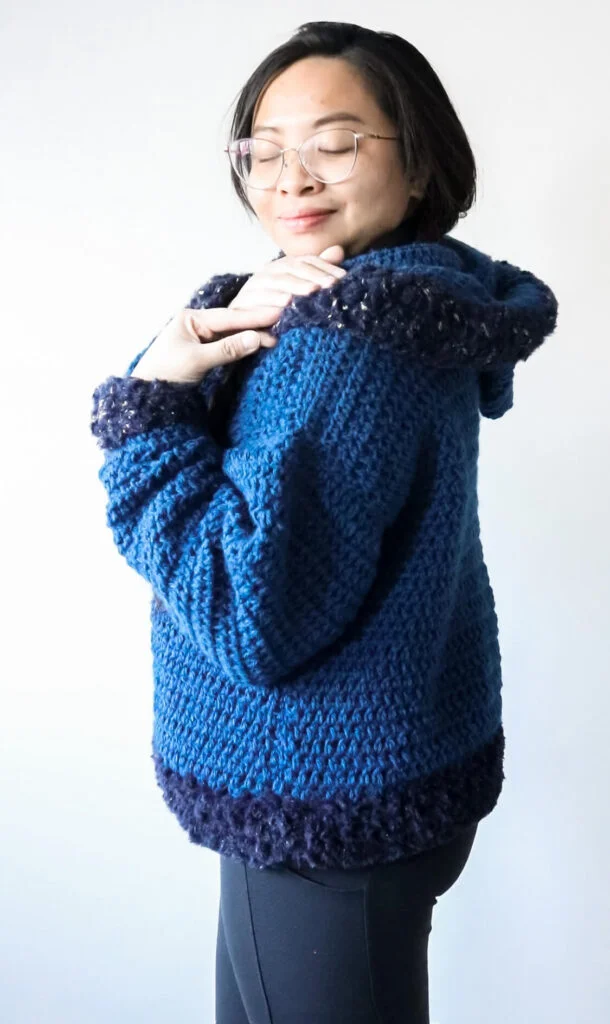
The Riverside Pullover is a cozy sweater that has a fur trim on the home, wrists, and bottom of the sweater. I wanted this sweater to be as functional as possible so I can use it in the frigid cold.
The sweater has a relaxed fit with a wider fit. This is the sort of “cozy” I envision when I think of sipping on a cup of hot chocolate near the window while it snows outside.
How to Style a Crochet Hoodie
Hoodies are really easy to style and are often paired with a simple bottom like jeans or leggings.
Crocheted hoodies are a bit different because of the stitches create spaces where air can pass through. The winter air could get a bit cold for our tummies so I suggest wearing a camisole inside.
I got a pack of 3 (or was it 4?hmm) simple black and white camisoles from our local Costco for under $20. I use these under crocheted sweaters. Stores like H&M also have really cheap spaghetti strap camisoles for under $10.
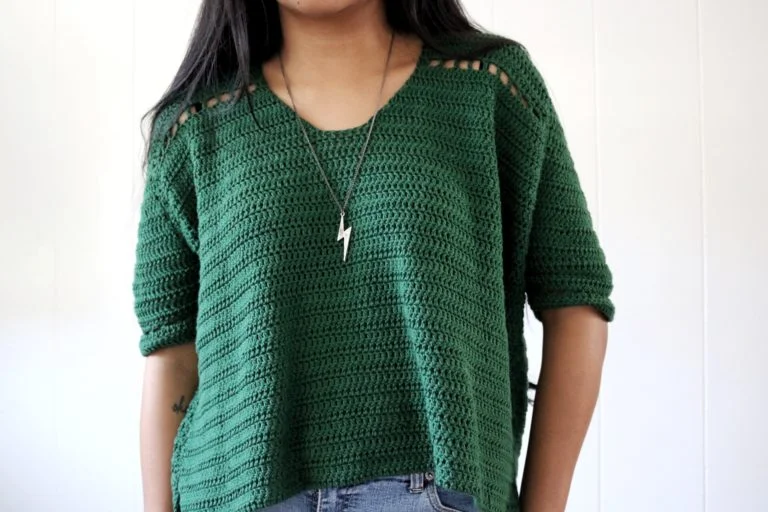
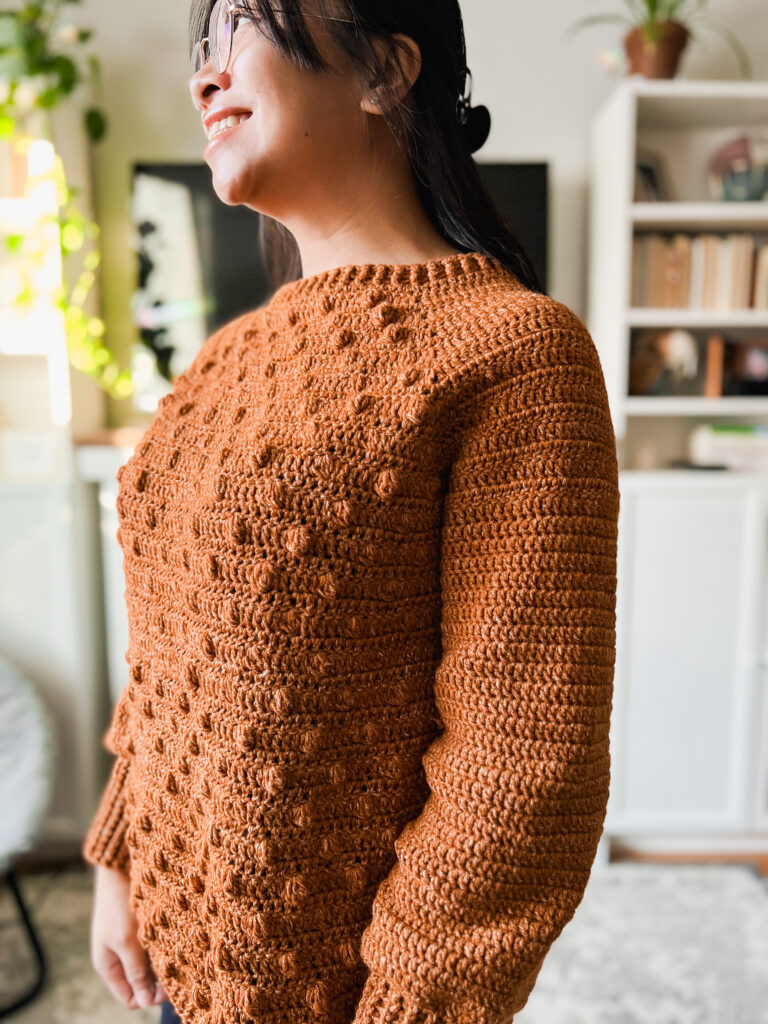
Want more Sweater Patterns?
Check out thee patterns (left to right): Arnica Pullover, Louis Belle Pullover, Wanderlust Sweater


See more crochet sweater patterns in this list I curated filled with trendy and FREE patterns:
Yarn Used for the Crochet Hoodie and it’s substitutes
For this design, I used Lion Brand Yarn’s Wool Ease in Riverside and Go For Faux in Galaxy for the fur trim.
I do not like to feel suffocated in my clothes and Wool Ease was light enough to make me feel comfortable and keep me warm.
Do you have the right yarn for this project? Make sure to check out my post Best Yarn for Crochet Sweaters to help you choose the perfect yarn for this design.
Substitutes for Wool Ease yarn:
- Lion Brand Yarn Heartland – this is my favorite yarn from Lion Brand because of the beautiful colors and texture. I made quite a few blanket and wrap patterns with this yarn. It is very much comparable to Wool Ease but does not have any wool blend in it.
- Paintbox Yarn’s Wool Mix Aran – Paintbox yarn is my second favorite yarn after Lion Brand and if you have been here for awhile, you might know that already 🙂 I love this brand because of the variety of colors they offer and the quality of the yarn. Their Wool Mix Aran is a great substitute forLion Brand’s Wool Ease and it has a denser mix of wool too.
- Plymouth Yarn Galway Worsted – Plymouth yarn is accessible in many places and is comparable to Wool Ease, but made of 100% wool, making it a bit pricier.
Substitute for Go for Faux yarn:
- Sirdar Alpine – this yarn is highly comparable to Go for Faux with similar colors as well. It does not have a sparkle blend like Galaxy which I used for the pattern but that is fine. It is also a couple dollars more than Go for Faux.
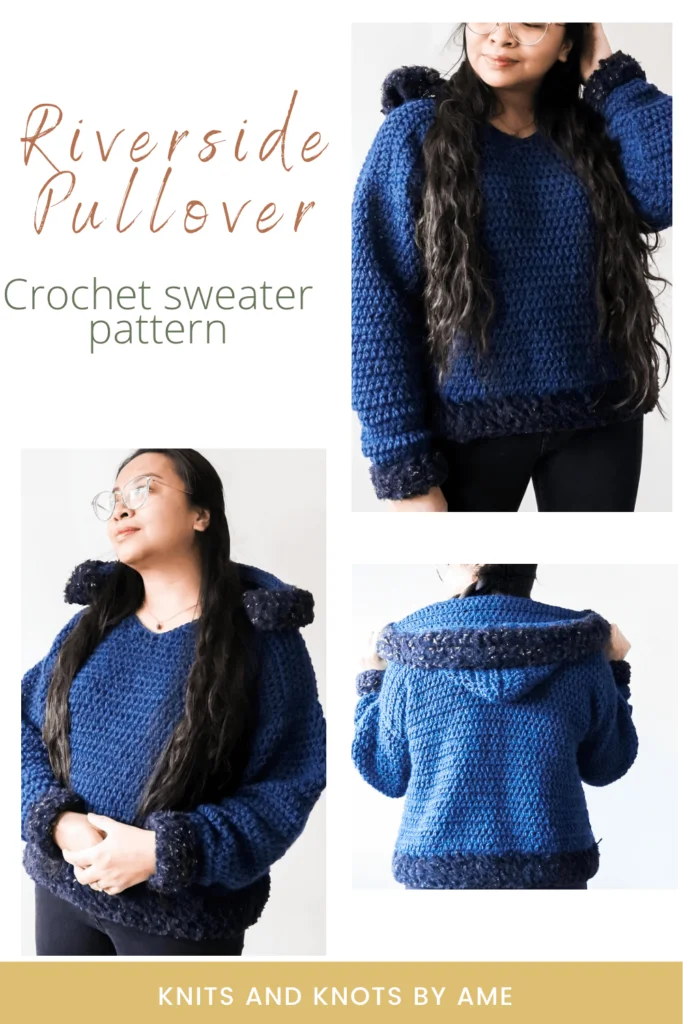
Crochet Hoodie Pattern: The Riverside Pullover
This post contains the free crochet pattern for the Riverside Pullover. You can find the other sizes (XS-XL) in this ad-free PDF version here for a low costs.
Sizes – XS-XL
Materials:
*based on size respectively
- Primary color: Wool Ease Riverside (5, 6, 6, 7, 7 balls)
- Secondary color: Go For Faux Galaxy (2 balls)
- 6.00mm and 8.00 mm crochet hook
- Scissors
- Tapestry Needle
- Stitch markers
Gauge – 4”x4” = 11 sts x 8 rows in half double crochet
Abbreviations (US Terms) •
- Ch – Chain
- Hdc – half double crochet
- Hdc2tog – half double crochet 2 together
- 2hdc – two half double crochet in one stitch
- Sc – single crochet Sl st – slip stitch

Pattern Notes
- This pattern is made using US terminology.
- The gauge for this pattern is made loosely. Refrain from tightening your stitches to keep the stitches nice and loose.
- When working on front rows (odd rows), make the stitch in the space between posts. This creates a seamless row design, avoiding the flat bar created when you hdc in stitches.
- The Ch at the beginning of rows are NOT included in the total st count as you will hdc into the first st after the ch 1.
- Regularly counting your sts in a row is good practice. In the photos you will notice a lot of stitch markers, these were just to help me count.
Crochet Pattern
Get the inexpensive ad-free pattern with extra written and picture tutorials on Etsy.
Begin with 6mm hook
Front Panel of the crochet hoodie
Ch 44(50, 55, 60, 66)+1
R1: hdc into the 2nd ch from the hook, hdc into each st until the end of the row (44, 50, 55, 60, 66 sts)
R2: ch 1, hdc in each st down the row (44, 50, 55, 60, 66 sts)
R3: ch 1 hdc into each space down the row until the last space before the last st, hdc into the the last st (44, 50, 55, 60, 66 sts)
R3-26(28, 28, 30, 32): repeat R2 and R3 respectively. (44, 50, 55, 60, 66 sts)
You are now going to start working on the neckline. Place a stitch marker in the middle of the row (22, 25, 28, 30, 33 stitch)
Note: For medium, 28 is the middle stitch, you will work your decreases on the stitches surrounding the middle stitch. As for the other sizes, the row should split evenly.
R27(29, 29, 31, 33): ch 1, hdc for 18 (21, 23, 24, 26, 29) sts, hdc2tog, hdc2tog (20, 23, 25, 26, 28, 31 sts)
R28(30, 30, 32, 34): ch 1, hdc2tog, hdc2tog, hdc until end of the row (18, 21, 23, 24, 26, 29 sts)
R29(31, 31, 33, 35): ch 1, hdc for 14(17, 19, 20, 22, 25) sts, hdc2tog, hdc2tog (16, 19, 21, 22, 24, 27 sts)
R30(32, 32, 34, 36): ch 1, hdc2tog, hdc2tog, hdc until end of the row (14, 17, 19, 20, 22, 25 sts)
R31(33, 33, 35, 37) – 34(36, 36, 38, 40): ch 1, hdc in each st down the row (14, 17, 19, 20, 22, 25 sts)
Fasten off with a long tail.
Attach yarn on the opposite side of the stitch marker (right side facing you).
R27(29, 29, 31, 33): ch 1, hdc2tog, hdc2tog, hdc until end of the row (20, 23, 25, 26, 28, 31 sts)
R28(30, 30, 32, 34): ch 1, hdc for 16(19, 21, 22, 24, 27) sts, hdc2tog, hdc2tog (18, 21, 23, 24, 26, 29 sts)
R29(31, 31, 33, 35): ch 1, hdc2tog, hdc2tog, hdc until end of the row (16, 19, 21, 22, 24, 27 sts)
R30(32, 32, 34, 36): ch 1, hdc for 12(15, 17, 18, 20, 23) sts, hdc2tog, hdc2tog (14, 17, 19, 20, 22, 25 sts)
R31(33, 33, 35, 37) – 34(36, 36, 38, 40): ch 1, hdc in each st down the row (14, 17, 19, 20, 22, 25 sts)
Fasten off with a long tail.
Back Panel of the Crochet Hoodie
Ch 44(50, 55, 60, 66)+1
R1: hdc into the 2nd ch from the hook, hdc into each st until the end of the row (44, 50, 55, 60, 66 sts)
R2: ch 1, hdc in each st down the row (44, 50, 55, 60, 66 sts)
R3: ch 1 hdc into each space down the row until the last space before the last st, hdc into the the last st (44, 50, 55, 60, 66 sts)
R3-30(32, 32, 34, 36): repeat R2 and R3 respectively. (44, 50, 55, 60, 66 sts)
You are now going to start working on the neckline. Place a stitch marker in the middle of the row (22, 25, 28, 30, 33 stitch)
Note: For medium, 28 is the middle stitch, you will work your decreases on the stitches surrounding the middle stitch. As for the other sizes, the row should split evenly.
R31(33, 33, 35, 37): ch 1, hdc for 18 (21, 23, 24, 26, 29) sts, hdc2tog, hdc2tog (20, 23, 25, 26, 28, 31 sts)
R32(34, 34, 36, 38): ch 1, hdc2tog, hdc2tog, hdc until end of the row (18, 21, 23, 24, 26, 29 sts)
R33(35, 35, 37, 39): ch 1, hdc for 14(17, 19, 20, 22, 25) sts, hdc2tog, hdc2tog (16, 19, 21, 22, 24, 27 sts)
R34(36, 36, 38, 40): ch 1, hdc2tog, hdc2tog, hdc until end of the row (14, 17, 19, 20, 22, 25 sts)
Fasten off
Attach yarn on the opposite side of the stitch marker (right side facing you).
R31(33, 33, 35, 37): ch 1, hdc2tog, hdc2tog, hdc until end of the row (20, 23, 25, 26, 28, 31 sts
R32(34, 34, 36, 38): ch 1, hdc for 16(19, 21, 22, 24, 27) sts, hdc2tog, hdc2tog (18, 21, 23, 24, 26, 29 sts)
R33(35, 35, 37, 39): ch 1, hdc2tog, hdc2tog, hdc until end of the row (16, 19, 21, 22, 24, 27 sts)
R34(36, 36, 38, 40): ch 1, hdc for 12(15, 17, 18, 20, 23) sts, hdc2tog, hdc2tog (14, 17, 19, 20, 22, 25 sts)
Fasten off
Crochet hoodie Sleeves (make 2)
For the sleeves you are going to increase on both sides every three rows after the first three rows.
Ch 16(19, 22, 25, 28)+1
R1: hdc into the 2nd ch from the hook, hdc into each st until the end of the row (16, 19, 22, 25, 28 sts)
R2: ch 1, hdc in each st down the row (16, 19, 22, 25, 28 sts)
R3: ch 1 hdc into each space down the row until the last space before the last st, hdc into the the last st (16, 19, 22, 25, 28 sts)
R4: ch 1, 2hdc, hdc in each st, until the last st, 2hdc (18, 21, 24, 27, 30 sts)
R5: ch 1 hdc into each space down the row until the last space before the last st, hdc into the the last st (18, 21, 24, 27, 30 sts)
R6: ch 1 hdc into each space down the row until the last space before the last st, hdc into the the last st (18, 21, 24, 27, 30 sts)
Continue increasing in this matter (increase on both ends every 3 rows)
R35: ch 1 hdc into each space down the row until the last space before the last st, hdc into the the last st (38, 41, 44, 47, 50 sts)
For XS Only: Fasten off with long tail
R36: ch 1 hdc into each space down the row until the last space before the last st, hdc into
the the last st (41, 44, 47, 50 sts)
For S and M Only: Fasten off with long tail
R37: ch 1 hdc into each space down the row until the last space before the last st, hdc into
the the last st (47, 50 sts)
Fasten off with long tail
Assembly
- Lay the panels and down as seen in the picture. Use the long tail from the necklines of the front panel to seam to the shoulders of the back panel as shown by the dotted lines.
- Locate the middle of the sleeve and align with the seamline of the shoulders. Seam the topo of the sleeve to the side of the panel evenly on each side from the middle. Do not stretch. Your beginning and end rows of where you seamed should line up for each sleeve.
- Fold the garment in half with front panel facing you and sleeves folded with sides touching.
- Seam the side of the sleeve closed and the down the side of the body (refer to dotted line on picture below. Repeat on both sides.
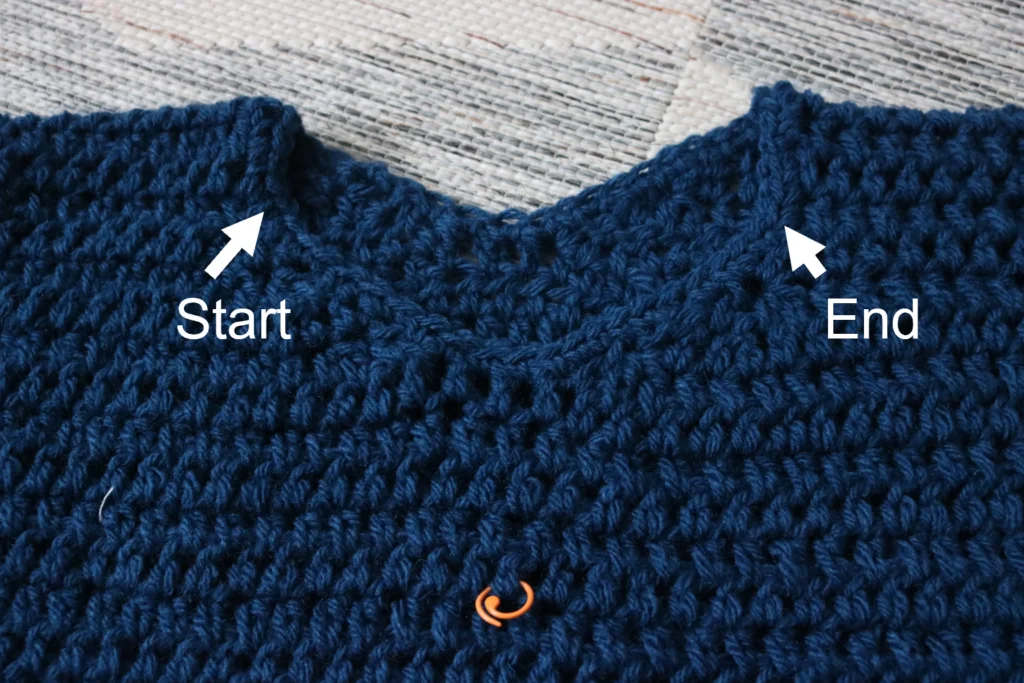
- Single crochet around the neckline.
Crochet Hood
Attach yarn to the point on the neckline where the increase rows ends (row 33)
R1: ch 1, *hdc, 2hdc. Repeat from * until the marked end.
R2: ch 1, hdc in each st down the row
R3: ch 1 hdc into each space down the row until the last space before the last st, hdc into the the last st
R4-24: Repeat R2 and R3 respectively
Mark the middle of the row.
R25: ch 1, hdc until 4 sts before the stitch marker. Hdc2tog, hdc2tog, hdc2tog, hdc2tog, hdc until the end of the row (mark the middle again)
R26: ch 1, hdc until 4 sts before the stitch marker. Hdc2tog, hdc2tog, hdc2tog, hdc2tog, hdc until the end of the row (mark the middle again)
Fold the top in half with the right side facing in so that the top edge is aligned.
Sc through the top loops (or seam) to close the top shut.

Add Fur Trim
Note: to add the fur trim you will need to change your hook to 8mm. To crochet evenly around the edges through the spaces and skipping one space.
- Attach yarn to the edge of the hood. Make 4 rows of sc. Fasten off, Fold over the hood when worn over head
- Attach yarn to the wrist cuff. Make 4 rounds of sc (remember to sl st at the end of each round to end the round). Fasten off. Fold over the wrist.
- Attach yarn to the bottom of the pullover. Make 4 rounds of sc. Fasten off.

Now it’s time to get making!
Want to try out some patterns? Make sure to check out all of my beginner friendly patterns here where you can find garments, amigurumi, and accessories.
Want to see crochet sweater patterns for fall?
That’s all for now my maker friend! Remember, never miss a stitch by subscribing to my newsletter. See you next time!
xoxo
Abigail