How to Make a Comfy Oversized Crochet Sweater
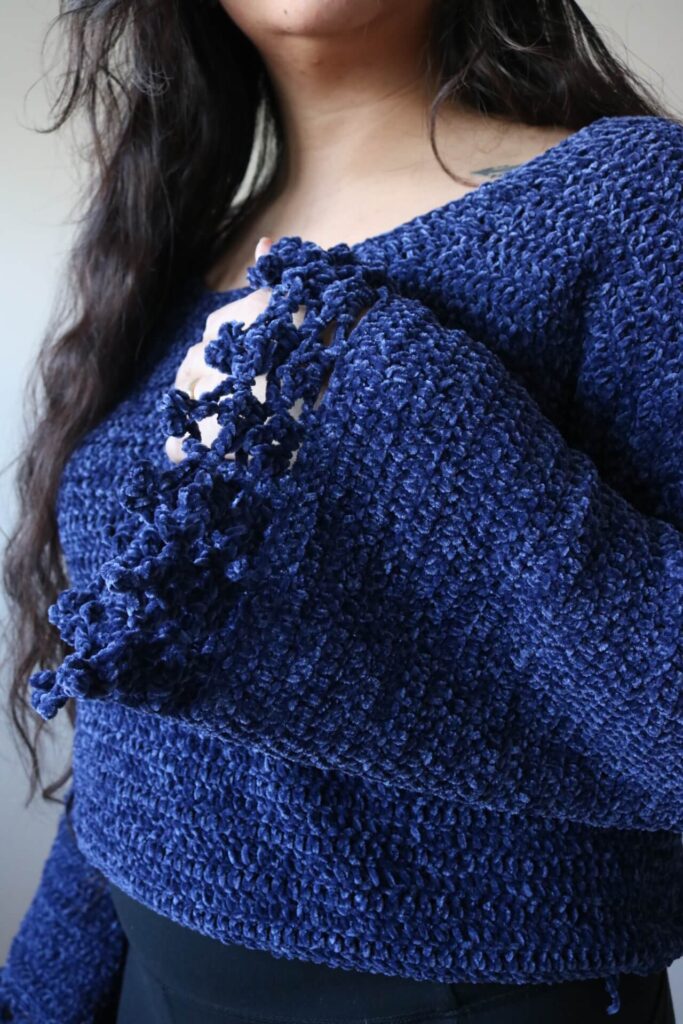
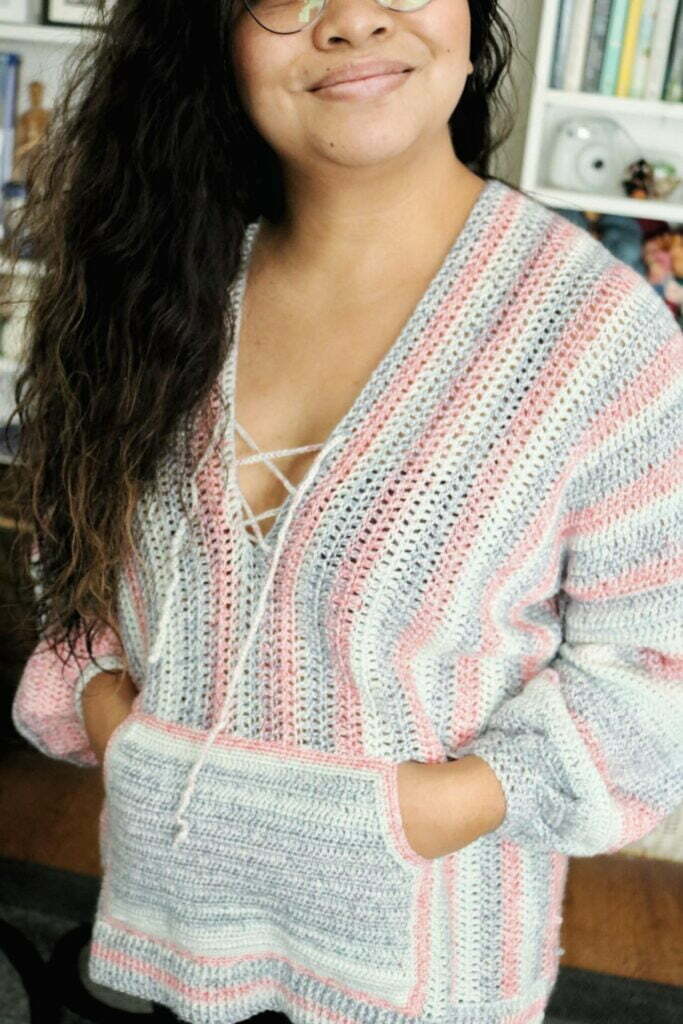
This post show you how to make an oversized crochet sweater that is great for transition months. This pattern uses lightweight yarn for great drape and features a pocket and strings that close the wide neckline.
Get the inexpensive ad-free pattern for this Wanderlust Sweater. Print and add to your crochet pattern collection now. See more free sweater patterns here.
Related: Free Pattern Crochet Hoodie with Fur Trim
This post may contain affiliate links. I get a small commission from any purchase made through these links at no expense to the buyer. This allows me to keep free awesome content coming your way. Check out my privacy policy for a full rundown of disclosures.
Inspiration behind the Wanderlust Sweater
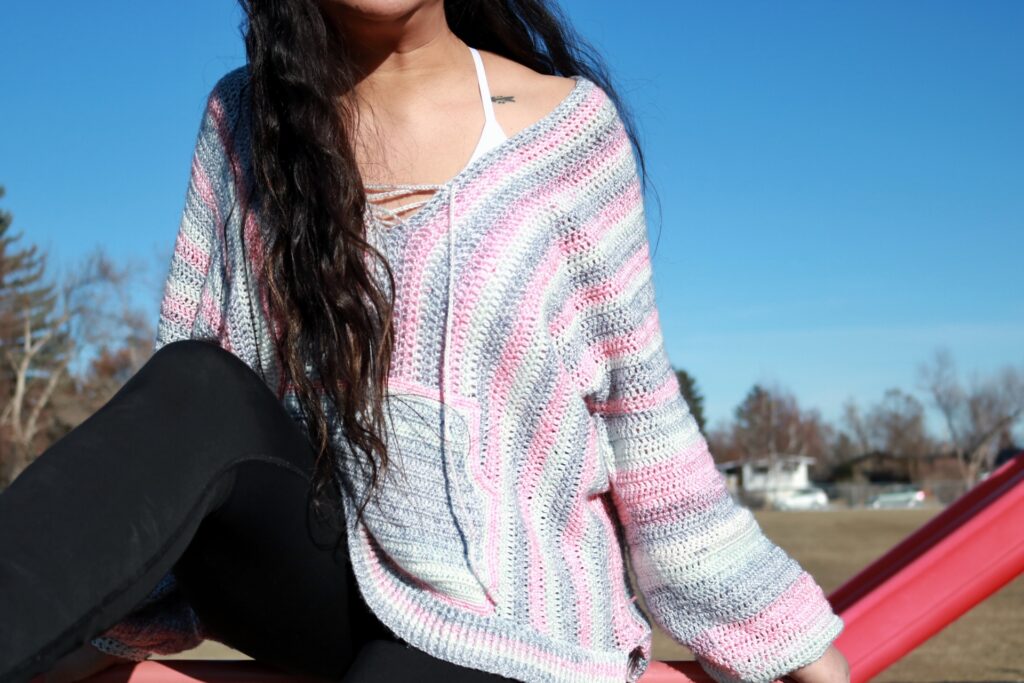
The Wanderlust Sweater was inspired by long beautiful road trips, unexpected traveling stops, and living life outdoors.
During the time when I finished this pattern, my wife and I took a road trip to Jasper National Park in Alberta. This little trip was our way of ending our summer adventures before I had to go back to my – then – job working in the school system. Gotta love working in the school system with all the long breaks!
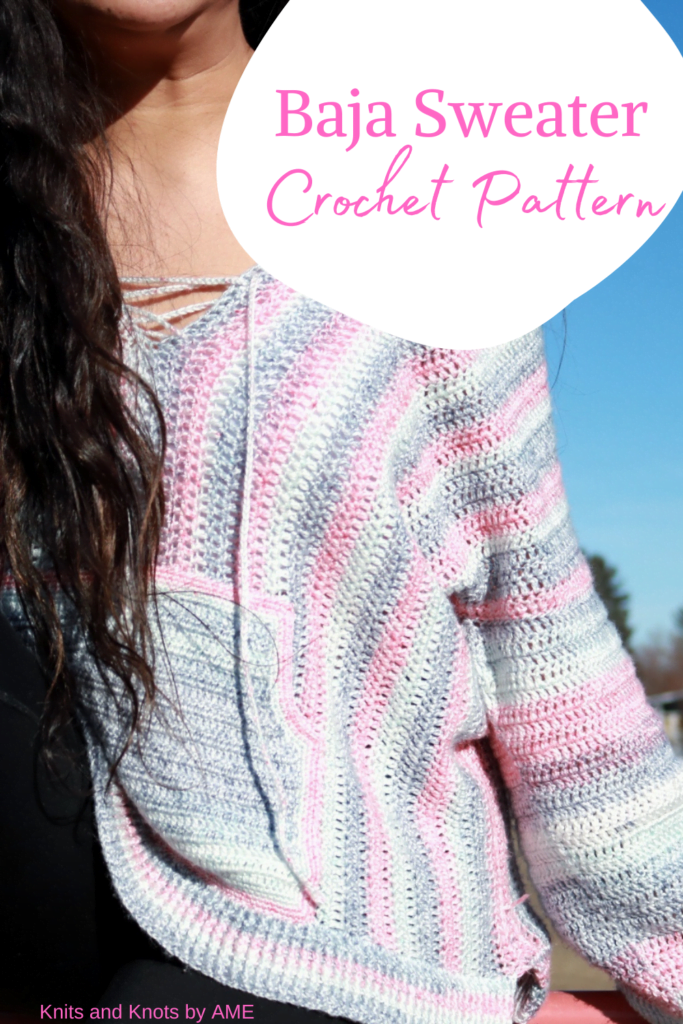
That summer we were out almost every weekend hiking and exploring our beautiful province. The Wanderlust Sweater resembles a baja sweater that is commonly seen in outdoor stores and lifestyle.
Design Details
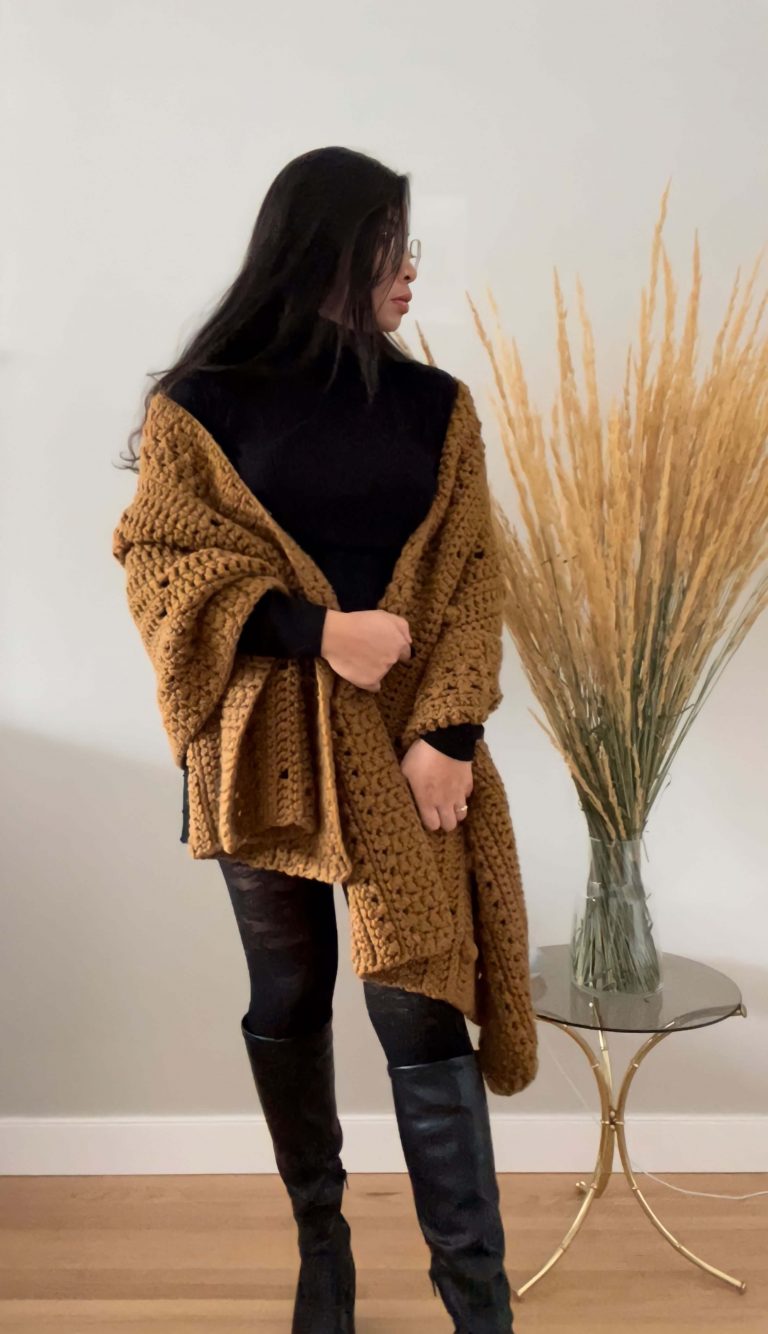
The Wanderlust Sweater is an oversized crochet sweater that is made mostly side to side and features a large pocket. The construction of this sweater is very easy making it a great beginner friendly crochet pattern.
The sweater has a relaxed fit that drapes beautifully over the body. This is the sort of “cozy” I envision on a camping trip around a campfire enjoying the sunset with a cup of warm soup.
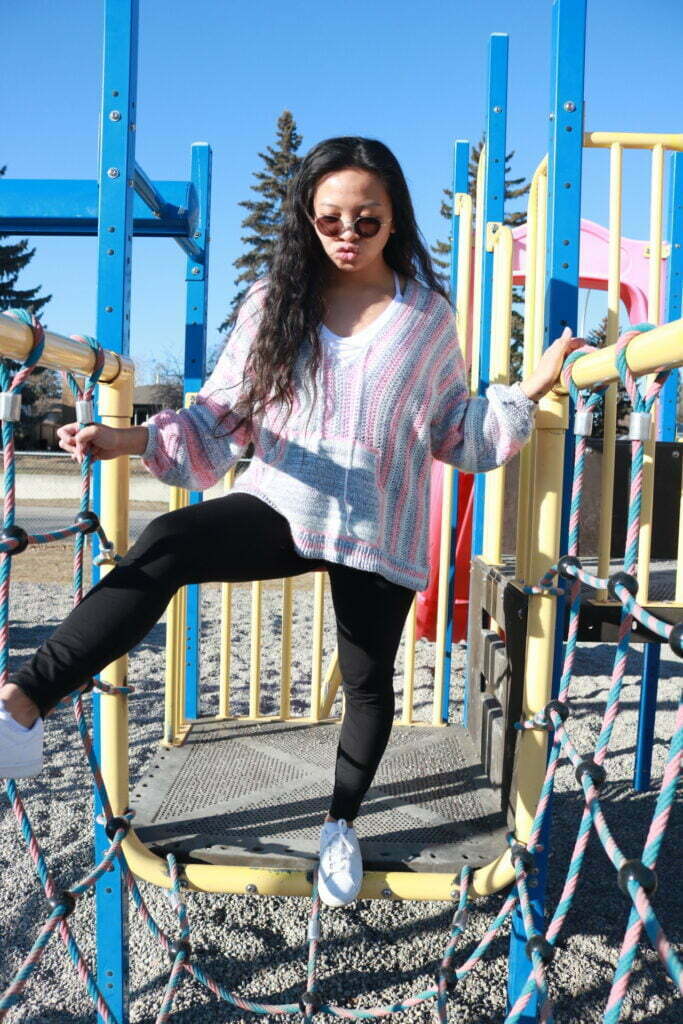
How to Style an Oversized Crochet Sweater
Oversized sweaters are easy to style and are often paired with a simple bottom and shoes.
Crocheted sweaters are a bit different because of the stitches create spaces where air can pass through. The winter air could get a bit cold for our tummies so I suggest wearing a camisole inside.
I got a pack of 3 (or was it 4?hmm) simple black and white camisoles from our local Costco for under $20. I use these under crocheted sweaters. Stores like H&M also have really cheap spaghetti strap camisoles for under $10.
Want more Sweater Patterns?
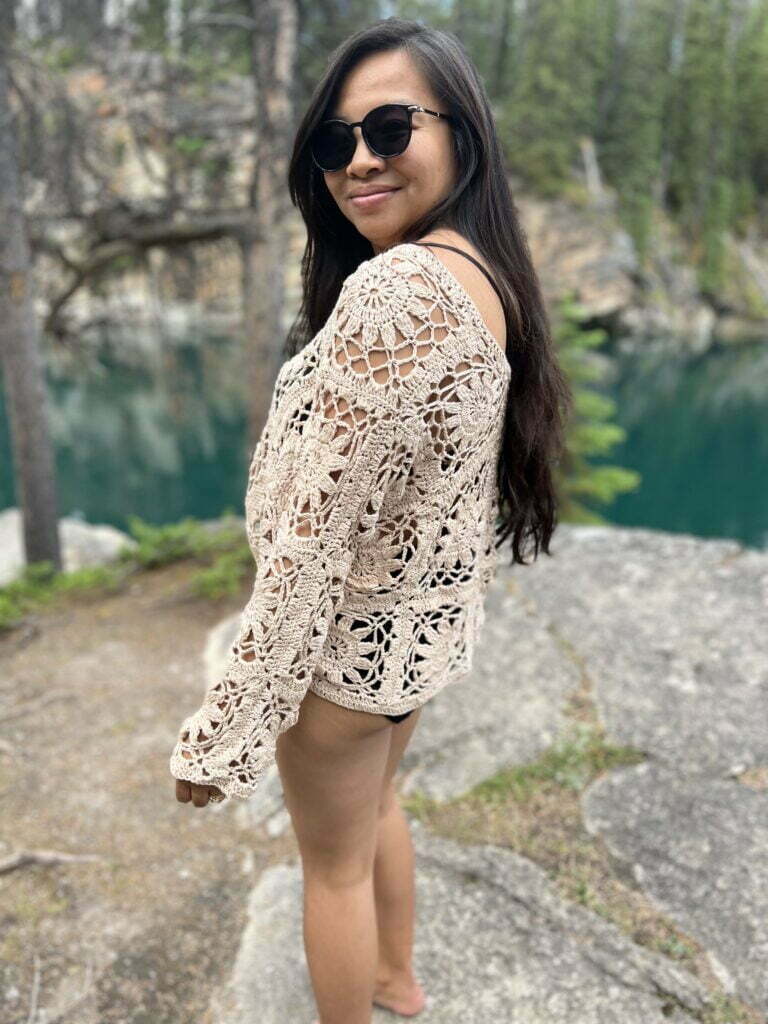
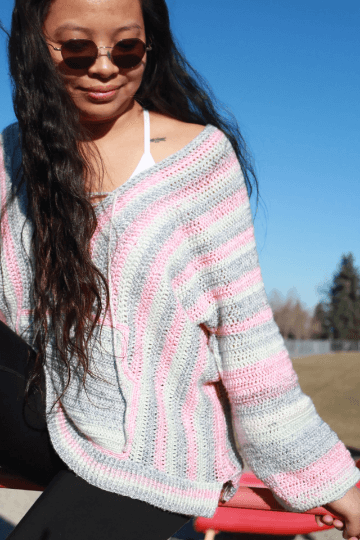
Check out thee patterns (left to right): Arnica Pullover, Louis Belle Pullover, Wanderlust Sweater

See more crochet sweater patterns in this list I curated filled with trendy and FREE patterns:
Yarn Used for this oversized crochet sweater
For this design, I used Lion Brand Yarn’s Dotted Line, which has unfortunately been discontinued. Dotted Line was an 100% acrylic yarn in CYC 2 weight. The yarn had beautiful speckles all throughout and was very soft! I would compare it to hand dyed yarn. Just beautiful!
For this pattern, any sport weight yarn would do great! just make sure to make a gauge to make sure you get the right measurements/results.
I chose to use a lighter weight yarn for this sweater because I wanted to make it an oversized sweater without being bulky. This yarn weight was really great for that purpose and also making it a multi seasonal sweater.
Do you have the right yarn for this project? Make sure to check out my post Best Yarn for Crochet Sweaters to help you choose the perfect yarn for this design.
Oversized Crochet Sweater Pattern: The Wanderlust Sweater
This post contains the free crochet pattern for the Wanderlust Sweater. You can find the other sizes (XS-XL) in this ad-free PDF version here for a low costs.
Sizes – XS-XL
Materials:
*based on size respectively
- 3.75mm and 2.25mm crochet hook o2-fine weight Yarn (I used Lion Brand Yarn’s Dotted Line in Liberty) Approximate yardage – 1,885/1,935/1,985/2,100/2,250 yds (XS-XL respectively)
- Scissors
- Tapestry needle to weave in ends
Gauge – 4”x4” – 20 sts x 13 rows of double crochet
Abbreviations (US Terms)
- St/t – stitches
- Ch – chain
- Sc – single crochet
- Dc – double crochet
- Tc – triple crochet
- Scfp – single crochet in front post
- Scbp – single crochet in back post
- Dcfp – double crochet in front post
- Dcbp – double crochet in back post
- Tcfp – triple crochet in front post
- Yo – yarn over
Pattern Notes
- This pattern is worked in rows. Turn after each row and ch 2.
- The photo above shows a size medium on a 5’3 female weighing 150 lbs.
- The pattern is written in US terms.
Crochet Pattern
Are you a visual learner? You can get the PDF pattern at low cost here on the site (cheapest option) or go to where you are familiar Etsy or Ravelry. Want everything you need plus the pattern?
Body
Ch 198 (200, 200, 202, 204) + 2
*Alternatively, you can make 198 (200, 200, 202, 204) double crochet foundation stitches then move on to row 2.
R1: dc into the third ch from the hook (this will count as the first and second st). Dc into each of the chains across the row. (198, 200, 200, 202, 204 sts)
R2-29(30, 32, 34, 35): ch 2, dc into each st across the row. (198, 200, 200, 202, 204 sts)
R30(31, 33, 35, 36): ch 2, dc into the next 46 (46, 47, 48, 49) sts. Ch 55(58, 60, 63, 65) skip 55(58, 60, 63, 65) sts. Dc into next st and continue across the row. (198, 200, 200, 202, 204 sts – dc and ch)
R31(32, 34, 36, 37): ch 2, dc into next 46 (46, 47, 48, 49) sts. Dc into each ch. Dc into each st until end of the row (198, 200, 200, 202, 204 sts)
R33(33, 35, 37, 38)- 59(61, 65, 69, 71): ch 2, dc into each st across the row. (198, 200, 200, 202, 204 sts)
Bottom Ribbing
Attach yarn to a bottom corner of the body
Switch to 2.25mm
R1: Start with ch 2 (counts as one double crochet) Double crochet across the bottom following 2 dc per post and one dc in between posts/rows. (178, 184, 196, 208, 214 sts)
R2: ch 2, *fpdc, bpdc. Repeat from * until the end of the row. (178, 184, 196, 208, 214 sts)
R3: ch 2 *bpdc, fpdc. Repeat from * until the end of the row. (178, 184, 196, 208, 214 sts)
R4-8: repeat R2 and R3 consecutively. (178, 184, 196, 208, 214 sts sts)
Fasten off Repeat on opposite side
Sleeves (make 2)
Sleeves (make 2)
Ch 72(76, 80, 88, 92) + 2
R1: dc into 3rd ch from hook. Dc into each st across the row. (72, 76, 80, 88, 92 sts)
R2: Ch 2, dc into the same st, 2 dc, dc into next 76 sts, 2 dc, 2dc. (76, 80, 84, 92, 96 sts)
R3: Ch 2, dc into the same st, 2 dc, dc into next 80 sts, 2 dc, 2dc. (80, 84, 88, 96, 100 sts)
R4: Ch 2, dc into each st across the row. (80, 84, 88, 96, 100 sts)
R5: dc2tog, dc into next 84 sts, dc2tog. (80, 82, 86, 94, 99 sts)
R6: Ch 2, dc into each st across the row. (80, 82, 86, 94, 98 sts)
R7: dc2tog, dc into next 82 sts, dc2tog. (78, 80, 84, 92, 96 sts)
R8: Ch 2, dc into each st across the row. (78, 80, 84, 92, 96 sts)
R9: dc2tog, dc into next 80 sts, dc2tog. (76, 78, 82, 90, 94 sts)
R10: Ch 2, dc into each st across the row. (76, 78, 82, 88, 94 sts)
R10: dc2tog, dc into next 78 sts, dc2tog. (74, 76, 80, 86, 92 sts)
R11-33(35, 35, 37,37): Ch 2, dc into each st across the row. (74, 76, 80, 86, 92 sts)
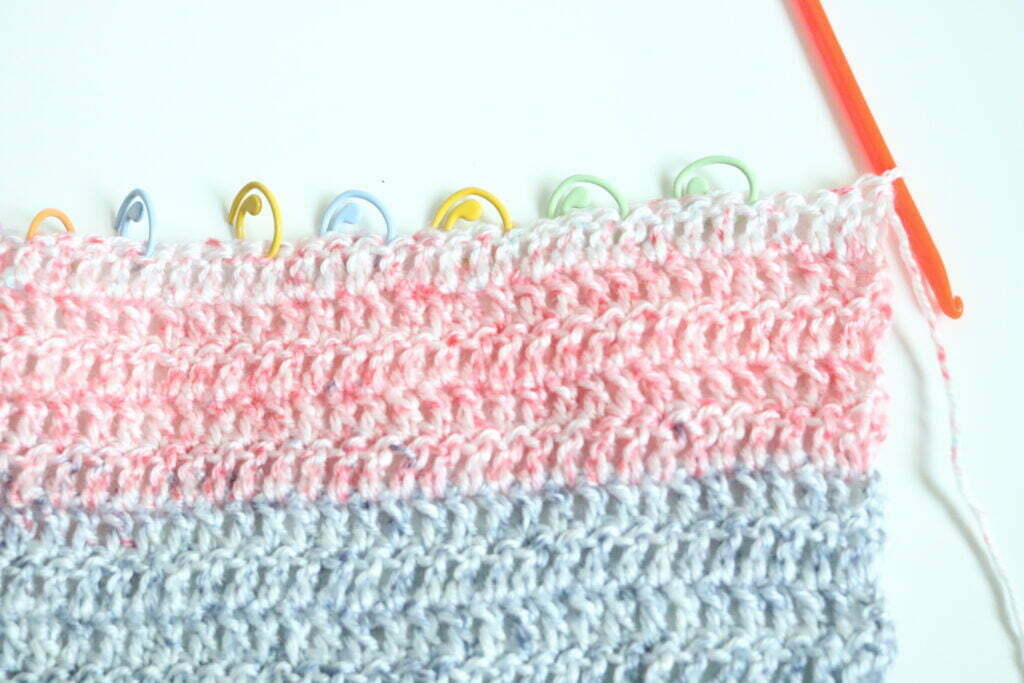
Wrist darts
At this point you are going to mark every 4sts. Follow the picture tutorial below to complete Row 34(36,36, 38,38).
Using the stitch markers as guides, fold the second segment over the first, then the third segment back over the second.
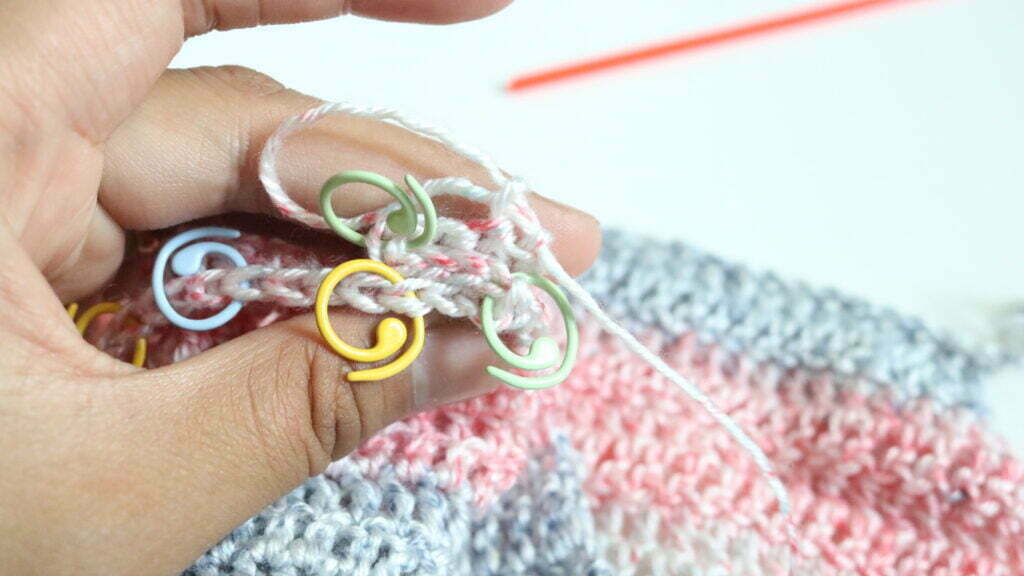
Prepare the first stich by inserting your hook through the loops marked by third stitch marker. Pull the working yarn loop through.

Ch 2, dc through the three sets of sts as one (you are going to be making each dc in this row in this manner). Dc into remaining 2 sts of the “dart”
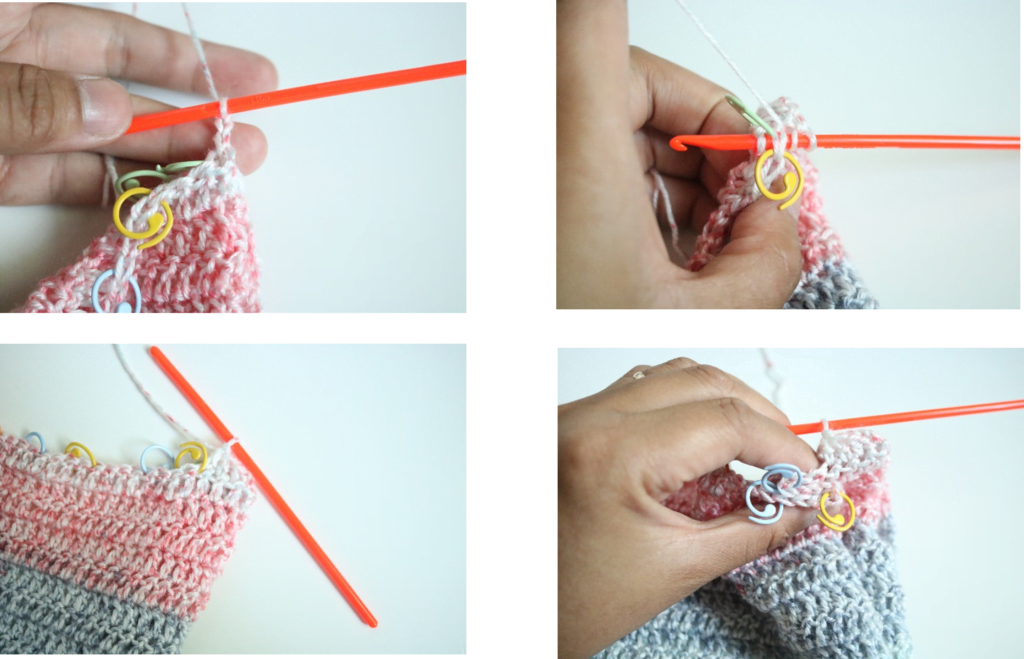
Repeat this process until the end of the row. (24, 28, 28, 32, 32 sts)
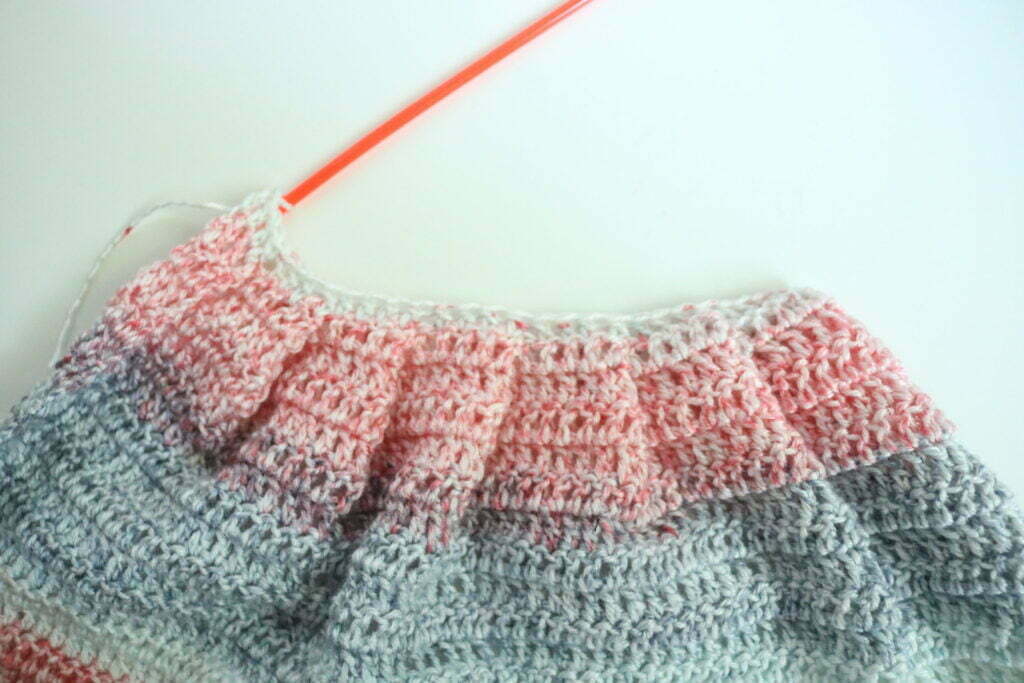
R35(37, 37, 39, 39)-37(39, 39, 41, 41): Ch 2, dc into each st across the row (24, 28, 28, 32, 32 sts)
Pocket (if desired)
Use 2.25mm hook
Ch 65 +2
R1: Dc into 3rd ch from hook, dc into each st across the row (65 sts)
R2-11: Ch 2, dc into each st across the row (65 sts)
R12: dc2tog, dc2tog, dc into each st until last 4 sts, dc2tog, dc2tog (61 sts)
R13: dc2tog, dc2tog, dc into each st until last 4 sts, dc2tog, dc2tog (57 sts)
R14: dc2tog, dc2tog, dc into each st until last 4 sts, dc2tog, dc2tog (53 sts)
R15: dc2tog, dc2tog, dc into each st until last 4 sts, dc2tog, dc2tog (49 sts)
R16-21: ch 2, dc into each st across the row (49 sts)
You are now going to go around the pocket making the border. Start each round with a ch 1. Sc into each st and 3 sc into corners. Slip stitch into the beginning st of the round to end each round.
Assembly
- Mark the mid portion of the top of the sleeve and the body.
- Seam the sleeves on to the side of the body evenly following the stitches
Now it’s time to get making!
Want to try out some patterns? Make sure to check out all of my beginner friendly patterns here where you can find garments, amigurumi, and accessories.
Want to see crochet sweater patterns for fall?
That’s all for now my maker friend! Remember, never miss a stitch by subscribing to my newsletter. See you next time!
xoxo
Abigail