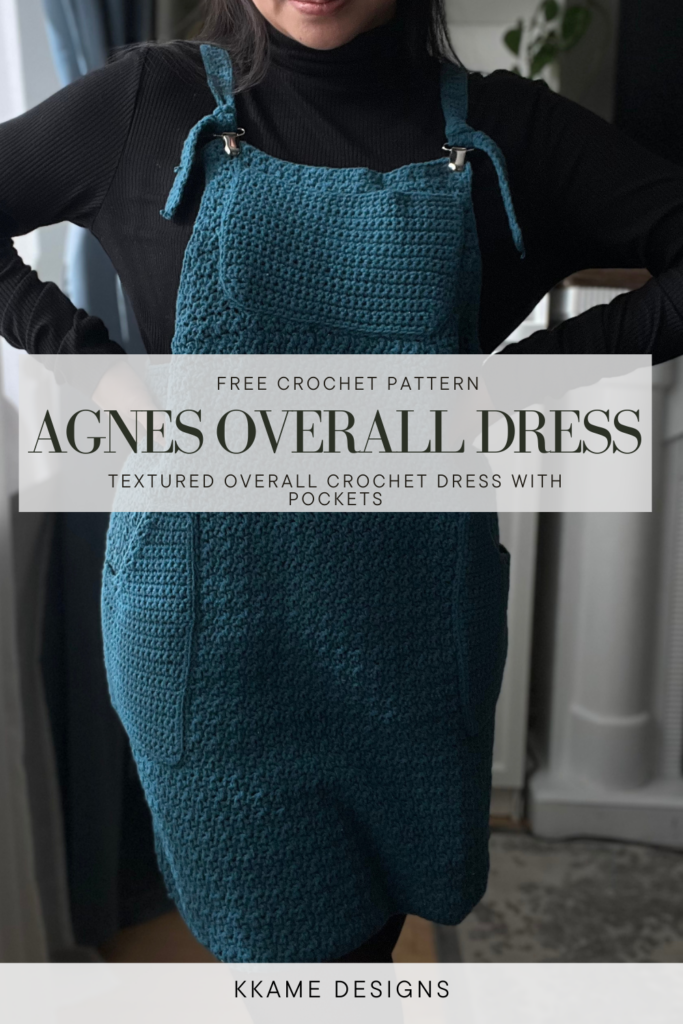
How to Make a Crochet Overall Dress with Textured Stitches for Fall
Hello my maker friend! It is time for another cozy crochet pattern and this time we are diving into a free crochet overall dress pattern that is perfect for the fall season!
This post contains affiliate links. I get a small commission from any purchase made through these links at no additional cost to the buyer. This allows me to keep free awesome content coming your way. Check out my privacy policy for a full rundown of disclosures.
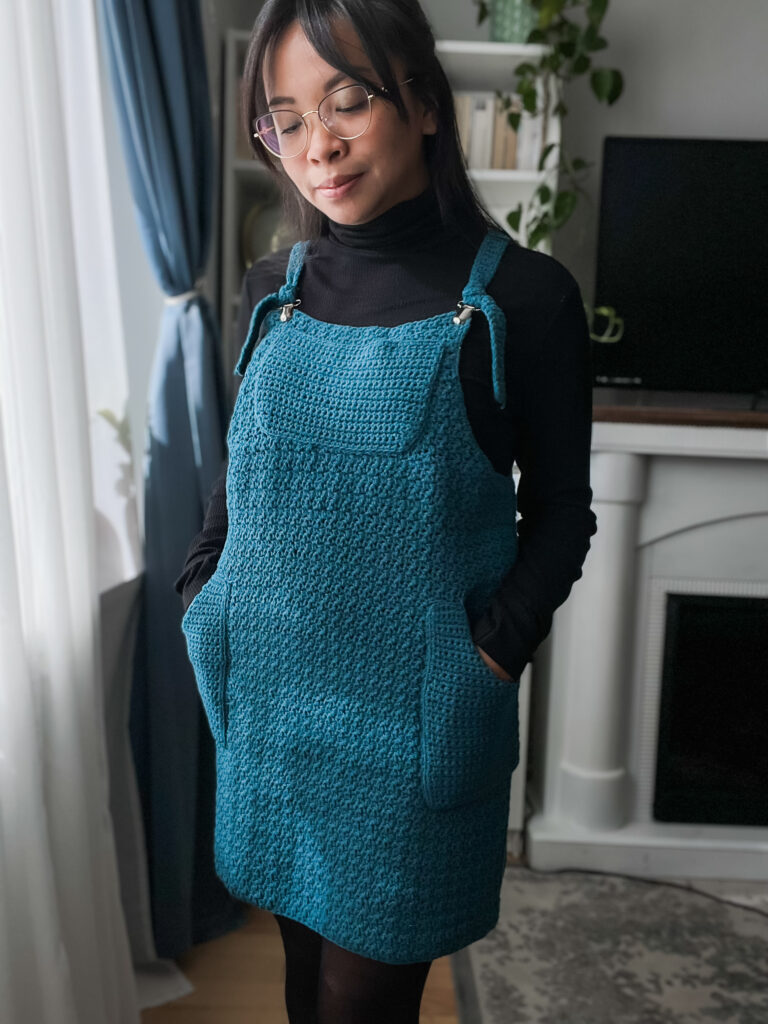
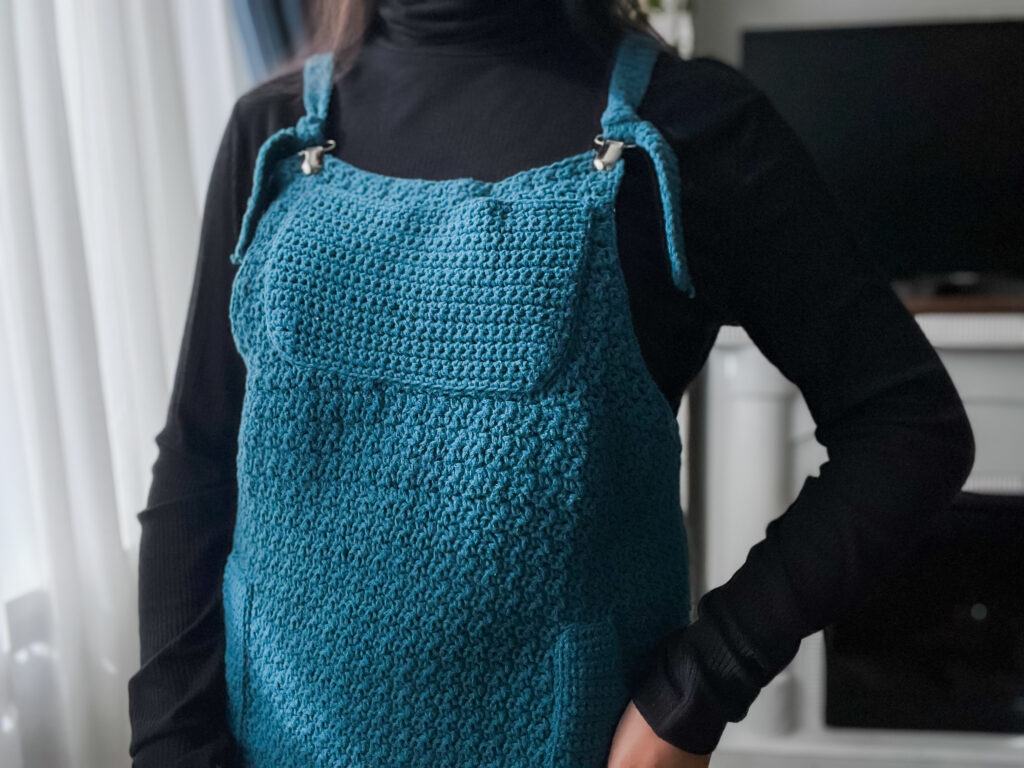
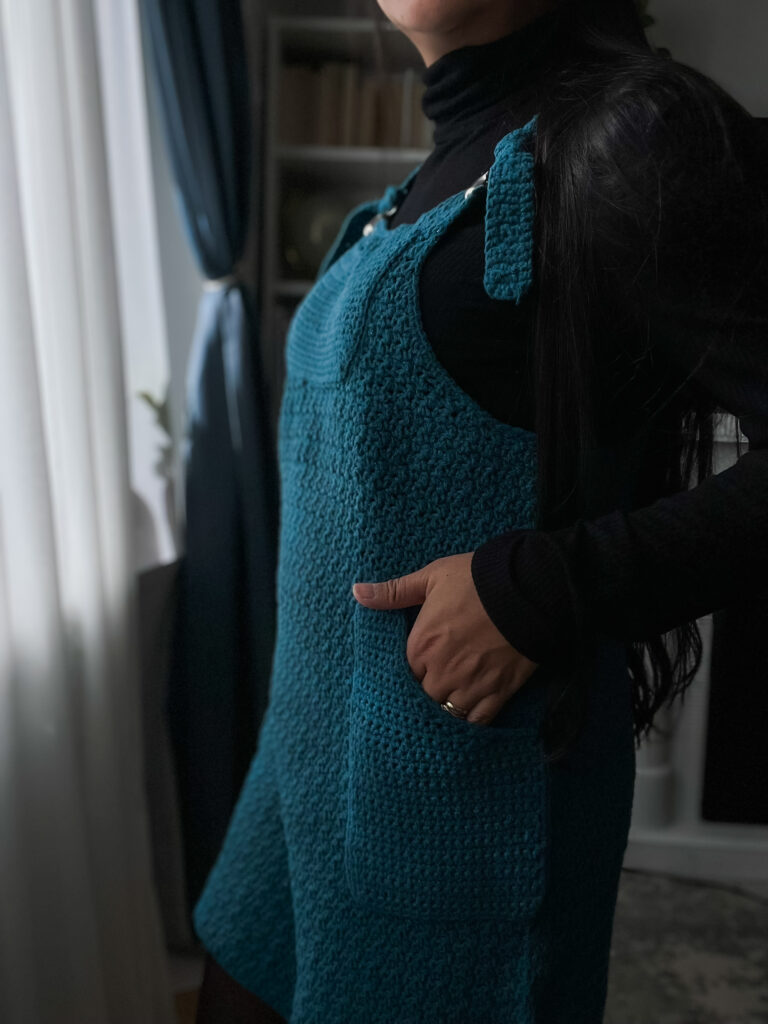
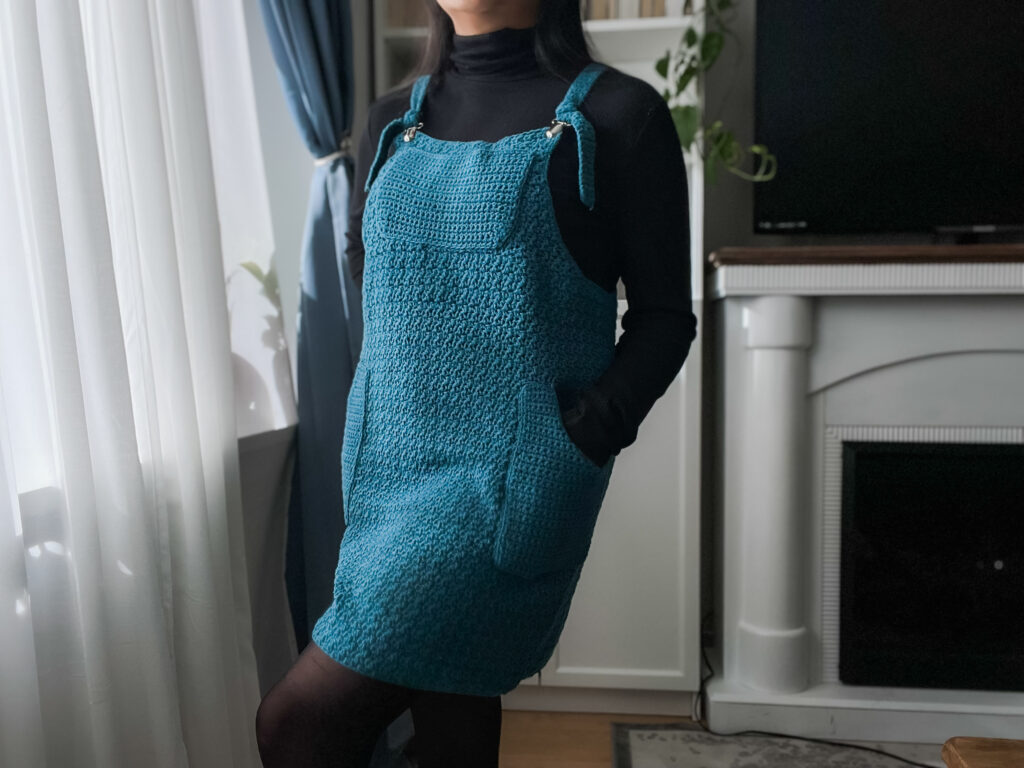
This is a cozy weather overall dress. This is a mid thigh length dress with adjustable straps and pockets. The straps can be sewn on or applied with any hardware of your choice for a store bought feel.
Get the inexpensive ad-free pattern for this pattern here. The paid pattern includes step-by-step instructions and picture tutorials to help you with chunky knit cardigan.
About this crochet overall dress
The Agnes Dress is named after one of my favourite hikes in Alberta, the Agnes Tea House hike in Lake Louise. I designed this dress around the time my wife and I hiked to the tea house and decided to hike all around the Lake Louise area. It was such a beautiful day and the fall atmosphere inspired me so much!
I wanted the dress to feel like – well – fall. The colors, smell, and cozy feeling that fall brings made me think of velvet. A festive dress to wear to family gatherings and style up or down.
I really wanted to use a proper overall buckle for the hardware but I could not find any so I opted for these suspender clips. The design also works without and sort of hardware at all and one can simply sew the strap on and slip the dress over to wear.
Construction of this crochet overall dress
The Agnes dress is constructed bottom up and made in two panels: front and back. The panels are seamed at the side and the pockets (optional) are sewed on to the garment.
The body of the dress uses a textured stitch that helps give warmth to the overall look. Shaping is made around the armhole and minimal shaping is used to keep the pattern beginner friendly.
Hardware can be added according to ones taste but may also be emitted since the dress can slip on.
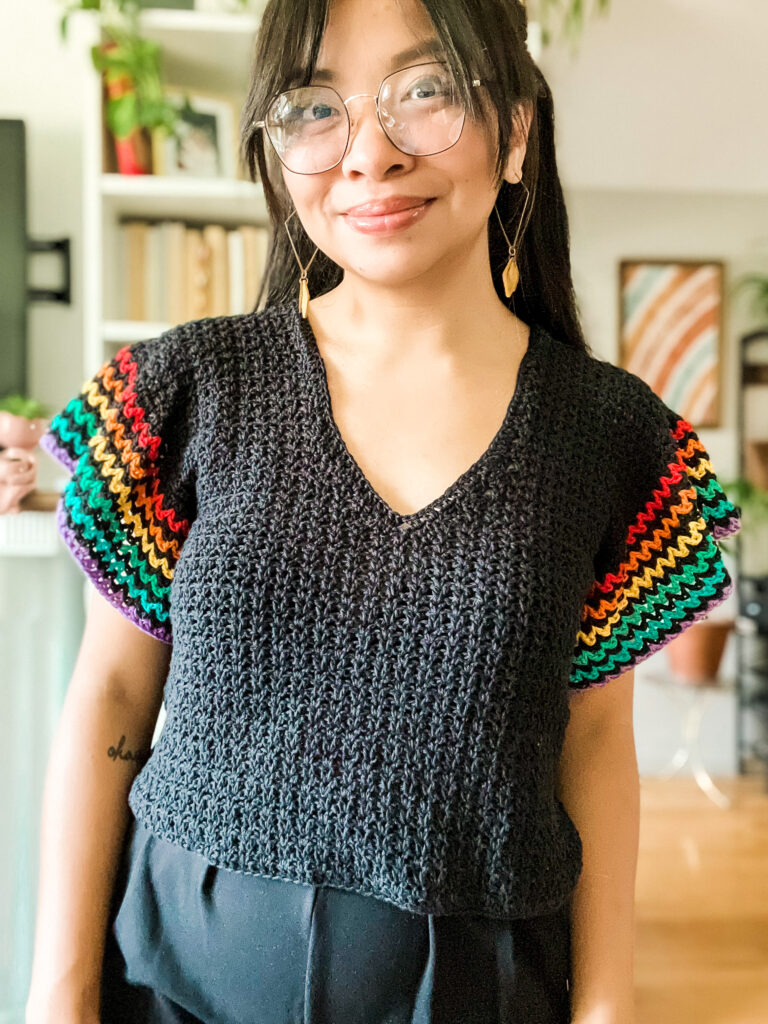
Related Post: Check out this curated list of sweater patterns to make this year
Want more fall designs?
Check out these patterns (left to right): Norquay Skirt and the Shu Poncho
Yarn
For this chunky crochet cardigan I used Lion Brand Yarn’s Feels Like Butta in the colorway Teal.
I have made a whole review about this yarn when it first launched. This was even before I was a designer for the brand! Feels Like Butta is actually the yarn I used for my very first knit design and kit with Lion Brand Yarn.
This yarn is super soft as the name depicts and feels like a warm hug! I like the texture of this yarn for cooler months because of how warm it is! The yarn comes in a generous amount and works up into a very interesting fabric. Frogging with this yarn is actually a pain so might want to be a little careful with your stitches
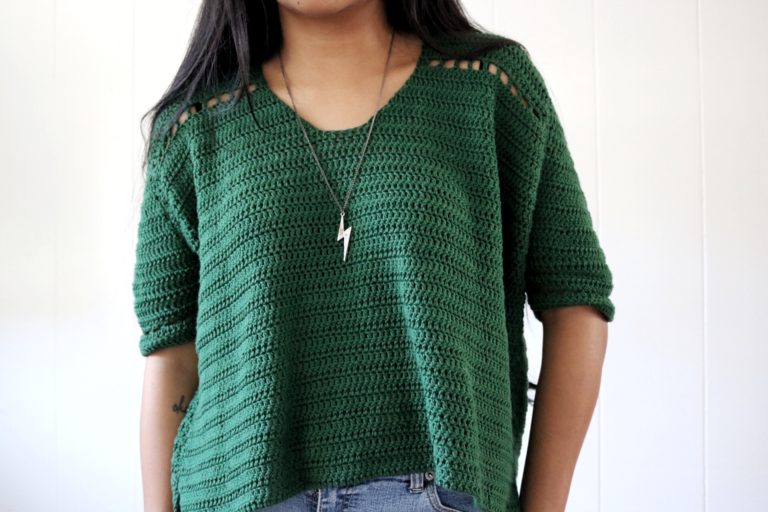
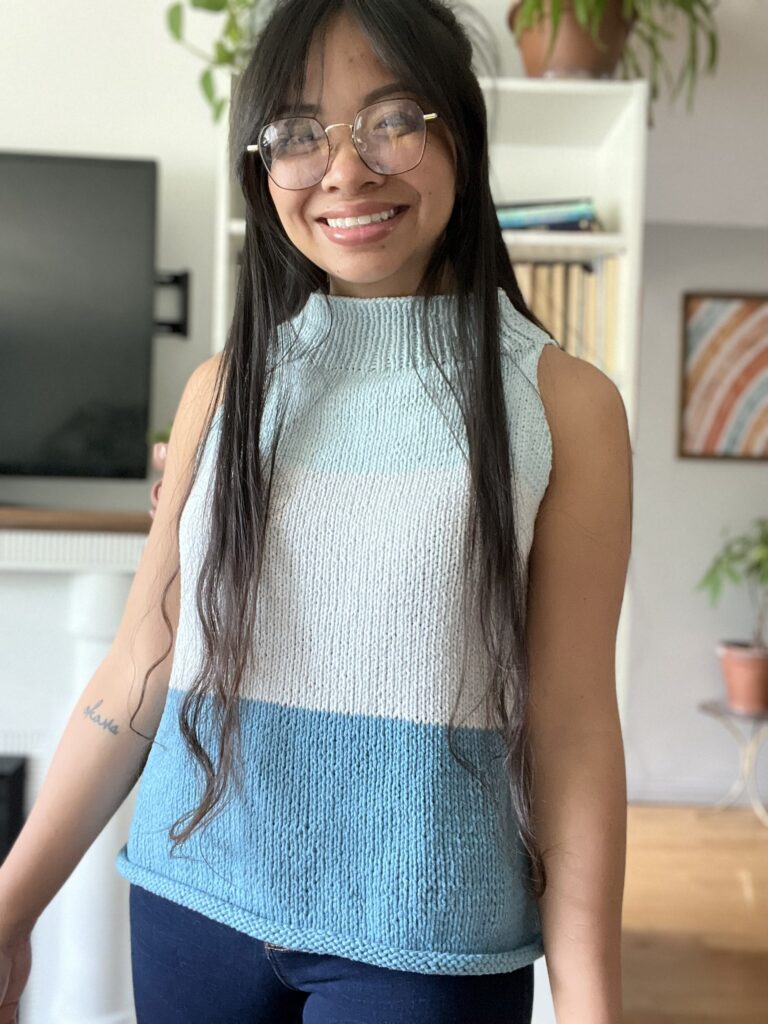
This is another design I have using Lion Brand Yarn’s Feels Like Butta (Tana Turtle Tank, also a free pattern):
Crochet Overall Dress with Pockets – Agnes Dress
First off, this is a free crochet pattern for the Agnes Dress in medium. Due to the length of the pattern I have only included this size, the other sizes XS-XL can be found in the premium ad-free pattern. The PDF pattern includes extra picture tutorials for visual learners too. This pattern is for personal use only.
Want everything you need for this dress? Grab the crochet kit on Lion Brand Yarn
Pattern notes:
- This pattern is made using US terminology.
- It is good practice to check the number of stitches in each row to make sure you are on track.
- The beginning chain/chains in a row is counted as a stitch in the final stitch count.
Materials:
- CYC 4 yarn (XS 872- XL 1308 yds)
- 4.0mm crochet hook
- Tapestry Needle
- Scissors
- Overall hardware (optional)
Gauge – Do not forget to make your gauge!
4”x4” – 14 sts x 13 rows of alternating stitches of sc and dc
Sizes and Measurements
| Size | Length | Bust Flap | Hips |
| X-Small | 25 | 8 | 34 |
| Small | 25 | 9 | 35 |
| Medium | 25.75 | 10 | 40 |
| Large | 27 | 11 | 44 |
| X-Large | 27.5 | 12 | 48 |
Abbreviations:
- Ch – Chain
- St/s – Stitch/es
- SC – single crochet
- DC – double crochet
- sc2tog – single crochet decrease
- dc2otg – double crochet decrease
- slst – slip stitch
Let’s start making your crochet overall dress
Front Panel
Chain 60, 64, 70, 78, 84 + 1
Row 1: sc into the second ch from the hook, dc, *sc, dc. Repeat from * until the end of the row. (60, 64, 70, 78, 84 sts)
Row 2-49 (49, 52, 55, 55)
: *sc, dc. Repeat from * until the end of the row. (60, 64, 70, 78, 84 sts per row)
At this point, this should measure from the top of your hips to the length of the skirt (mid thigh). If you wish for it to be longer, add rows here. If you want it shorter, take out some rows.
M ONLY
Row 53: dc2tog, *sc, dc. Repeat from * until the last two sts of the row. Sc2tog. (68 sts)
Row 54-66: *dc, sc. Repeat from * until end of the row. (68 sts)
Row 67: slip 4 sts. Ch 2, sc. *dc, sc. Repeat from * until the last 4 sts. (60 sts)
Row 68: sc2tog, dc2tog, *sc, dc. Repeat from * until last 4 sts, sc2tog, dc2tog. (56 sts)
Row 69: dc2tog, sc2tog, *dc, sc. Repeat from * until last 4 sts, dc2tog, sc2tog. (52 sts)
Row 70: dc2tog, sc. *dc, sc. Repeat from * until last 2 sts, sc2tog. (50 sts)
Row 71: sc2tog, dc. *sc, dc. Repeat from * until last 2 sts, dc2tog. (48 sts)
Row 72: dc2tog, sc. *dc, sc. Repeat from * until last 2 sts, sc2tog. (46 sts)
Row 73: sc2tog, dc. *sc, dc. Repeat from * until last 2 sts, dc2tog. (44 sts)
Row 74: dc2tog, sc. *dc, sc. Repeat from * until last 2 sts, sc2tog. (42 sts)
Row 75: sc2tog, dc. *sc, dc. Repeat from * until last 2 sts, dc2tog. (40 sts)
Row 76: dc2tog, sc. *dc, sc. Repeat from * until last 2 sts, sc2tog. (38 sts)
Row 77: sc2tog, dc. *sc, dc. Repeat from * until last 2 sts, dc2tog. (36 sts)
Row 78-84: *sc, dc. Repeat from * until the end of the row (36 sts)
Fasten off
Note: This is where the top of the overall will fall on your chest. Add or take out as many rows as you need here.
Back Panel
Chain 60, 64, 70, 78, 84 + 1
Row 1: sc into the second ch from the hook, dc, *sc, dc. Repeat from * until the end of the row. (60, 64, 70, 78, 84 sts)
Row 2-49 (49, 52, 55, 55): *sc, dc. Repeat from * until the end of the row. (60, 64, 70, 78, 84 sts per row)
Note: If you made any adjustments here on the front, repeat the adjustments here in the back.
M ONLY
Row 53: dc2tog, *sc, dc. Repeat from * until the last two sts of the row. Sc2tog. (68 sts)
Row 54-66: *dc, sc. Repeat from * until end of the row. (68 sts)
Row 67: slip 4 sts. Ch 2, sc. *dc, sc. Repeat from * until the last 4 sts. (60 sts)
Row 68: sc2tog, dc2tog, *sc, dc. Repeat from * until last 4 sts, sc2tog, dc2tog. (56 sts)
Row 69: dc2tog, sc2tog, *dc, sc. Repeat from * until last 4 sts, dc2tog, sc2tog. (52 sts)
Row 70: dc2tog, sc. *dc, sc. Repeat from * until last 2 sts, sc2tog. (50 sts)
Row 71: sc2tog, dc. *sc, dc. Repeat from * until last 2 sts, dc2tog. (48 sts)
Row 72: dc2tog, sc. *dc, sc. Repeat from * until last 2 sts, sc2tog. (46 sts)
Row 73: sc2tog, dc. *sc, dc. Repeat from * until last 2 sts, dc2tog. (44 sts)
Row 74: dc2tog, sc. *dc, sc. Repeat from * until last 2 sts, sc2tog. (42 sts)
Row 75: sc2tog, dc. *sc, dc. Repeat from * until last 2 sts, dc2tog. (40 sts)
Row 76: dc2tog, sc. *dc, sc. Repeat from * until last 2 sts, sc2tog. (38 sts)
Row 77: sc2tog, dc. *sc, dc. Repeat from * until last 2 sts, dc2tog. (36 sts)
Row 78: dc2tog, sc. *dc, sc. Repeat from * until last 2 sts, sc2tog. (34 sts)
Row 79: sc2tog, dc. *sc, dc. Repeat from * until last 2 sts, dc2tog. (32 sts)
You are now going to start to strap portion
Row 80: ch 1, dc, sc, dc, sc, dc, sc, dc, sc2tog, dc2tog (10 sts)
Row 81: sc2tog, dc2tog, sc, dc, sc, dc, sc, dc (8 sts)
Row 82: ch 1, dc, sc, dc, sc, dc, sc2tog (7 sts)
Row 83: sc2tog, dc, sc, dc, sc, dc (6 sts)
Row 84: ch 1, dc, sc, dc, sc2tog (5 sts)
Row 85: sc2tog, dc, sc, dc (4 sts)
- Single crochet rows until end of the strap length.
- Now you are going to start making rows for the length of your strap. Every strap is different depending on your choice of hardware. Keep trying on your dress and adjusting the strap length as needed. Make sure to repeat from the start of the strap portion with the same number of rows for the opposite strap once you figure out how long you need it to be.
- Seam the dress sides together waist to length of the skirt.
- Attach the yarn to the middle of the straps and work a single crochet border around the entire top edge of the dress for a clean finish.
- Attach your chosen hardware or sew the straps to the top corners of the front panel.
- Fasten off.

Pockets
Top pocket
Ch 28+1
Row 1: sc into the 2nd ch from the hook. Sc into each ch down the row (28 sts)
Row 2-18: ch 1, sc in each st down the row. (28 sts)
Row 19: sc2tog, sc into each st until the last 2 sts, sc2tog (26 sts)
Row 20: sc2tog, sc2tog, sc into each st until the last 4 sts, sc2tog, sc2tog (22 sts)
Make a sc border around the whole pocket.
Fasten off with a long tail.
Side Pockets (make 2)
Ch 18+1
Row 1: sc into the 2nd ch from the hook. Sc into each ch down the row (21 sts)
Row 2-12: ch 1, sc in each st down the row. (21 sts)
Row 13: slip 4 stitches, sc2tog, sc2tog, sc into each st down the row (17 sts)
Row 14: ch 1, sc into each st down the row until last 4 sts, sc2tog, sc2tog (15 sts)
Row 15: sc2tog, sc into each st down the row (14 sts)
Row 16: ch 1, sc into each st until last 2 sts, sc2tog (13 sts)
Row 17: sc2tog, sc into each st down the row (12 sts)
Row 18: ch 1, sc into each st until last 2 sts, sc2tog (11 sts)
Row 19: sc2tog, sc into each st down the row (10 sts)
Row 20: ch 1, sc into each st until last 2 sts, sc2tog (9 sts)
Row 21: sc2tog, sc into each st down the row (8 sts)
Row 22: ch 1, sc into each st until last 2 sts, sc2tog (7 sts)
Row 23: sc2tog, sc into each st down the row (6 sts)
Row 24-36: ch 1, sc into each st (6 sts)
Make a sc border around the pocket
Fasten off with a long tail.
Place the pockets on the dress where you wish it to be. Seam the pocket to the dress using a whip stitch through the back loops of the single crochet border.
You now have a crocheted dress!
Add this design to your crochet pattern stash and get the premium version now.
I would love to see how your style your Agnes Dress this fall. Make sure to tag me @knitsandknotsbyame on IG. Until next time, creatives!
Looking for more beautiful patterns? Make sure to check out all of my beginner friendly patterns here where you can find garments, amigurumi, and accessories.
That’s all for now my maker friend! Remember, never miss a stitch by subscribing to my newsletter. Happy crocheting!
xoxo
Abigail