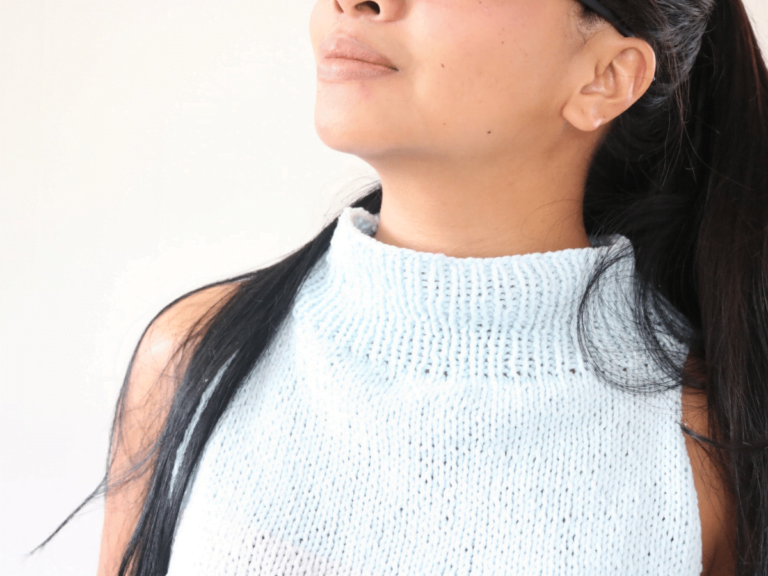
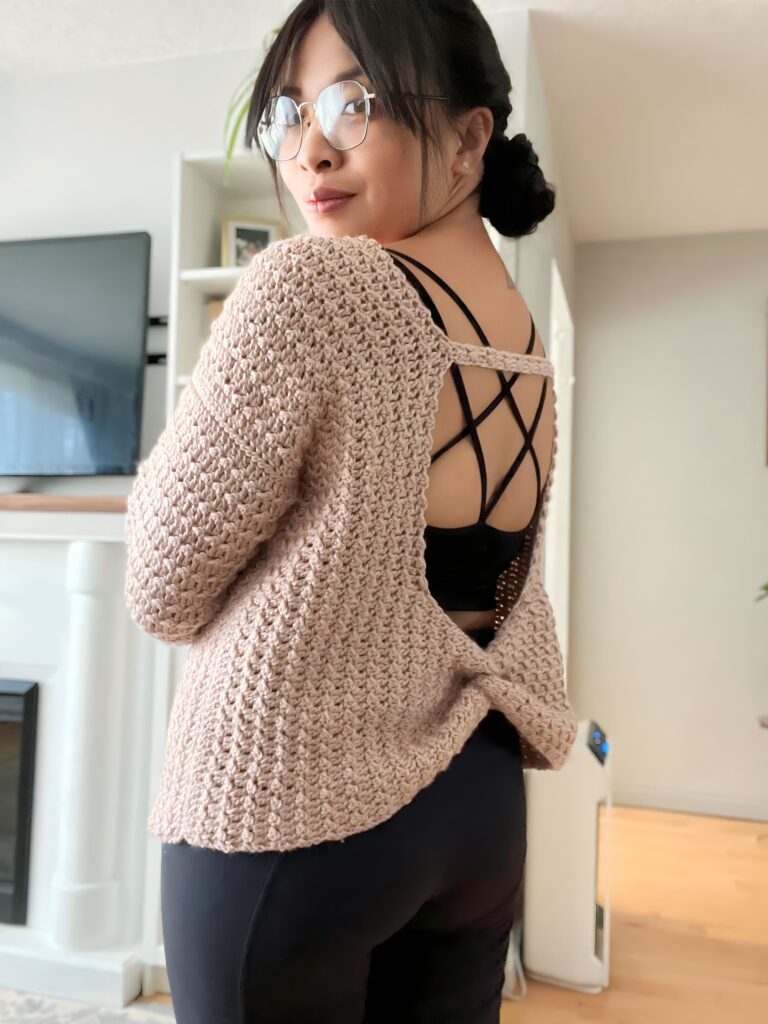
Free Easy Crochet Sweater Pattern That Looks Timeless
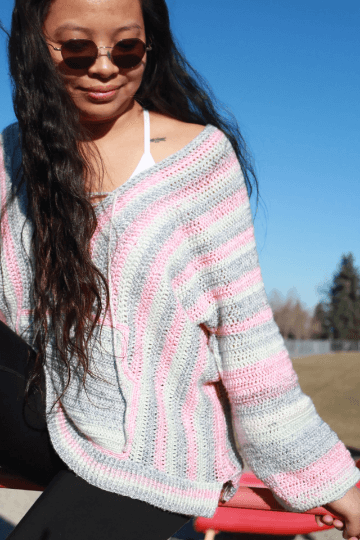
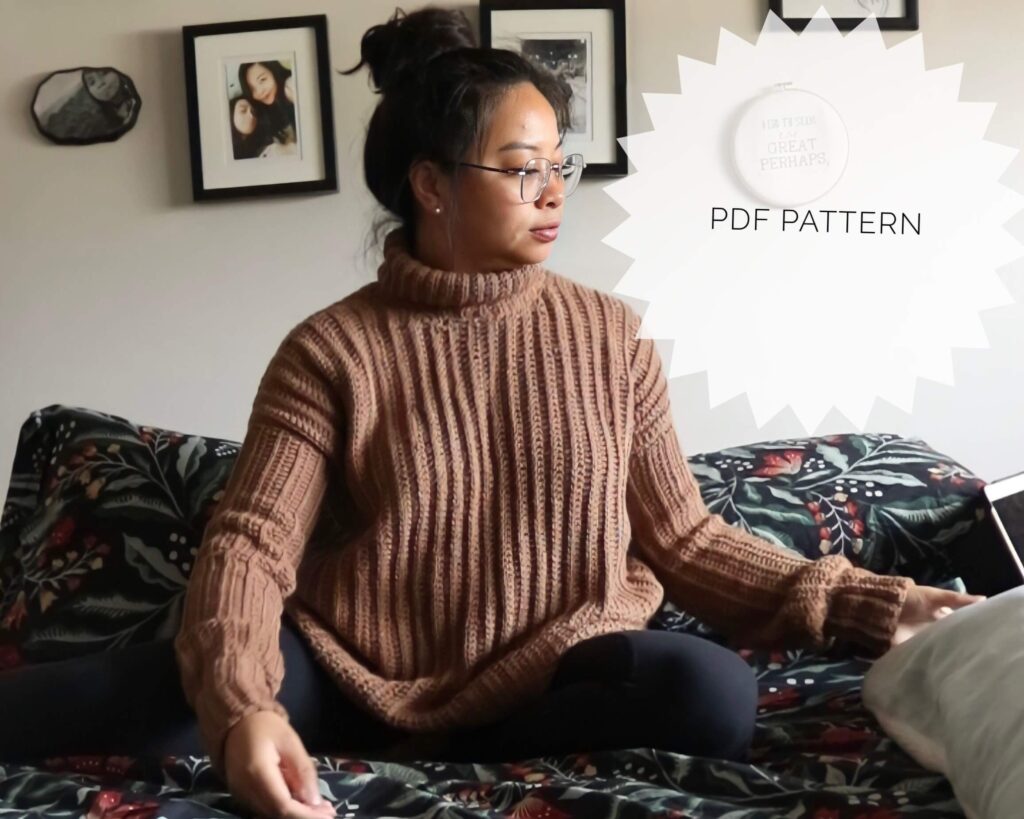
This post shares the the free crochet pattern for the Fiddle Sweater – a ribbed turtleneck crochet sweater. This top is an advanced beginner pullover that uses easy shaping, simple construction, and features a crochet stitch that leaves a vertical braid.
Get the inexpensive ad-free pattern for this pattern here. The paid pattern includes extra written and picture tutorials to help you with your crocheted sweater.
Want to create you own handmade wardrobe? I put together this list of free crocheted sweater patterns so you do not have to spend hours looking for your next project.
This post contains affiliate links. I get a small commission from any purchase made through these links at no expense to the buyer. This allows me to keep free awesome content coming your way. Check out my privacy policy for a full rundown of disclosures.
About this timeless and easy crochet sweater pattern
The Fiddle Sweater was inspired by the Fiddle Leaf plant and how timeless it looks. I have three Fiddle leaf figs in my home and a 12 ft one in my bedroom! I was inspired by how simple, bold, and elegant this gorgeous tree it and wanted to translate that feeling into a design.
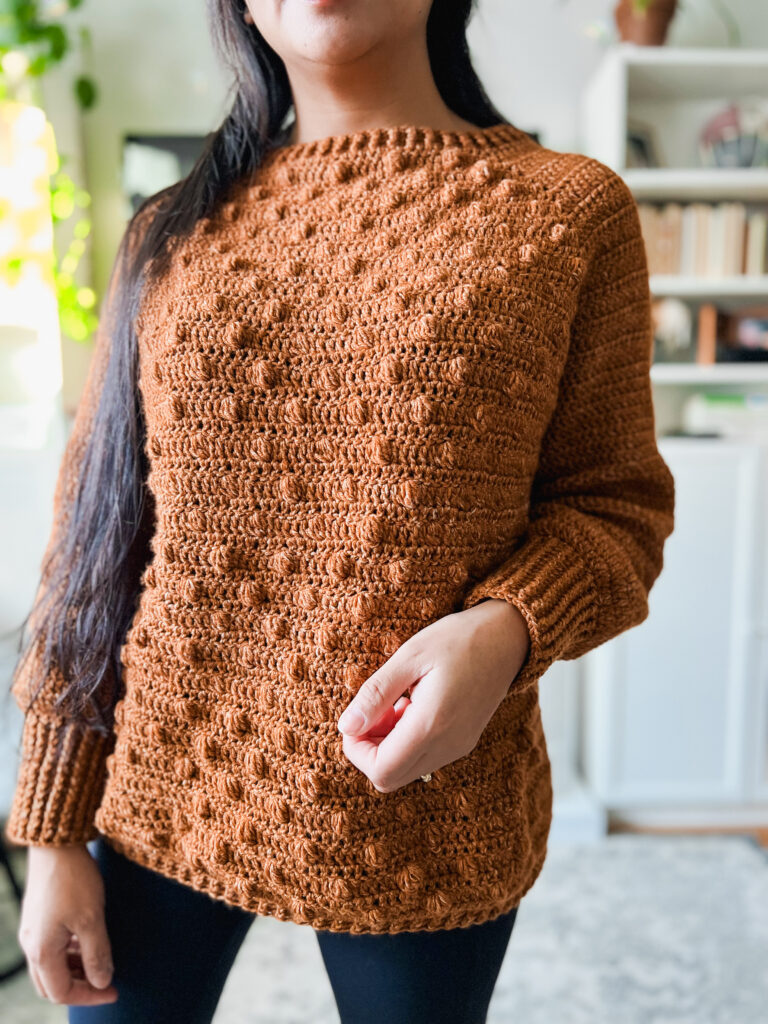
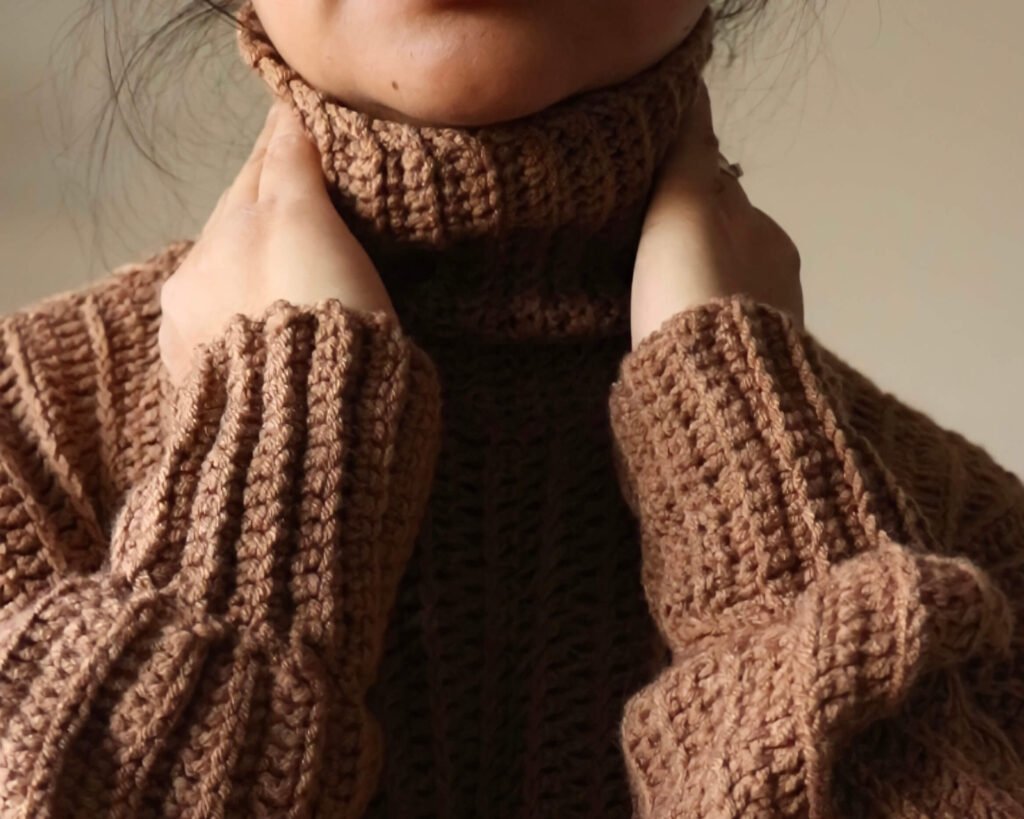
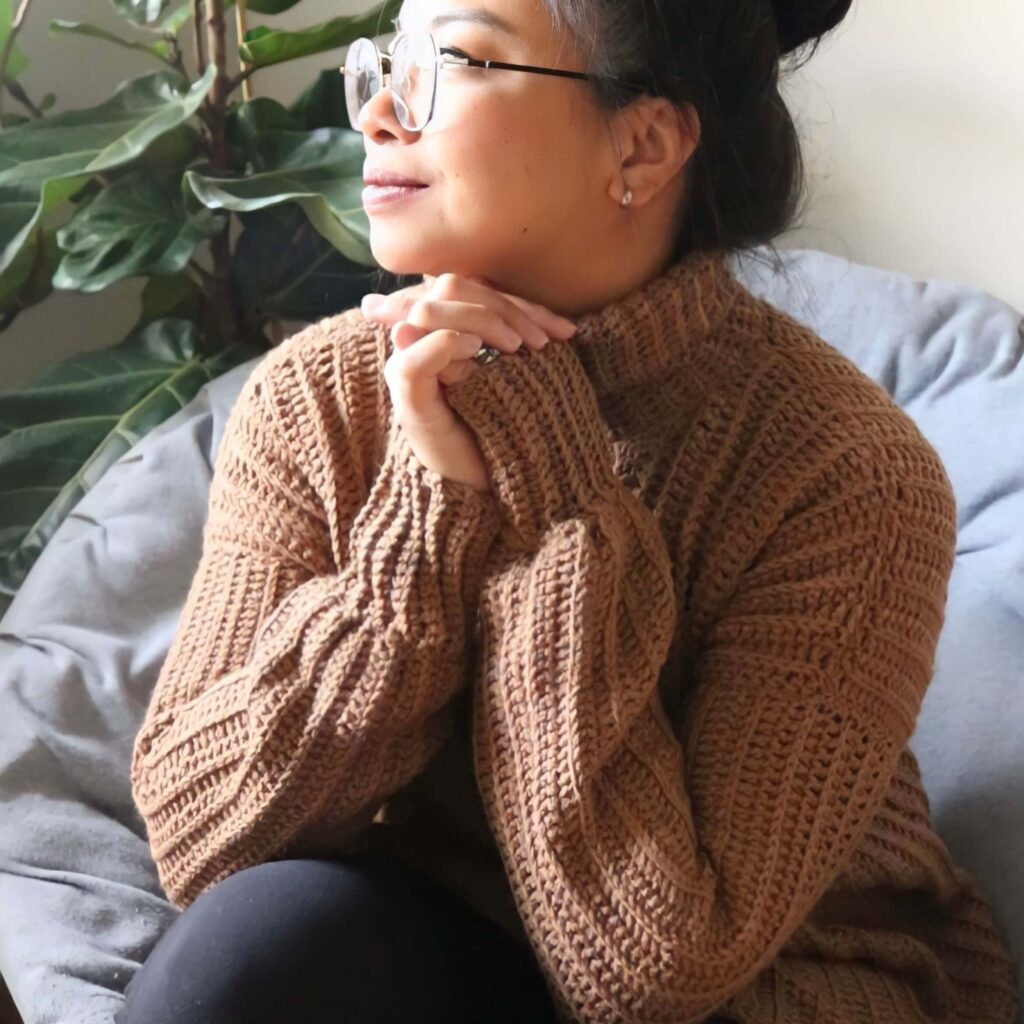
The crochet pullover is primarily made using basic crochet stitches like double and single crochet. In the pattern, you will see double crochet stitches in the third loop and beautiful stretchy ribbing stitches in single crochet through the back loop around the wrists and turtleneck. It is made using basic shapes making is easy to put together with minimal seaming.
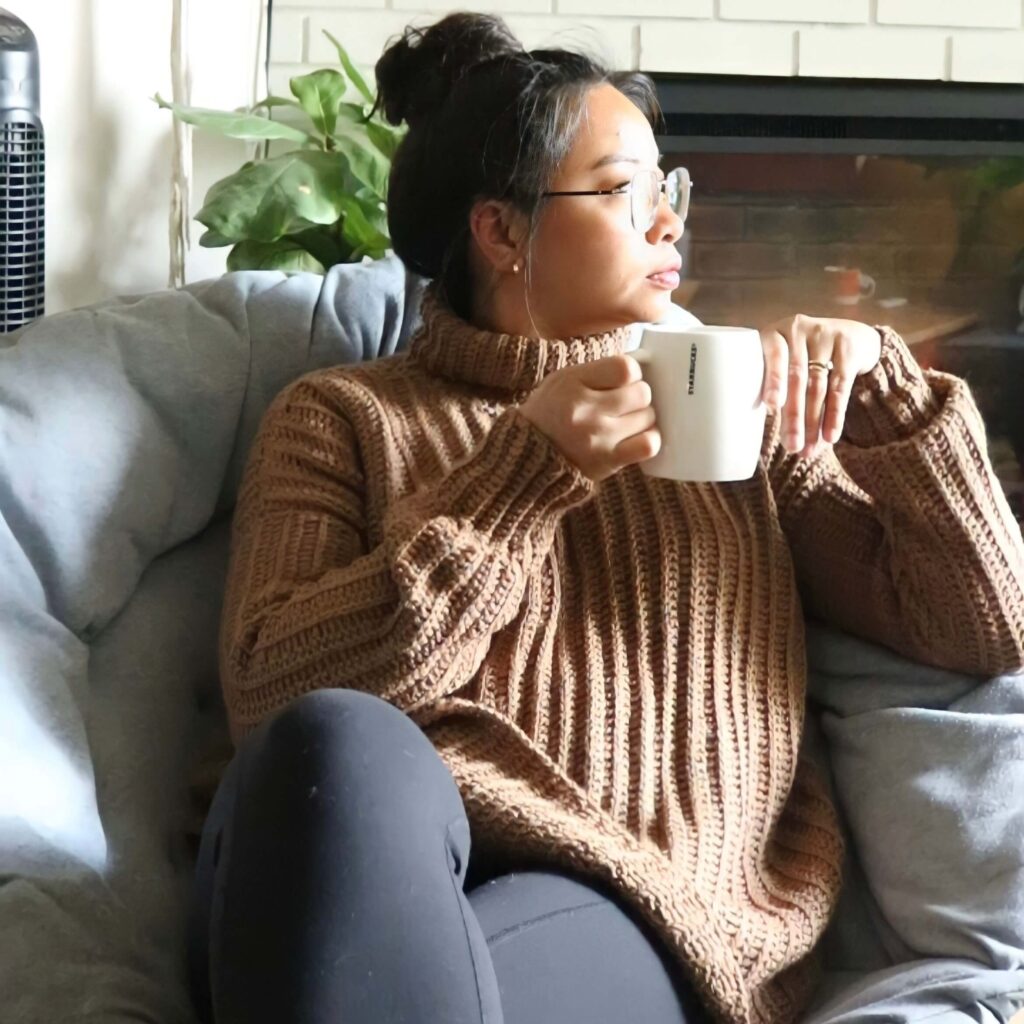
When I designed the sweater, my vision word was Comfy. I kept thinking of autumn colors, burning candles, coffee, and snuggling under a blanket to watch horror movies in a cozy sweater. YES! I said horror movies, I am such fan of thrillers and things that go bump in the night. All these things I wanted to convey and make into my own sweater to lounge in doing ALL the things.
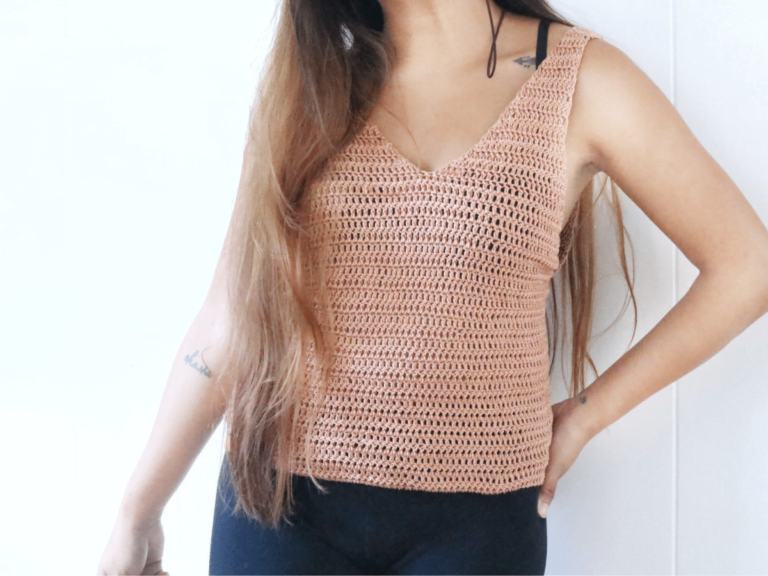
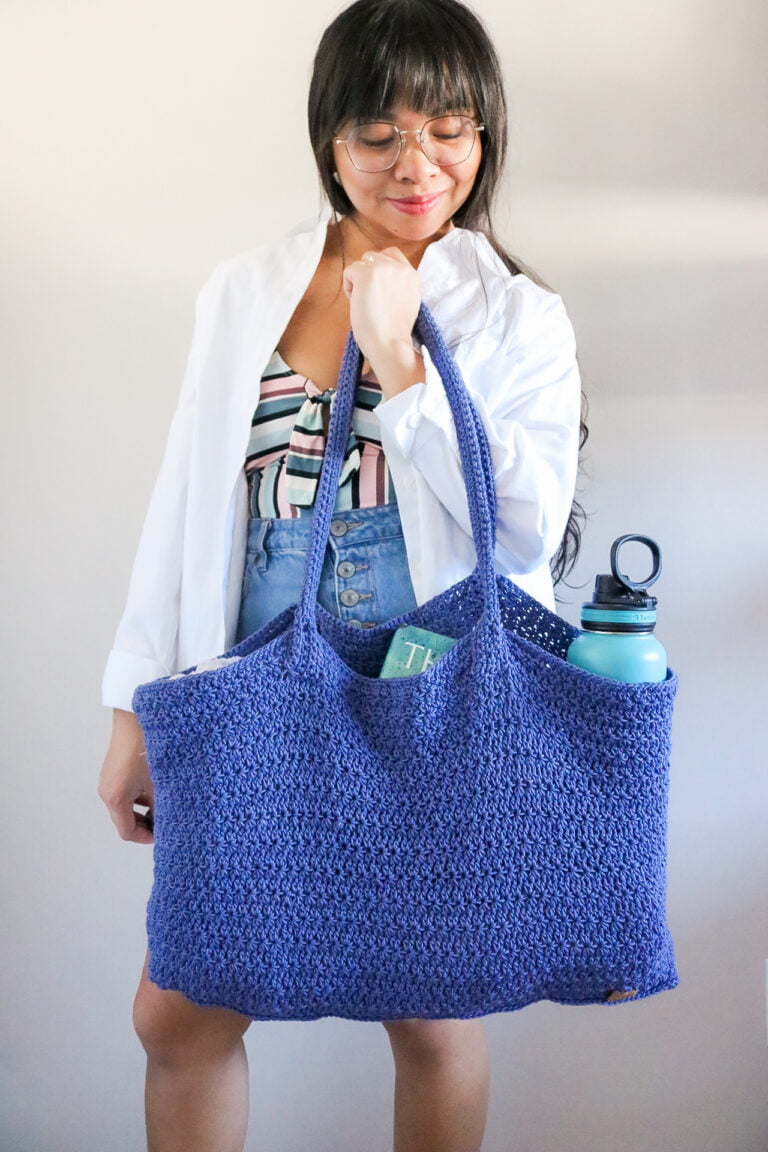
Related Post: Check out this Crochet Crossbody Sweater
First sweater? No worries! The construction for this top is fairly simple with minimal shaping required (only on the neck portion!). Told yah! This easy crochet sweater is absolutely great for beginner crocheters. The easy construction of this top makes it extremely easy to modify and adjust according to the different body sizes.
Want more Easy Crochet Sweater Patterns?
Check out thee patterns for your next crochet project(left to right): Ellie Pullover , Puffin Pullover, Wanderlust Sweater
See more crochet sweater patterns in this list I curated filled with trendy and FREE patterns:
Yarn
I want to thank Lion Brand Yarn for providing me with the yarn for this beautiful top! Nevertheless, everything I say about this yarn is my own opinion.
Do you have the right yarn for this project? Make sure to check out my post Best Yarn for Crochet Sweaters to help you choose the perfect yarn for this design.
The original crochet sweater is made using Color Theory which is an acrylic yarn in worsted weight designed in collaboration with Two of Wands. Worsted weight yarn is a great versatile weight that can be used during transition months like spring and fall. It is light enough to wear a coat over but also enough to wear on its own during warmer weather. Basically, worsted wight yarn lies between bulky yarn and light yarn.
This yarn was extremely easy to work with and provided me with a good yardage to make a decently oversized sweater with just a little over 6 balls. What I appreciate most about this line of yarn is how all the colors were carefully thought of and has such a timeless feel.
Want to make the sweater in a different weight yarn? You can always choose to use a more bulky weight yarn like chunky yarn for an even more comfy sweater, but take note, you will need to use a hook and redo a gauge that will work for the yarn you choose. This is the same to say if you prefer a lightweight yarn, you will need a smaller hook size, redo the gauge, and then adjust the math for the entire piece. Doable BUT a pain if you are not a wiz at math.
The Fiddle Sweater Pattern
This is a free written pattern the Fiddle Sweater – an easy crochet sweater for advanced beginners. This pattern is for personal use only.
Are you a visual learner? You can always get the ad-free crochet pattern pdf version with picture tutorials here.
Pattern notes:
- This pattern is made using US terminology.
- The pattern is written in rows. Turn after each row.
- The ch 2 or ch 1 at the beginning of the row is counted as a stitch in the final count. This is the first stitch, move on to the next st after each initial ch st.
- Crocheting into the third loop is used throughout the pattern.
- Crocheting in the back loop is used on the cuffs and cowl.
Materials:
- CYC 4 Yarn – check out my post Best Yarn for Crochet Sweaters to find the right yarn for you
- 4.0mm crochet Hook
- Scissors
- Needle
- Tape measure
Gauge – Do not forget to make your gauge!
Body – 4”x4” = 16sts x 9 rows of double crochet in the third loop
Cuffs and Neck – 4”x4” = 16sts x 16 rows of single crochet through back loop
Size Guide
This pattern has a more oversized fit to flatter all body types and just creates a really comfy feel for the colder months.
For best result, base your garment according to your bust size. These are approximate measurements and the end result will vary depending on your own tension so be sure to check your gauge.
| Garment Width | Pullover Length | |
| Extra Small | 20 | 20.4 |
| Small | 22 | 22.22 |
| Medium | 24 | 24 |
| Large | 26 | 25.8 |
| Extra Large | 26 | 27.5 |
Abbreviations (US Terms)
- Ch – Chain stitches
- Dc – double crochet
- Sc – single crochet
- Sctbl – single crochet through back loop
- St/s – stitch/es
Front Panel of the Easy Crochet Sweater
Ch 70 (78, 86, 94, 94) + 2
R1: dc into 4th ch from the hook (this makes the first two stitches of the row), dc into each ch down the row until the last three stitches. 2dc, 2dc, dc. (72, 80, 88, 96, 96 sts)
R2: ch 2, 2 dc into third loop, 2 dc into third loop, dc into third loop of each st down the row (74, 82, 90, 98, 98 sts)
R3: ch 2, dc into third loop of each st unti last 3 sts. 2dc into third loop, 2dc into third loop, dc. (76, 84, 92, 100, 100 sts)
R4: ch 2, 2 dc into third loop, 2 dc into third loop, dc into third loop of each st down the row (78, 86, 94, 102, 102 sts)
R5: ch 2, dc into third loop of each st unti last 3 sts. 2dc into third loop, 2dc into third loop, dc. (80, 88, 96, 104, 104 sts)
R6-14(16, 18, 20 22): ch 2, dc into third loop of each st until end of the row. (80, 88, 96, 104, 104 sts)
You are now going to start with the neckline
R15 (17, 19, 21, 23): Slip Stitch 4 stitches. Ch 2, dc2tog through third loops, dc2tog through third loops, dc2tog through third loops, dc into third loop of each st down the row. (73, 81, 89, 97, 97 sts)
R16 (18, 20, 22, 24): ch 2, dc into third loop of each st until last 5 sts. Dc2tog through third loops, dc2tog through third loops, dc. (71, 79, 87, 95, 95 sts)
R17 (19, 21, 23, 25): ch 2, dc2tog through third loops, dc2tog through third loops, dc into third loop of each st until end of the row. (69, 77, 85, 93, 93 sts)
R18 (20 22, 24, 26): ch 2, dc into third loop of each st until last 5 sts. Dc2tog through third loops, dc2tog through third loops, dc. (67, 75, 83, 91, 91 sts)
R19 (21, 23, 25, 27): ch 2, dc2tog through third loops, dc into third loop of each st until end of the row (66, 74, 82, 90, 90 sts)
R20 (22, 24, 26, 28)- 27 (29, 31, 33, 35): ch 2, dc into third loop of each st until end of the row. (66, 74, 82, 90, 90 sts)
R28 (30, 32, 34, 36): ch 2, dc into third loop of each st until last 2 sts. 2dc into third loop, dc. (67, 75, 83, 91, 91 sts)
R29 (31, 33, 35, 37): ch 2, 2dc into third loop, 2dc into third loop, dc into third loop of each st until end of the row. (69, 77, 85, 93, 93 sts)
R30 (32, 34, 36, 38): ch 2, dc into third loop of each st until last three sts. 2dc into third loop, 2dc into third loop, dc. . (71, 79, 87, 95, 95 sts)
R31 (33, 35, 37, 39): ch 2, 2dc into third loop, 2dc into third loop, dc into third loop of each st until end of the row . (73, 81, 89, 97, 97 sts)
R32, (34, 36, 38, 40): ch 2, dc into third loop of each st until last 4 sts. 2dc into third loop, 2dc into third loop, 2dc into third loop, dc. (76, 84, 92, 100, 100 sts)
You are now working on the opposite shoulder
R33 (35, 37, 39, 41): ch 6, dc into 4th ch from the hook, dc, dc. (you just added four stitches and now continuing down the row as usual). Dc into third loop of each st down the row. (80, 88, 96, 104, 104 sts)
R34 (36, 38, 40, 42) – 41 (45, 49, 53, 57): ch 2, dc into third loop of each st until end of the row. (80, 88, 96, 104, 104 sts)
R42 (46, 50, 54, 58): ch 2, dc2tog through third loops, dc2tog through third loops, dc into third loop of each st until end of the row (78, 86, 94, 102, 102 sts)
R43 (47, 51, 55, 59): ch 2, dc into third loop of each st until last 5 sts. Dc2tog through third loops, dc2tog through third loops, dc. (76, 84, 92, 100, 100 sts)
R44 (48, 52, 56, 60): ch 2, dc2tog through third loops, dc2tog through third loops, dc into third loop of each st until end of the row (74, 82, 90, 98, 98 sts)
R45 (49, 53, 57, 61): ch 2, dc into third loop of each st until last 5 sts. Dc2tog through third loops, dc2tog through third loops, dc. (72, 80, 88, 96, 96 sts)
R46 (50, 54, 58, 62): ch 2, dc2tog through third loops, dc2tog through third loops, dc into third loop of each st until end of the row (70, 78, 86, 94, 94 sts)
Back Panel of the Easy Crochet Sweater
Ch 70 (78, 86, 94, 94) + 2
R1: dc into 4th ch from the hook (this makes the first two stitches of the row), dc into each ch down the row until the last three stitches. 2dc, 2dc, dc. (72, 80, 88, 96, 96 sts)
R2: ch 2, 2 dc into third loop, 2 dc into third loop, dc into third loop of each st down the row (74, 82, 90, 98, 98 sts)
R3: ch 2, dc into third loop of each st unti last 3 sts. 2dc into third loop, 2dc into third loop, dc. (76, 84, 92, 100, 100 sts)
R4: ch 2, 2 dc into third loop, 2 dc into third loop, dc into third loop of each st down the row (78, 86, 94, 102, 102 sts)
R5: ch 2, dc into third loop of each st unti last 3 sts. 2dc into third loop, 2dc into third loop, dc. (80, 88, 96, 104, 104 sts)
R6-14(16, 18, 20 22): ch 2, dc into third loop of each st until end of the row. (80, 88, 96, 104, 104 sts)
You are now going to start with the neckline
R15 (17, 19, 21, 23): Ch 2, dc2tog through third loops, dc2tog through third loops, dc2tog through third loops, dc into third loop of each st down the row. (77, 85, 93, 101, 101 sts)
R16 (18, 20, 22, 24): ch 2, dc into third loop of each st until last 5 sts. Dc2tog through third loops, dc2tog through third loops, dc. (75, 83, 91, 99, 99 sts)
R17 (19, 21, 23, 25): ch 2, dc2tog through third loops, dc2tog through third loops, dc into third loop of each st until end of the row. (73, 81, 89, 97, 97 sts)
R18 (20, 22, 24, 26): ch 2, dc into third loop of each st until last 5 sts. Dc2tog through third loops, dc2tog through third loops, dc. (71, 79, 87, 95, 95 sts)
R19 (21, 23, 25, 27): ch 2, dc2tog through third loops, dc into third loop of each st until end of the row (70, 78, 86, 94, 94 sts)
R20 (22, 24, 26, 28)- 27 (29, 31, 33, 35): ch 2, dc into third loop of each st until end of the row (70, 78, 86, 94, 94 sts)
R28 (30, 32, 34, 36): ch 2, dc into third loop of each st until last 2 sts. 2dc into third loop, dc. (71, 79, 87, 95, 95 sts)
R29 (31, 33, 35, 37): ch 2, 2dc into third loop, 2dc into third loop, dc into third loop of each st until end of the row (73, 81, 89, 97, 97 sts)
R30 (32, 34, 36, 38): ch 2, dc into third loop of each st until last three sts. 2dc into third loop, 2dc into third loop, dc. (75, 83, 91, 99, 99 sts)
R31 (33, 35, 37, 39): ch 2, 2dc into third loop, 2dc into third loop, dc into third loop of each st until end of the row. (77, 85, 93, 101, 101 sts)
R32 (34, 36, 38, 40): ch 2, dc into third loop of each st until last 4 sts. 2dc into third loop, 2dc into third loop, 2dc into third loop, dc. (80, 88, 96, 104, 104 sts)
You are now working on the opposite shoulder
R33 (35, 37, 39, 41) – 41 (45, 49, 53, 57): ch 2, dc into third loop of each st until end of the row. (80, 88, 96, 104, 104 sts)
R42 (46, 50, 54, 58): ch 2, dc2tog through third loops, dc2tog through third loops, dc into third loop of each st until end of the row (78, 86, 94, 102, 102 sts)
R43 (47, 51, 55, 59): ch 2, dc into third loop of each st until last 5 sts. Dc2tog through third loops, dc2tog through third loops, dc. (76, 84, 92, 100, 100 sts)
R44 (48, 52, 56, 60): ch 2, dc2tog through third loops, dc2tog through third loops, dc into third loop of each st until end of the row (74, 82, 90, 98, 98 sts)
R45 (49, 53, 57, 61): ch 2, dc into third loop of each st until last 5 sts. Dc2tog through third loops, dc2tog through third loops, dc. (72, 80, 88, 96, 96 sts)
R46 (50, 54, 58, 62): ch 2, dc2tog through third loops, dc2tog through third loops, dc into third loop of each st until end of the row (70, 78, 86, 94, 94 sts)
Sleeve Panel (make 2)
Arm block
Ch 64 (64, 64, 64, 60+ 2)
R1: dc into 4th ch from the hook, dc into each ch down the row end of the row (64 sts)
R2-25 (25, 27, 32, 36): ch 2, dc into third loop of each st until end of the row. (64 sts)
Note: the sleeves are designed to fit snug around the upper arm and balloon around the cuff. If you need a wider block to fit around your upper arm, add more rows
Wrist cuff
Ch 16 + 1
R1: sc into 2nd ch from the hook, sctbl in each st until end of the row (16 sts)
R2-24: ch 1, sctbl in each st until end of the row (16 sts)
Note, wrists vary in sizes. This cuff should fit comfortably around your wrist when you wrap it around. If you need it longer, add more rows.
To assemble the sleeve, stretch the wrist cuff to evenly seam onto the bottom edge of the arm block. You can use stitch markers to help you stretch and space the pieces together.
Assembling your Easy Crochet Sweater
- Align and seam the shoulders together. These are the flat area on either side of the neckline
- Locate the middle of the top of the sleeve and align adjacent to where you seamed the shoulders. Seam the top of the sleeve accordingly. Repeat on opposite side.
- Fold the garment so that the front panel lays on the back panel (wrong sides out) and the sleeves fold over themselves. Seam from the wrist cuff to the armpit then down to the bottom of the garment, stopping where the curve begins.
- Seam the turtle neck cowl around the neckline opening, seam the sides closed once you get around.
Crochet Turtleneck Cowl
Ch 24 + 2
Note, this is for a 6.5” height for the cowl. You can adjust how high you want the neckline to your preference by adjusting the number of foundation chains.
R1: dc into 4th ch from the hook, dc into each ch down the row end of the row (24 sts)
R2-64: ch 2, sctbl of each st until end of the row. (24 sts)
Note, you can add more rows to comfortable fit the opening of the neckline. This measurement is for approximately 16 inches to go around the front and back panel neckline edges.
Seam the turtle neck cowl around the neckline opening, seam the sides closed once you get around.
Now it is time to enjoy your new sweater!
Looking for more patterns? Make sure to check out all of my beginner friendly patterns here where you can find garments, amigurumi, and accessories.
Want to see crochet sweater patterns for fall?
That’s all for now my maker friend! Remember, never miss a stitch by subscribing to my newsletter. See you next time!
xoxo
Abigail