The Simplest Crochet Stitch that looks like Knitting + Free Pattern
Hello again my friends! Today, I am going to show you the simplest crochet stitch that looks like it’s knitting! In this blog post, we’ll explore my favorite crochet knit-look stitch. Even better, I’ll walk you through a free pattern you can create using the crochet stitch.
This post may contain affiliate links. I get a small commission from any purchase made through these links at no expense to the buyer. This allows me to keep free awesome content coming your way. Check out my privacy policy for a full rundown of disclosures.
I always find it fascinating how basic stitches used in different ways can turn out to become really beautiful patterns. Crocheters who loves the look of knitting will discover the wonders crochet stitches that looks like knitting.
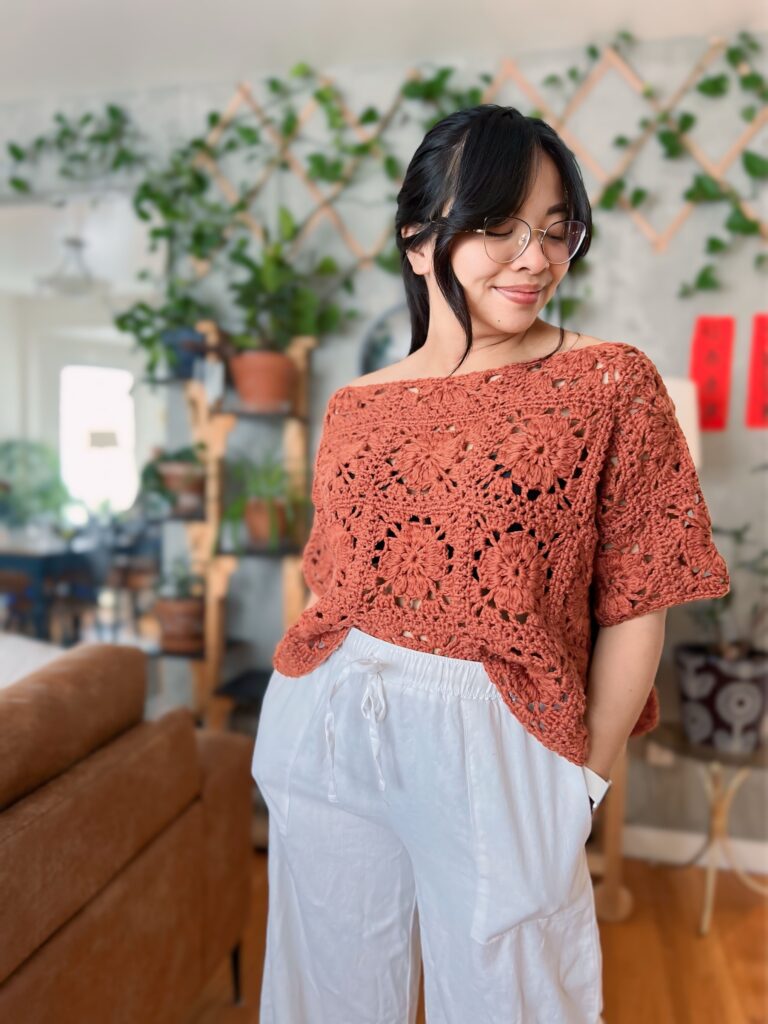
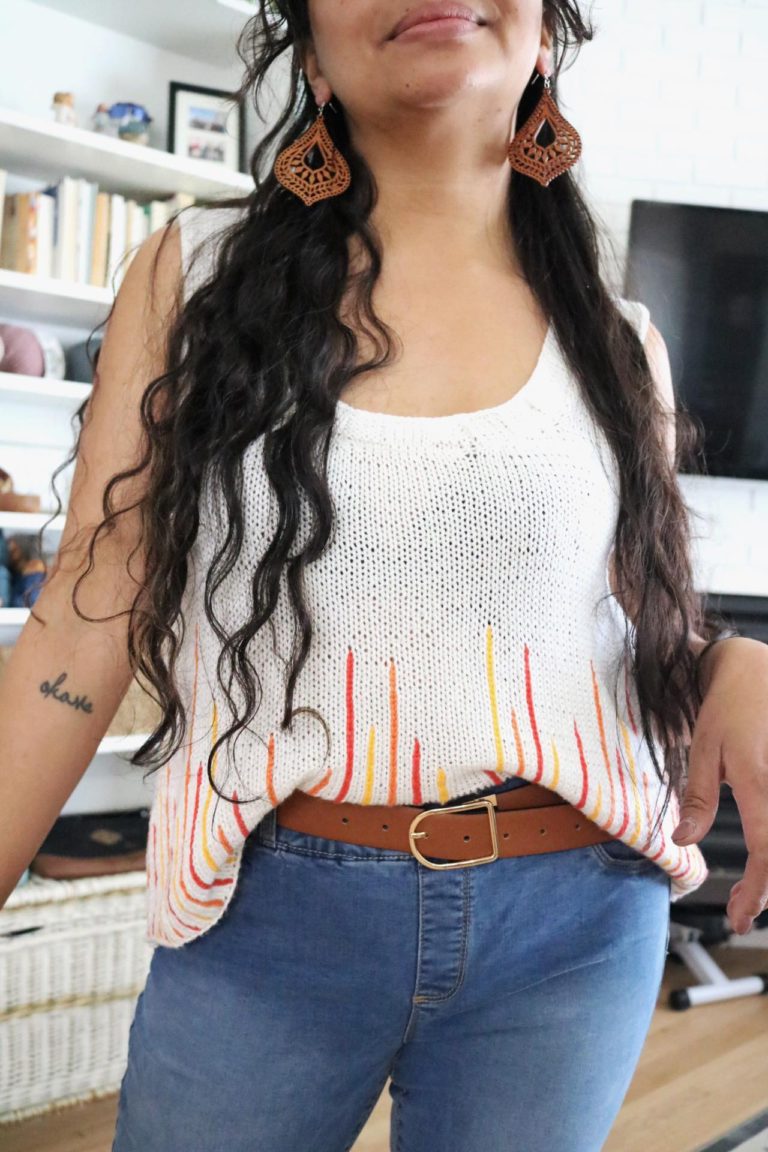
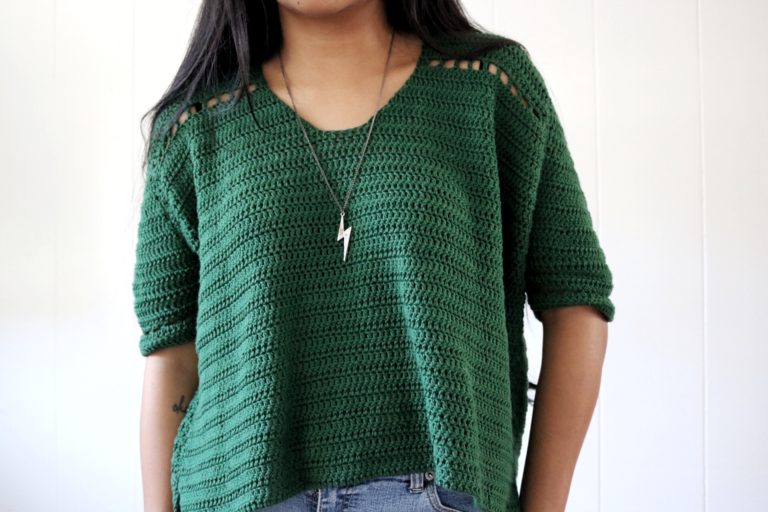
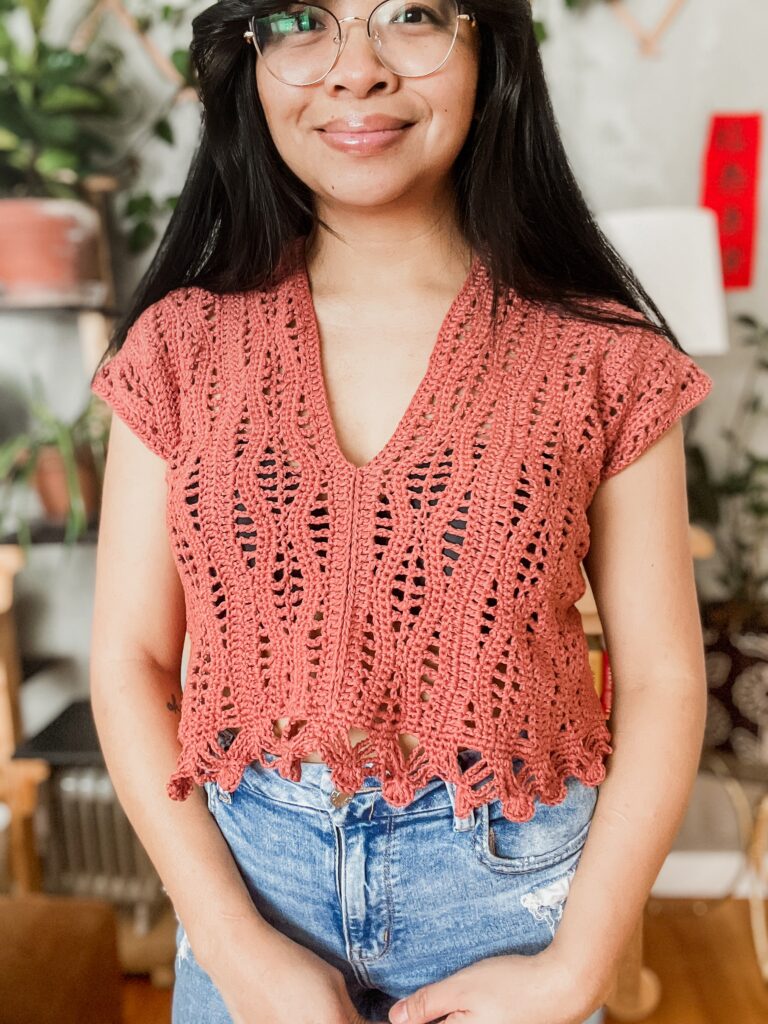
See more crochet top patterns in this list I curated filled with trendy:
Not sure about you, but I am a better crocheter than I am a knitter! Crocheting is easier for me and just makes more sense. On the other hand, I really REALLY love the look of knitting. So you coulf just imagine my excitement when I started to play around with crochet stitches that looked like knitting.
Crochet Stitches that look like knitting
There are a few crochet stitches that allows you to achieve the appearance and texture of knitted fabric while utilizing your crochet skills. These stitches allow crocheters to achieve the look and texture of knitted fabric while utilizing their crochet skills.
Waistcoat crochet stitch
Also known as the center single crochet or knit stitch in crochet, is a technique that produces a fabric with a texture resembling knit fabric. To achieve the waistcoat stitch, insert the crochet hook into the center of the previous row’s stitch instead of under the top loops, as done in a traditional single crochet stitch.
Tunisian knit stitch
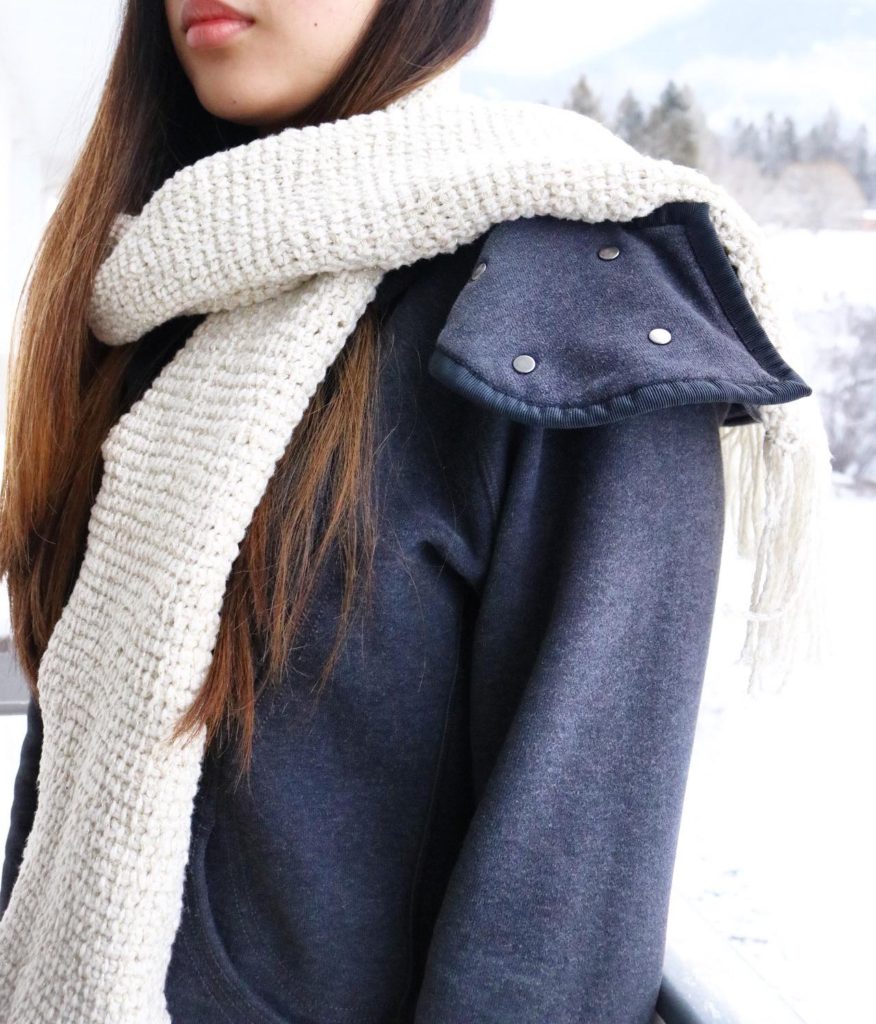
Tunisian crochet is a method of crochet that carries multiple loops along a long crochet hook or cable, similar to knitting. A tunisian simple stitch creates a unique look like stockinette stitch in knitting. See the scarf below made using tunisian crochet. Tunisian crochet simple stitch is a foundational stitch that produces a dense and textured fabric with a vertical grain. This style of crocheting uses a longer hook and creates a distinctive woven-like texture. The Tunisian simple stitch is an essential skill for Tunisian crochet enthusiasts and opens up a world of possibilities for creating unique and beautiful projects. Make the Lussier Scarf below with my free pattern.
Camel Stitch
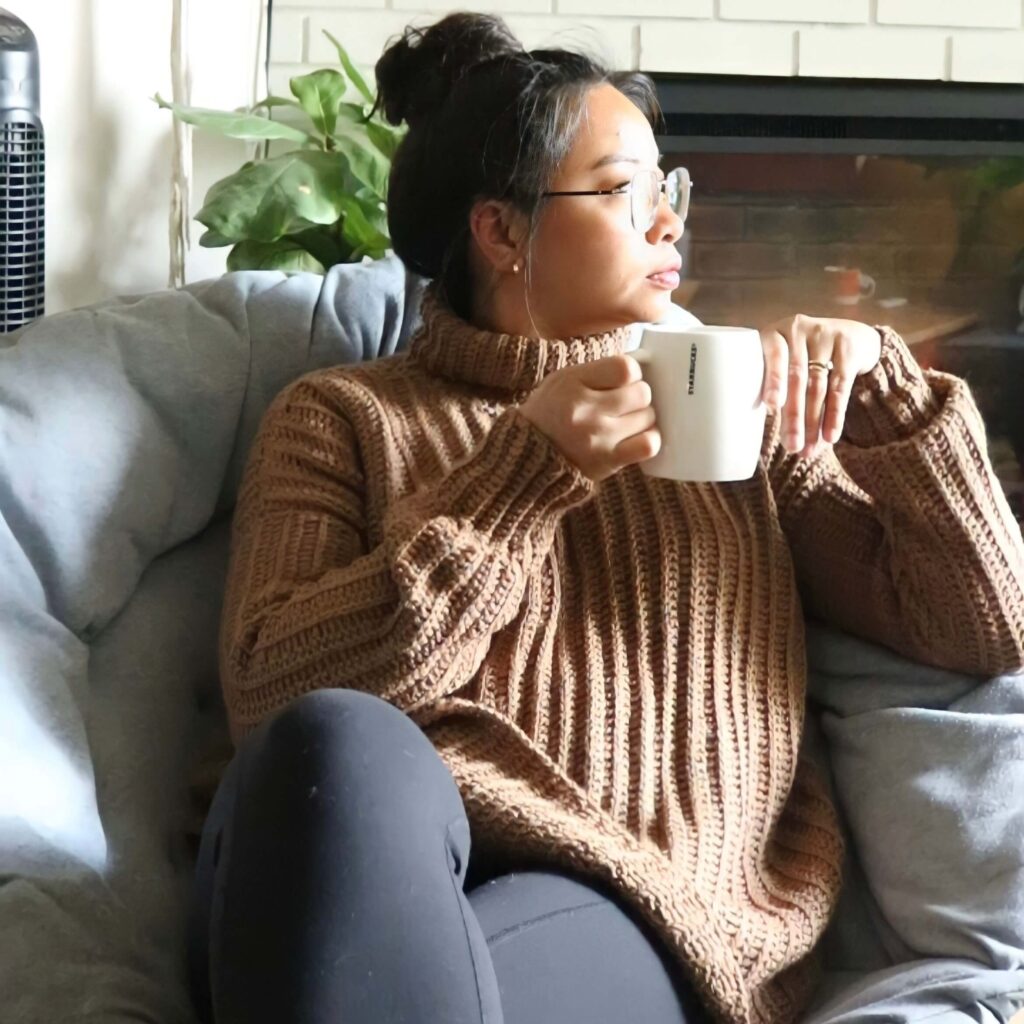
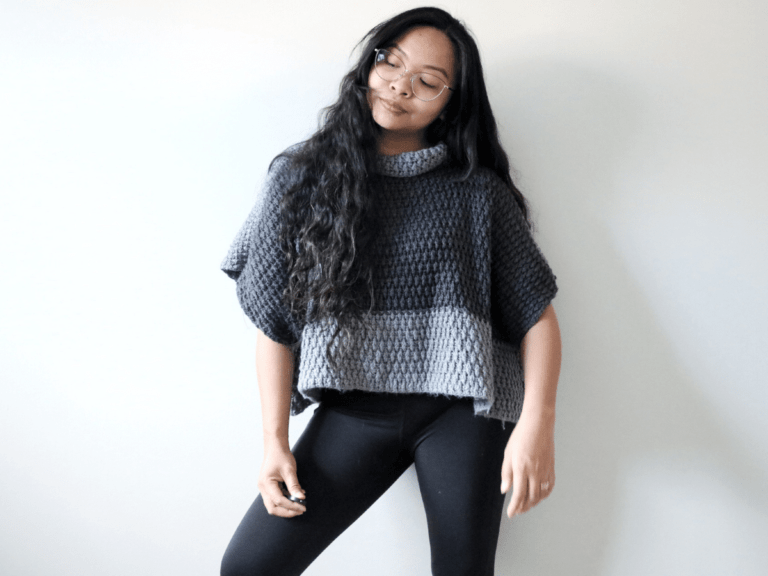
This is a crochet technique that creates a raised, textured fabric with a unique look – almost like a knitted line between rows. It gets its name from the hump-like appearance it creates on the surface of the fabric, resembling the back of a camel. You can use a single crochet, half double crochet (most common), or a double crochet stitch for the camel stitch. The variation lies in the placement of the hook wherein instead of crocheting through the top of stitches, you crochet through the 3rd loop of each stitch. I made this sweater using a variation of the camel stitch to create nice braided vertical lines. See the free tutorial for the Fiddle Sweater below.
Linen Stitch
Woven stitch or the granite stitch, is a crochet technique that creates a fabric with a woven-like appearance. It resembles a pattern of interlocking horizontal rows, similar to the weave of linen fabric. Work the stitch by alternating single crochets and chain stitches to create a dense and textured fabric.
Slip Stitch through back loops
This is my FAVORITE and, in my opinion is, the crochet stitch that resembles knitting the most.
Let’s talk a little about the stitch I am using today.
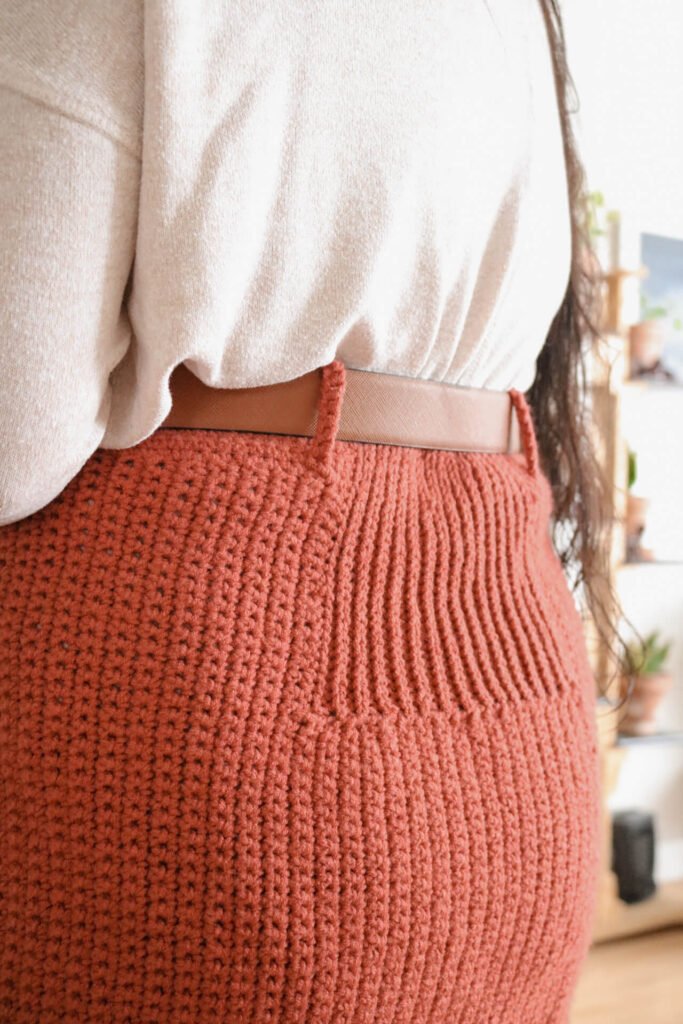
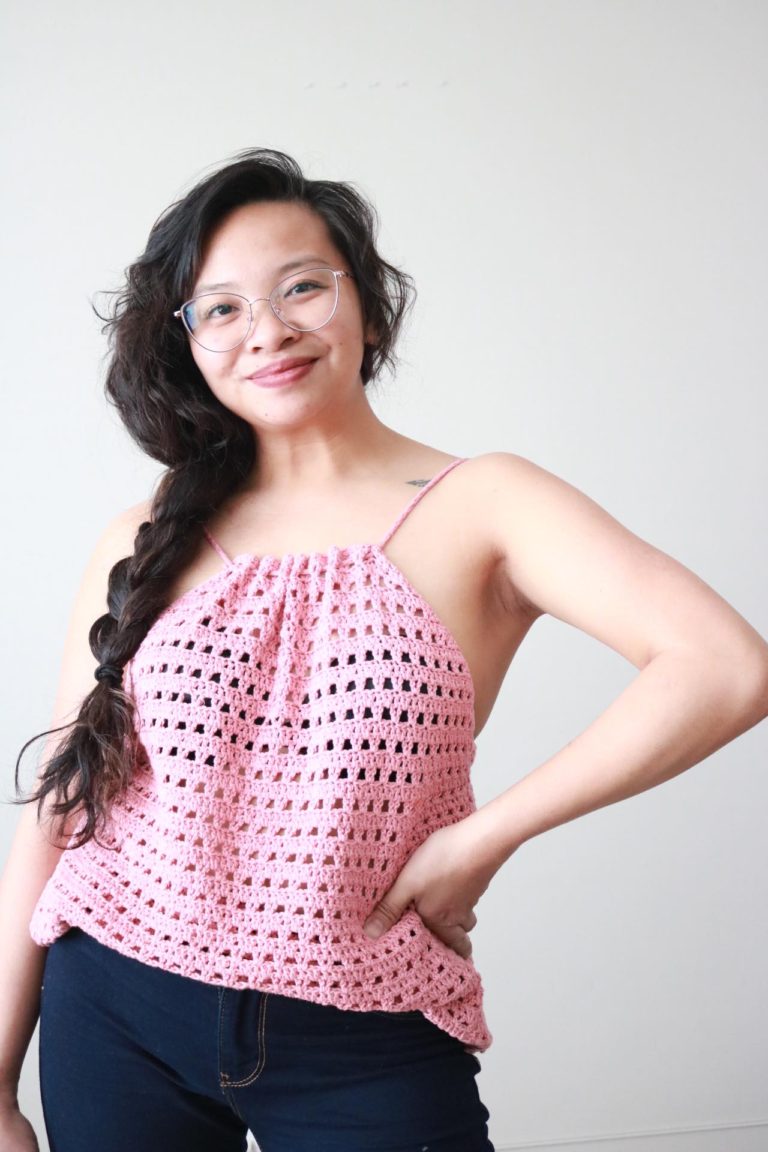
This tutorial today is going to specifically focus on slip stitches through the back loop. Slip Stitch through the back loop is one of the best essential crochet stitches to master. Not only does it make a nice knit effect, but it is also used in patterns as ribbing. I used this stitch in the crocheted skirt below. It is the perfect garter stitch for getting that cinched rib effect! See my free pattern to make this Norquay Skirt.
How to find the back loop in crochet
Before we get into the pattern we need to know how to find the back loops!
To find the back loop of a crochet stitch you want to loop at the upper most row. Take a close look at the top of the stitch and you will notice a braid. with the braid facing you, the leg on the left is considered the back loop and right leg is the front stitch.
Tips to Crocheting Slip Stitches
Before we get started with the tutorial, let’s go over some important pointers to keep in mind when crocheting slip stitches.
- When making this stitch the beginning and end of each row can get a bit confusing. It is wise to use a stitch marker and to count the total row stitches often. Make sure to count the number of stitches you have in each row periodically.
- Slip stitches will result in a thick fabric. This is because the stitches are dense and squishes up against one another. Crochet stitches that resemble knitting are known for their tightness and density. This can be advantageous when working on projects that require warmth, durability, or a tight fabric structure. For items like hats, scarves, or blankets, using a crochet stitch that emulates knitting can provide excellent insulation and ensure that the finished piece withstands daily use and maintains its shape over time.
- Slip stitches naturally want to be tight so you need to make sure to keep it loose. You really need to make sure to do a gauge before starting a project in this stitch just to loosen up those hands, play with tension, and top off those crochet skills. You might want to play around with hook sizes to make it easier.
- Changing your tension anywhere in the project is very very noticeable! This was quite annoying for me to see some stitches kind of sticking out. I’m pretty sure if this happens a good wet blocking to redistribute the stitches will fix the problem.
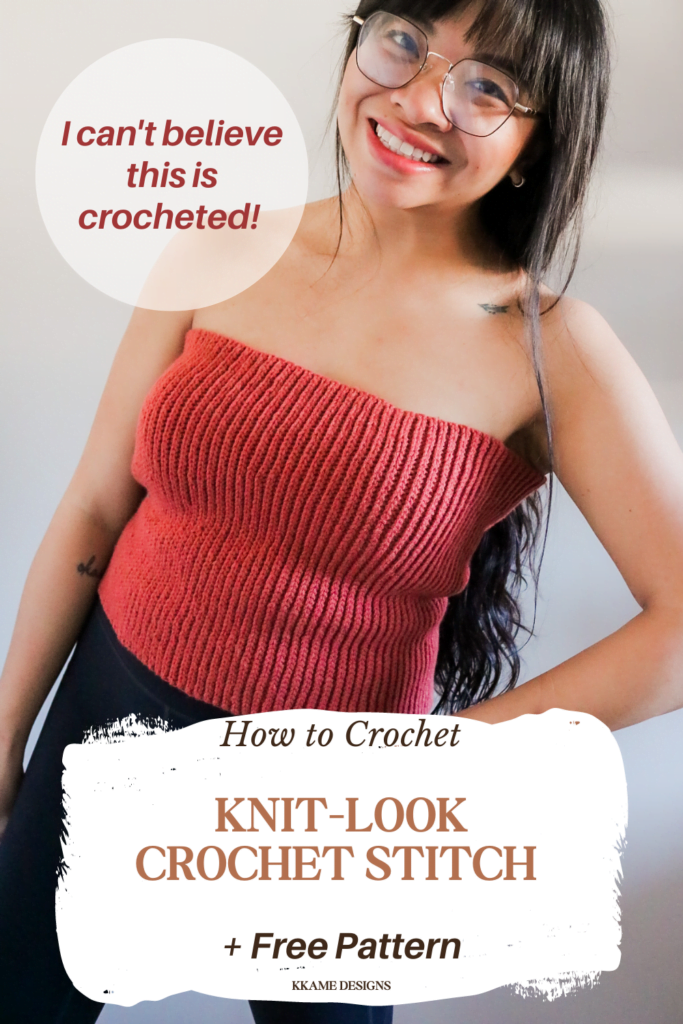
I made this top using only slip stitches through the back loops! Here is a free beginner pattern you can work on to practice this stitch!
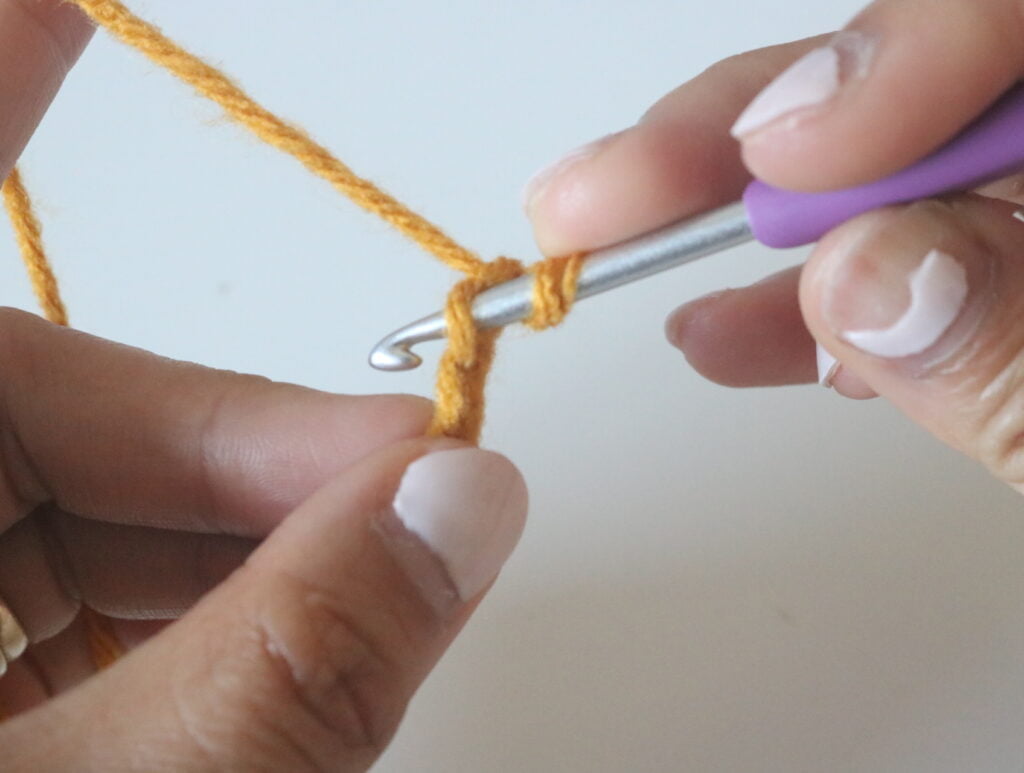
How to do the Crochet Knit-stitch (slst through back loops)
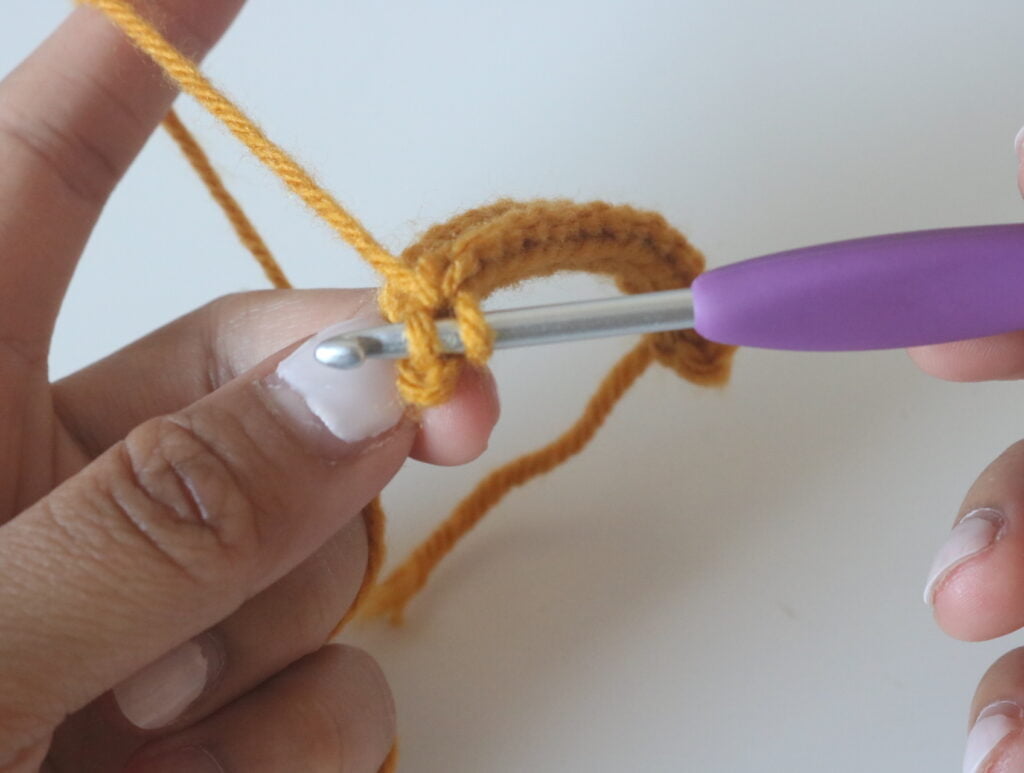
Okay! Now we are ready to learn this crochet stitch that looks like knitting. For the sake of this picture tutorial I a going to use a smaller swatch. ALSO, I am aware that I needed to get my nails done here, don’t come at me! Haha
Foundation row: crochet your foundation chain +1. Note, I crocheted a foundation chain of 16 because I want this tutorial to have a total of 15 sts per row.
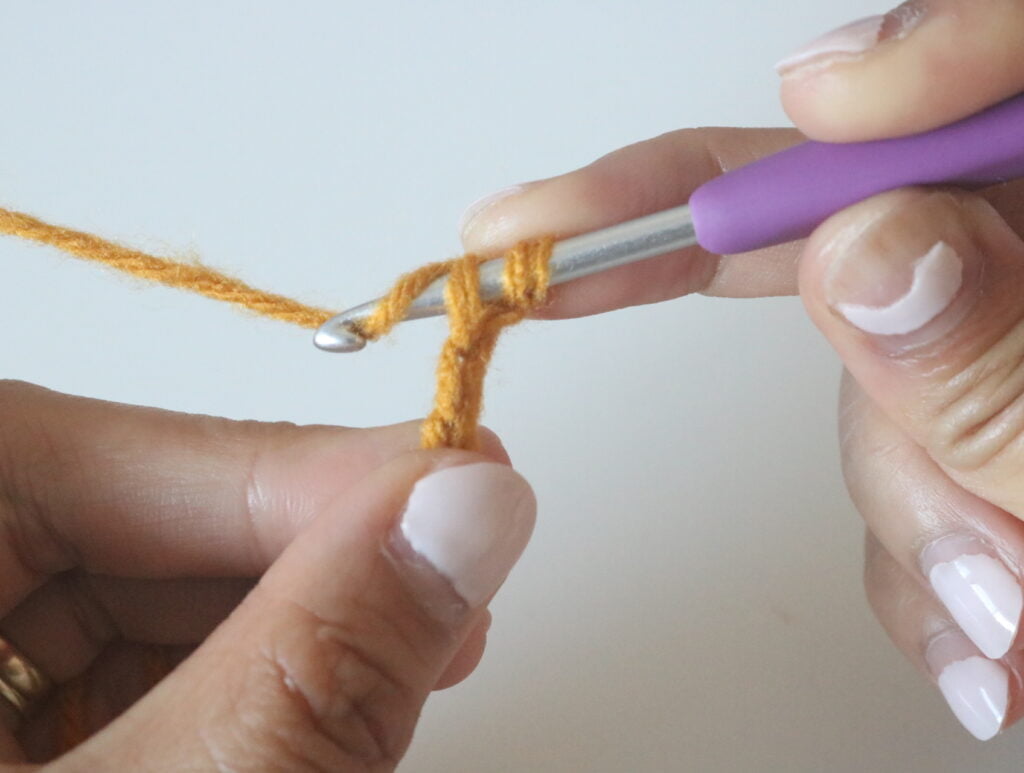
Row 1: insert your crochet hook into the second chain from the hook and perform a slip stitch, slip stitch in each chain down the entire row. The last stitch can be a little tricky to find so I strongle suggest counting your stitches for atleast a couple rows until you get used to this stitch.
When I get to the 14th stitch I take a look at what is left, locate the back loop of the last stitch, insert hook and pull through the yarn as usual.
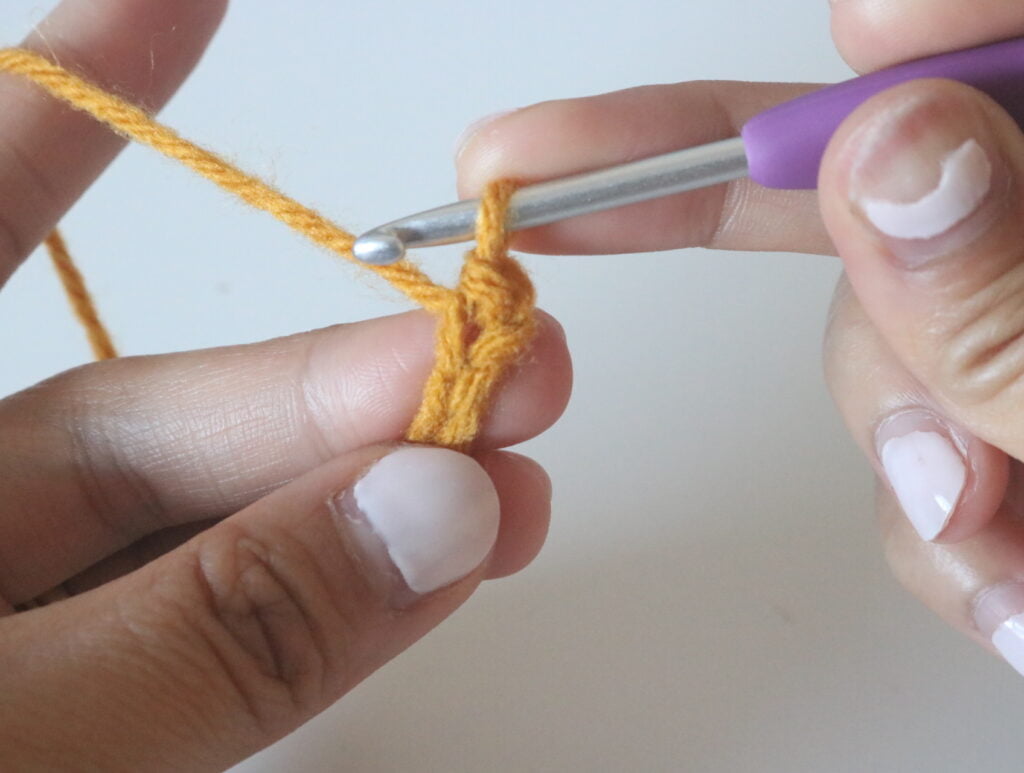

Row 2: make a turning chain by ch 1 and turn your work
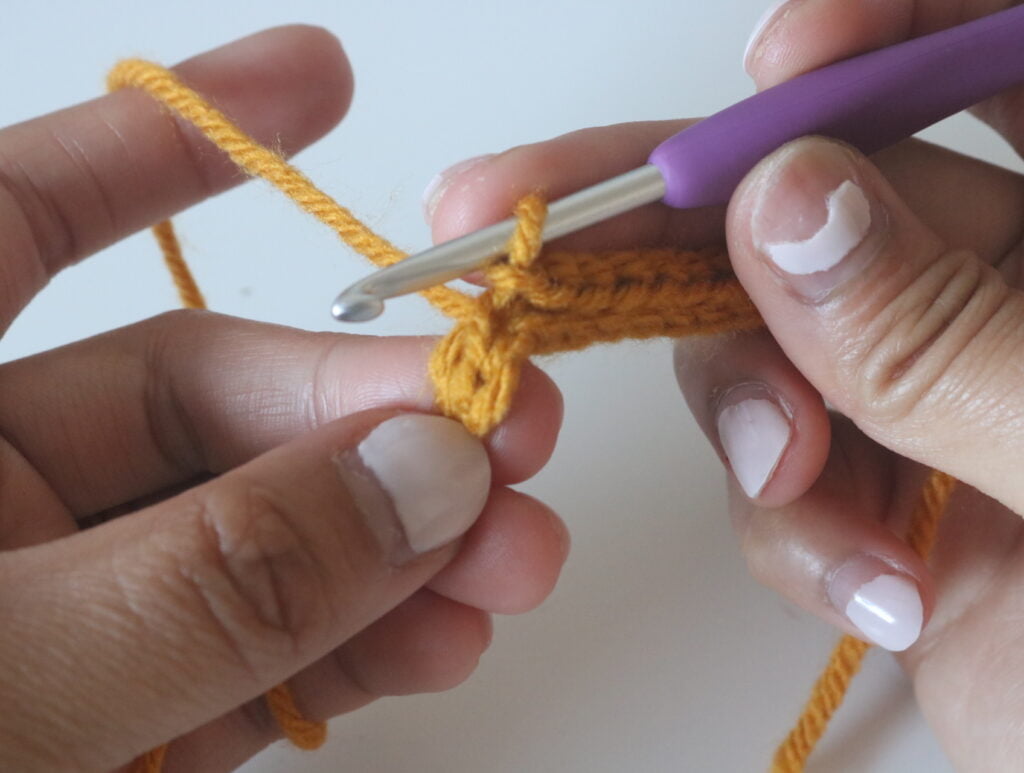
Row 3: Slip stitch through the back loop of the last st in previous row. Slip st in each st down the row.
Row 4+: repeat row for the front of the work.
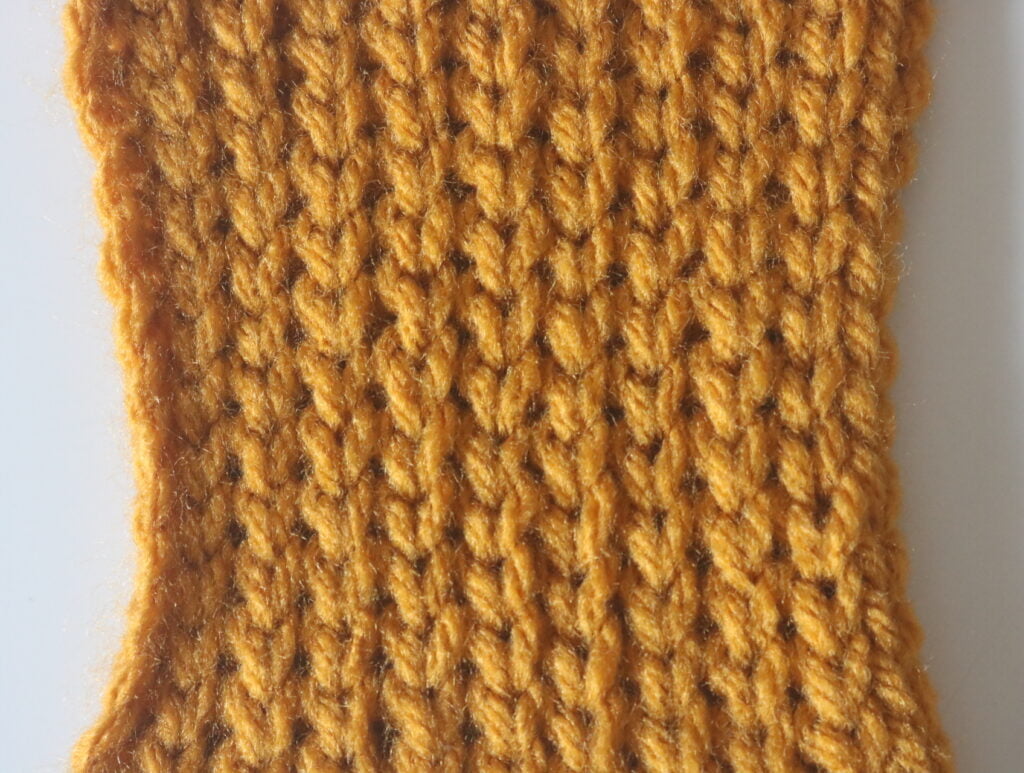
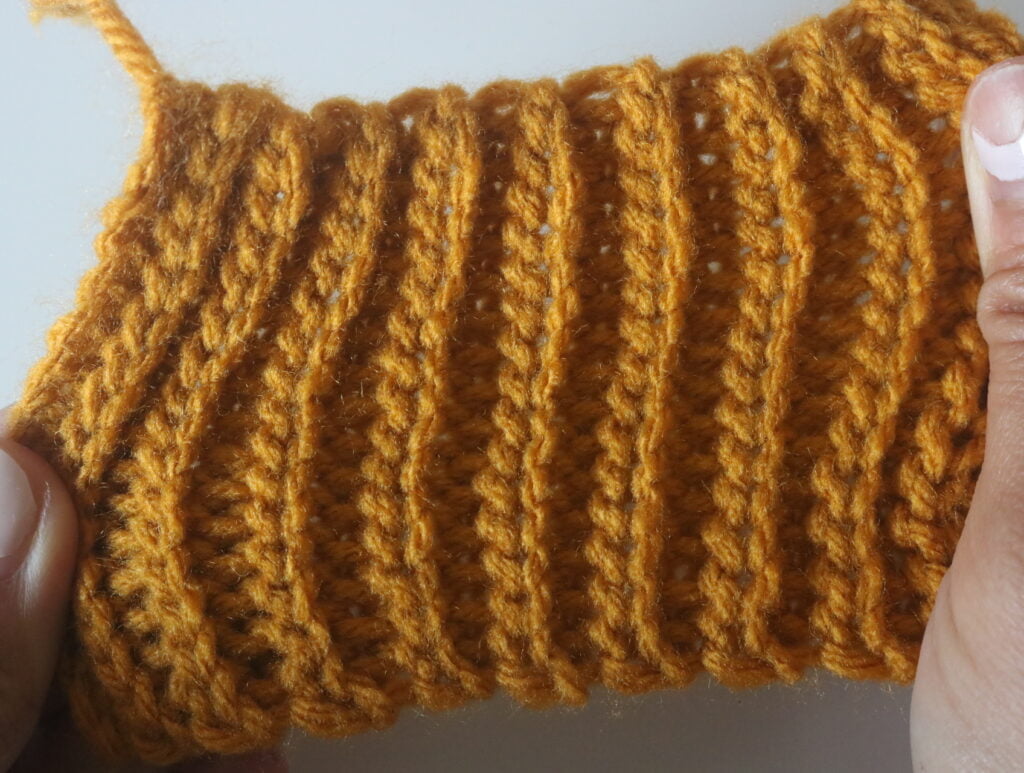
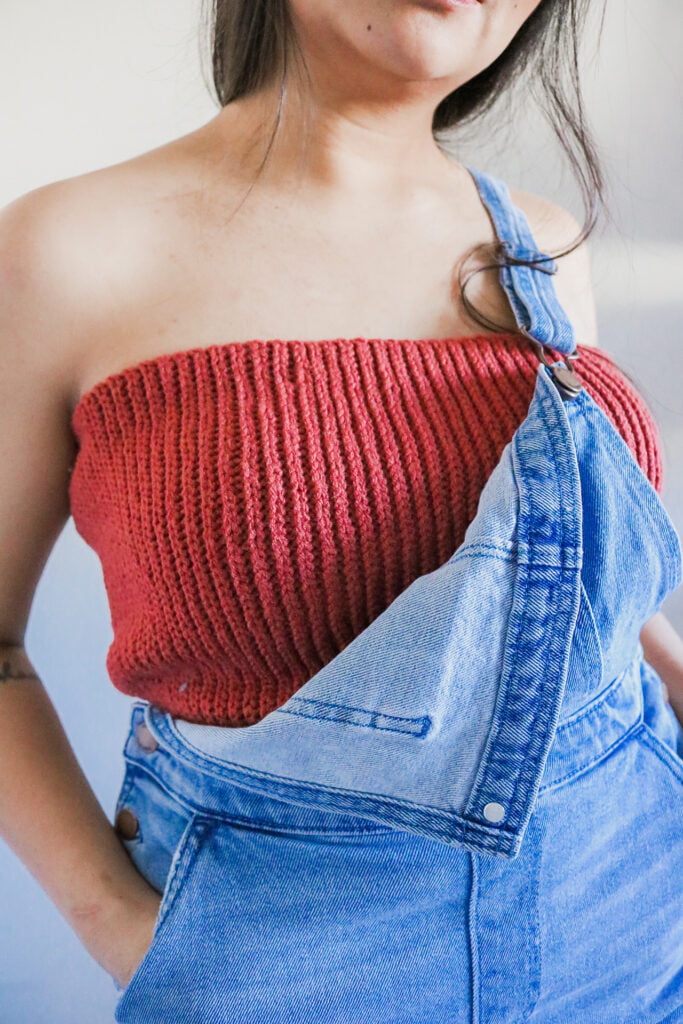
And that’s literally all there is to it! Check out this tube top I made using this stitch, it really replicated the look of knitting.
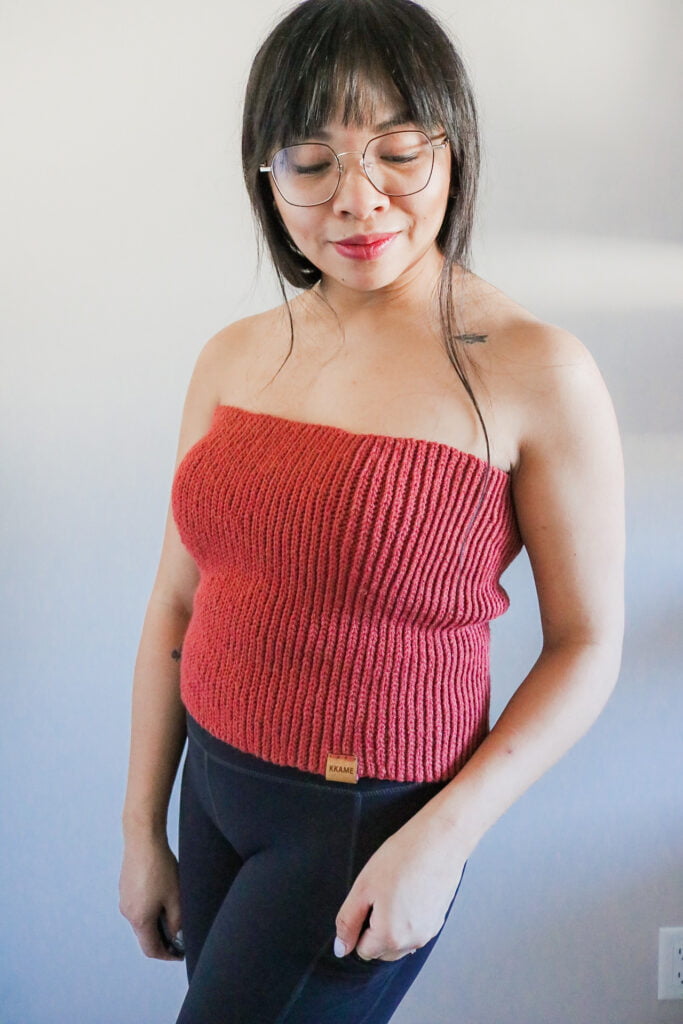
Crocheted Tube Top That Looks Knitted
I chose to use Lion Brand Yarn’s Color Theory to make this top. The crochet stitch that looks like knitting worked up beautifully in this yarn!
To make this top I started by making a 4 inch gauge. This is extremely important to do to get the correct fit. I know I know! Making gauge swatches can get boring. Learn about gauges here and you will understand why it is crucial.
After getting my gauge, measured how long I wanted the tube top to be then divided that number by 4, then multiplied it by the number of stitches I counted in my gauge.
I kept on crocheting and it really started to look like actual knitted fabric! The width of the top is based on measuring my waist and making it around 3-4x inches smaller. This is because the stitch expands up to 4x it’s compressed size so that would have been enough to hug my body but go over my bust.
When I got to the end of the row I simply fastened off with a long tail and used that to seam the sides shut.
And that is all there is to it! Easy-peasy!
Now it’s time to start experimenting with crochet stitches that look like knitting!
In summary, opting for a crochet stitch that looks like knitting allows crafters to enjoy the appearance of knitted fabric while utilizing their crochet skills. It offers versatility, eliminating the need for extra tools and providing the opportunity to create intricate patterns. Additionally, the tightness and density of these stitches make them suitable for projects that require warmth and durability. Overall, this technique combines the best of both crochet and knitting, appealing to a wide range of crafters.
Want to try out some patterns? Make sure to check out all of my beginner friendly patterns here where you can find garments, amigurumi, and accessories.
Want to see more tutorials and techniques?
That’s it for now my maker friend! I would love to see your knit-look crocheted tube top so make sure to tag me @knitsandknotsbyame.com on IG.
Until next time!
Abigail
One Comment
Comments are closed.